
How to Make LED Neon Signs.
How to make LED Neon signs with only a router and a bandsaw.
Easy Woodworking Project.
A quick a fun project that involves some freehand routing into plywood or MDF. Easy to make with just a bandsaw and a router. And here’s the thing, you don’t even need a router! Watch the video above to see how it’s done.
Supples


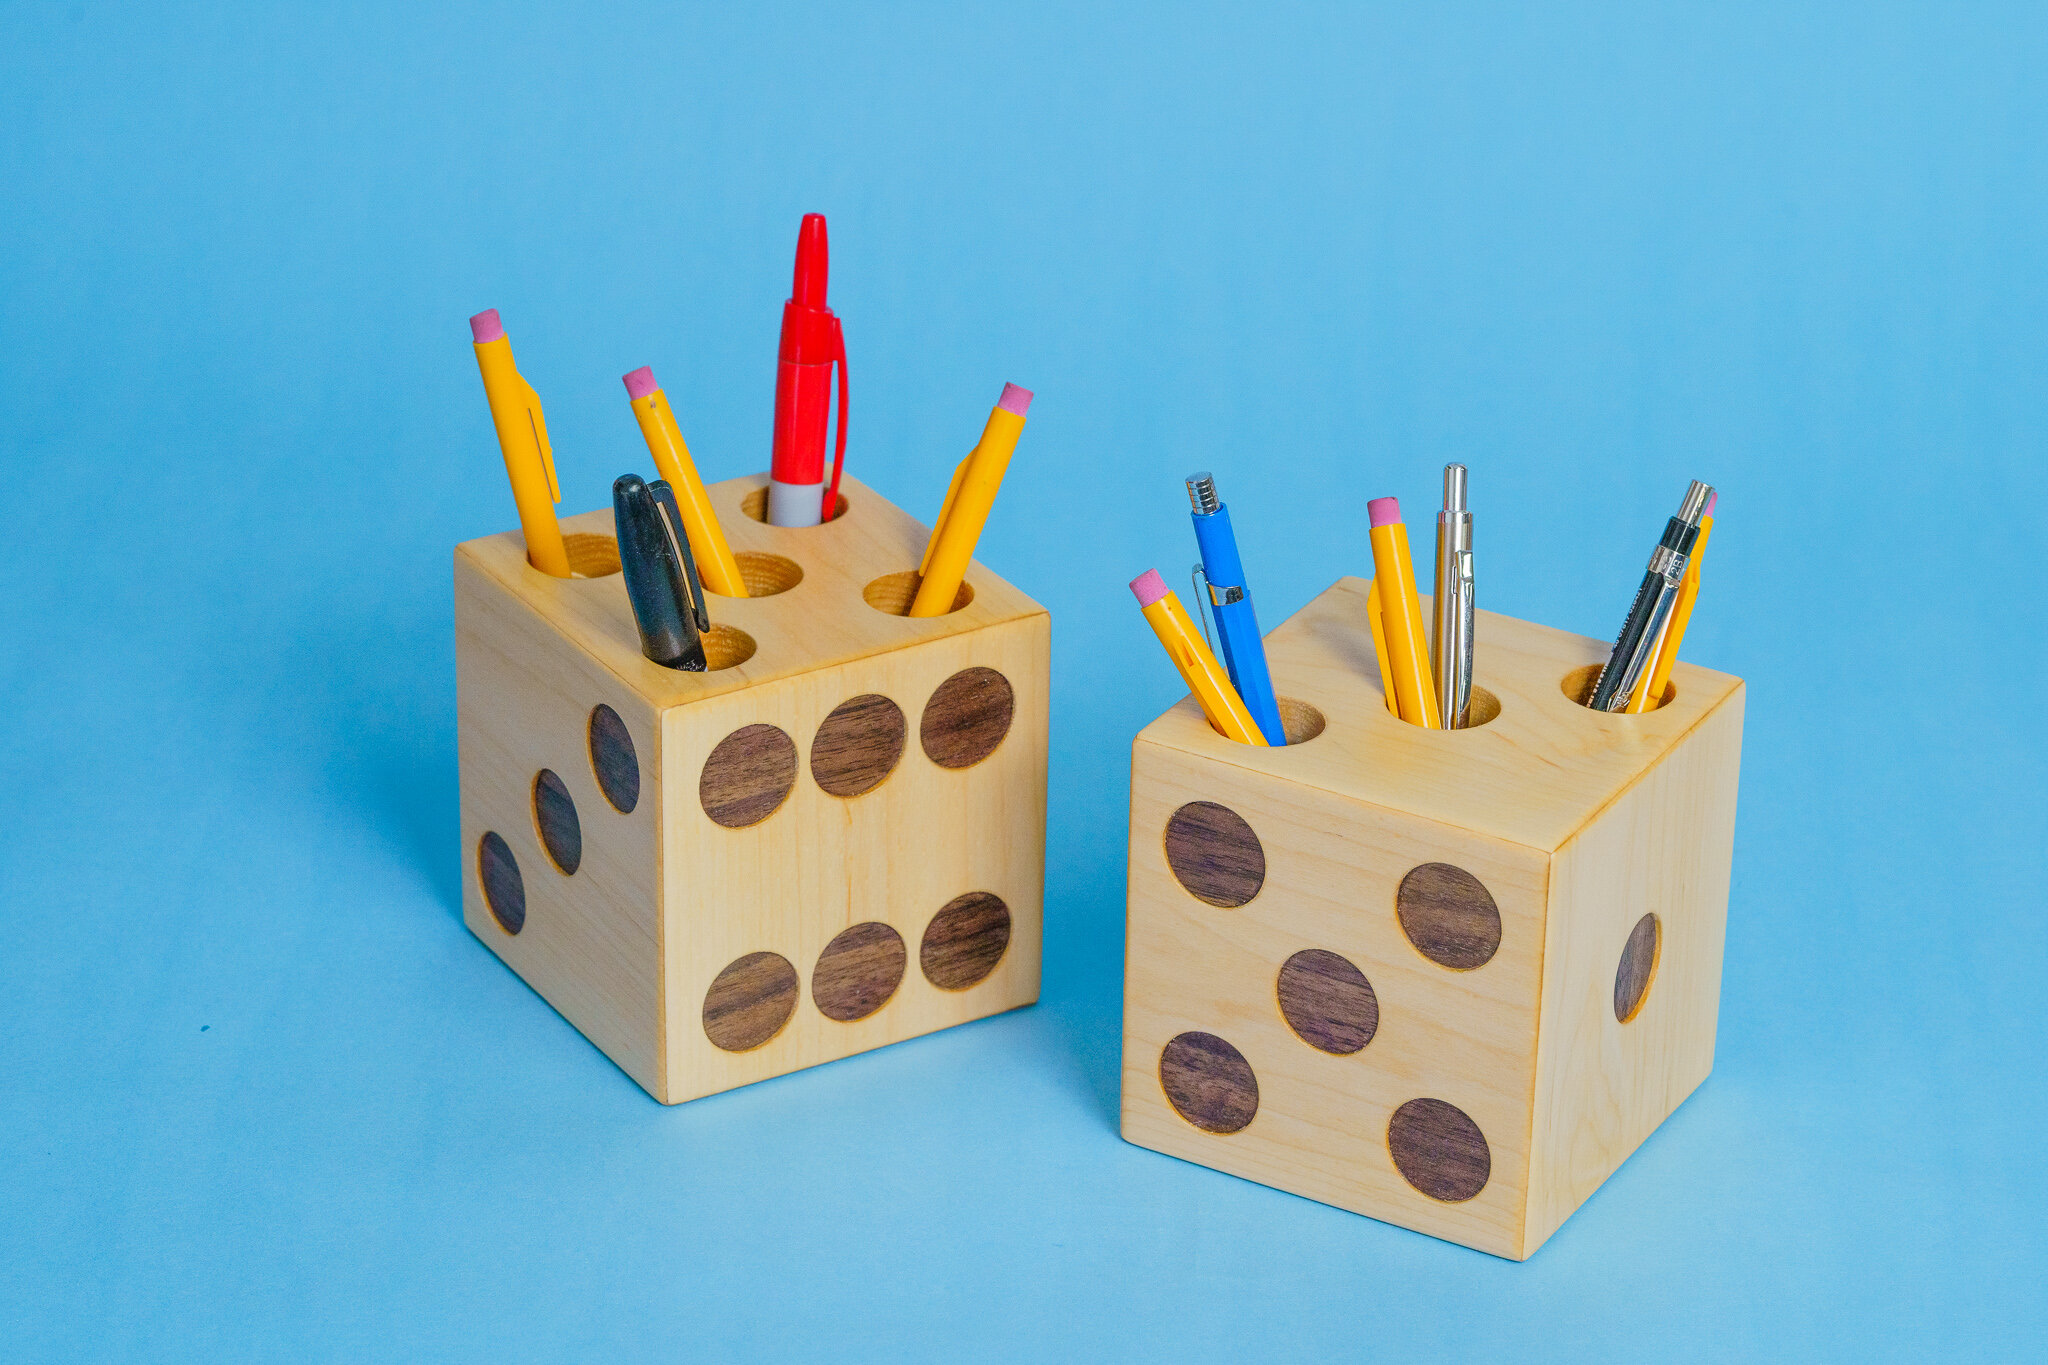
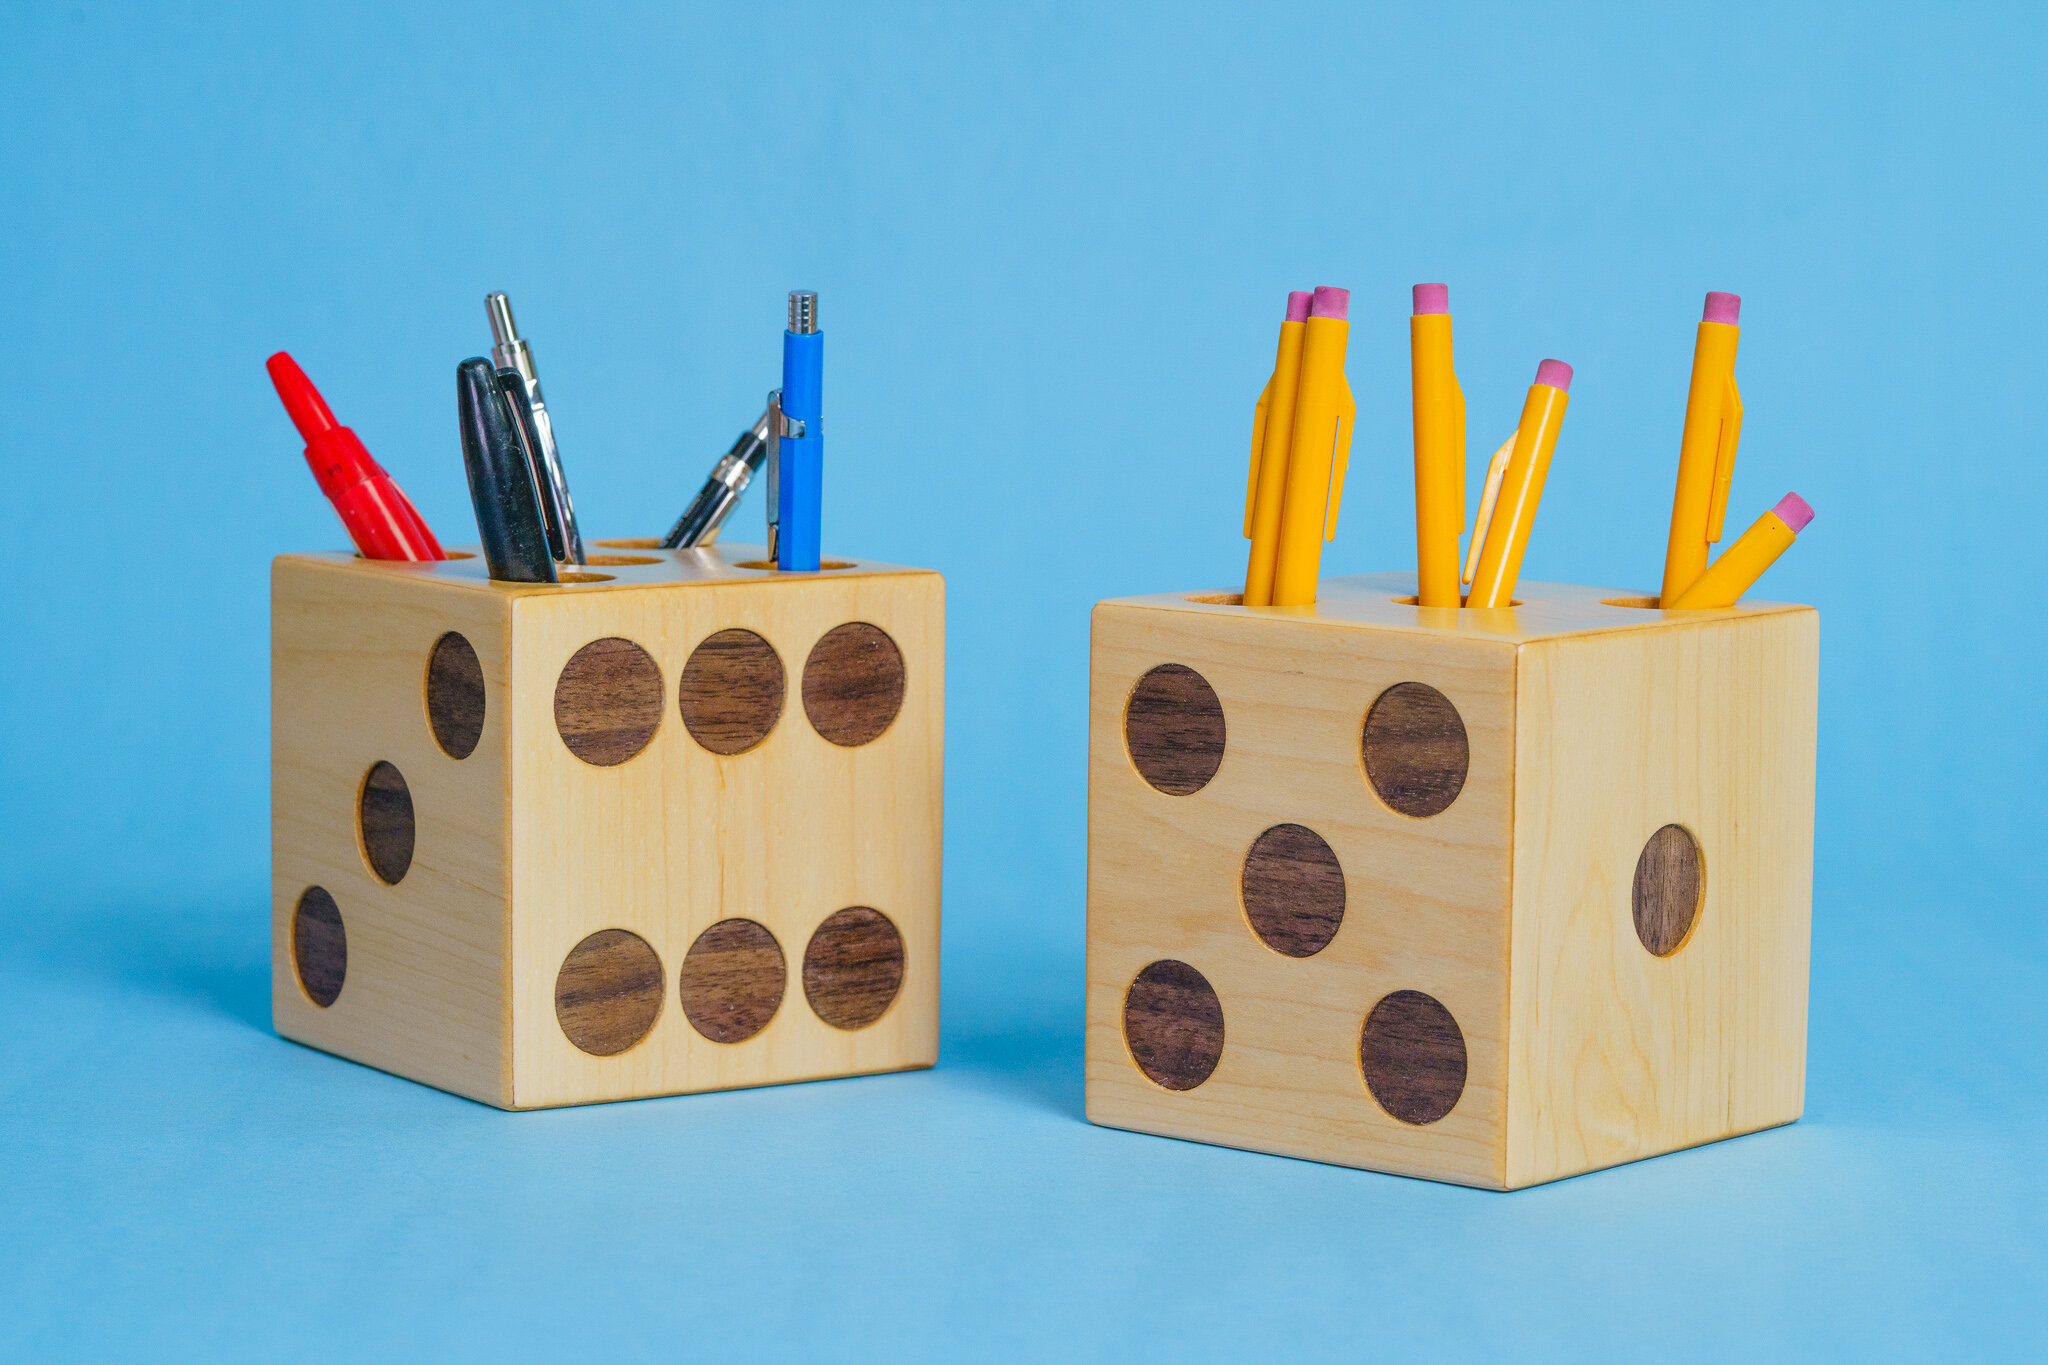
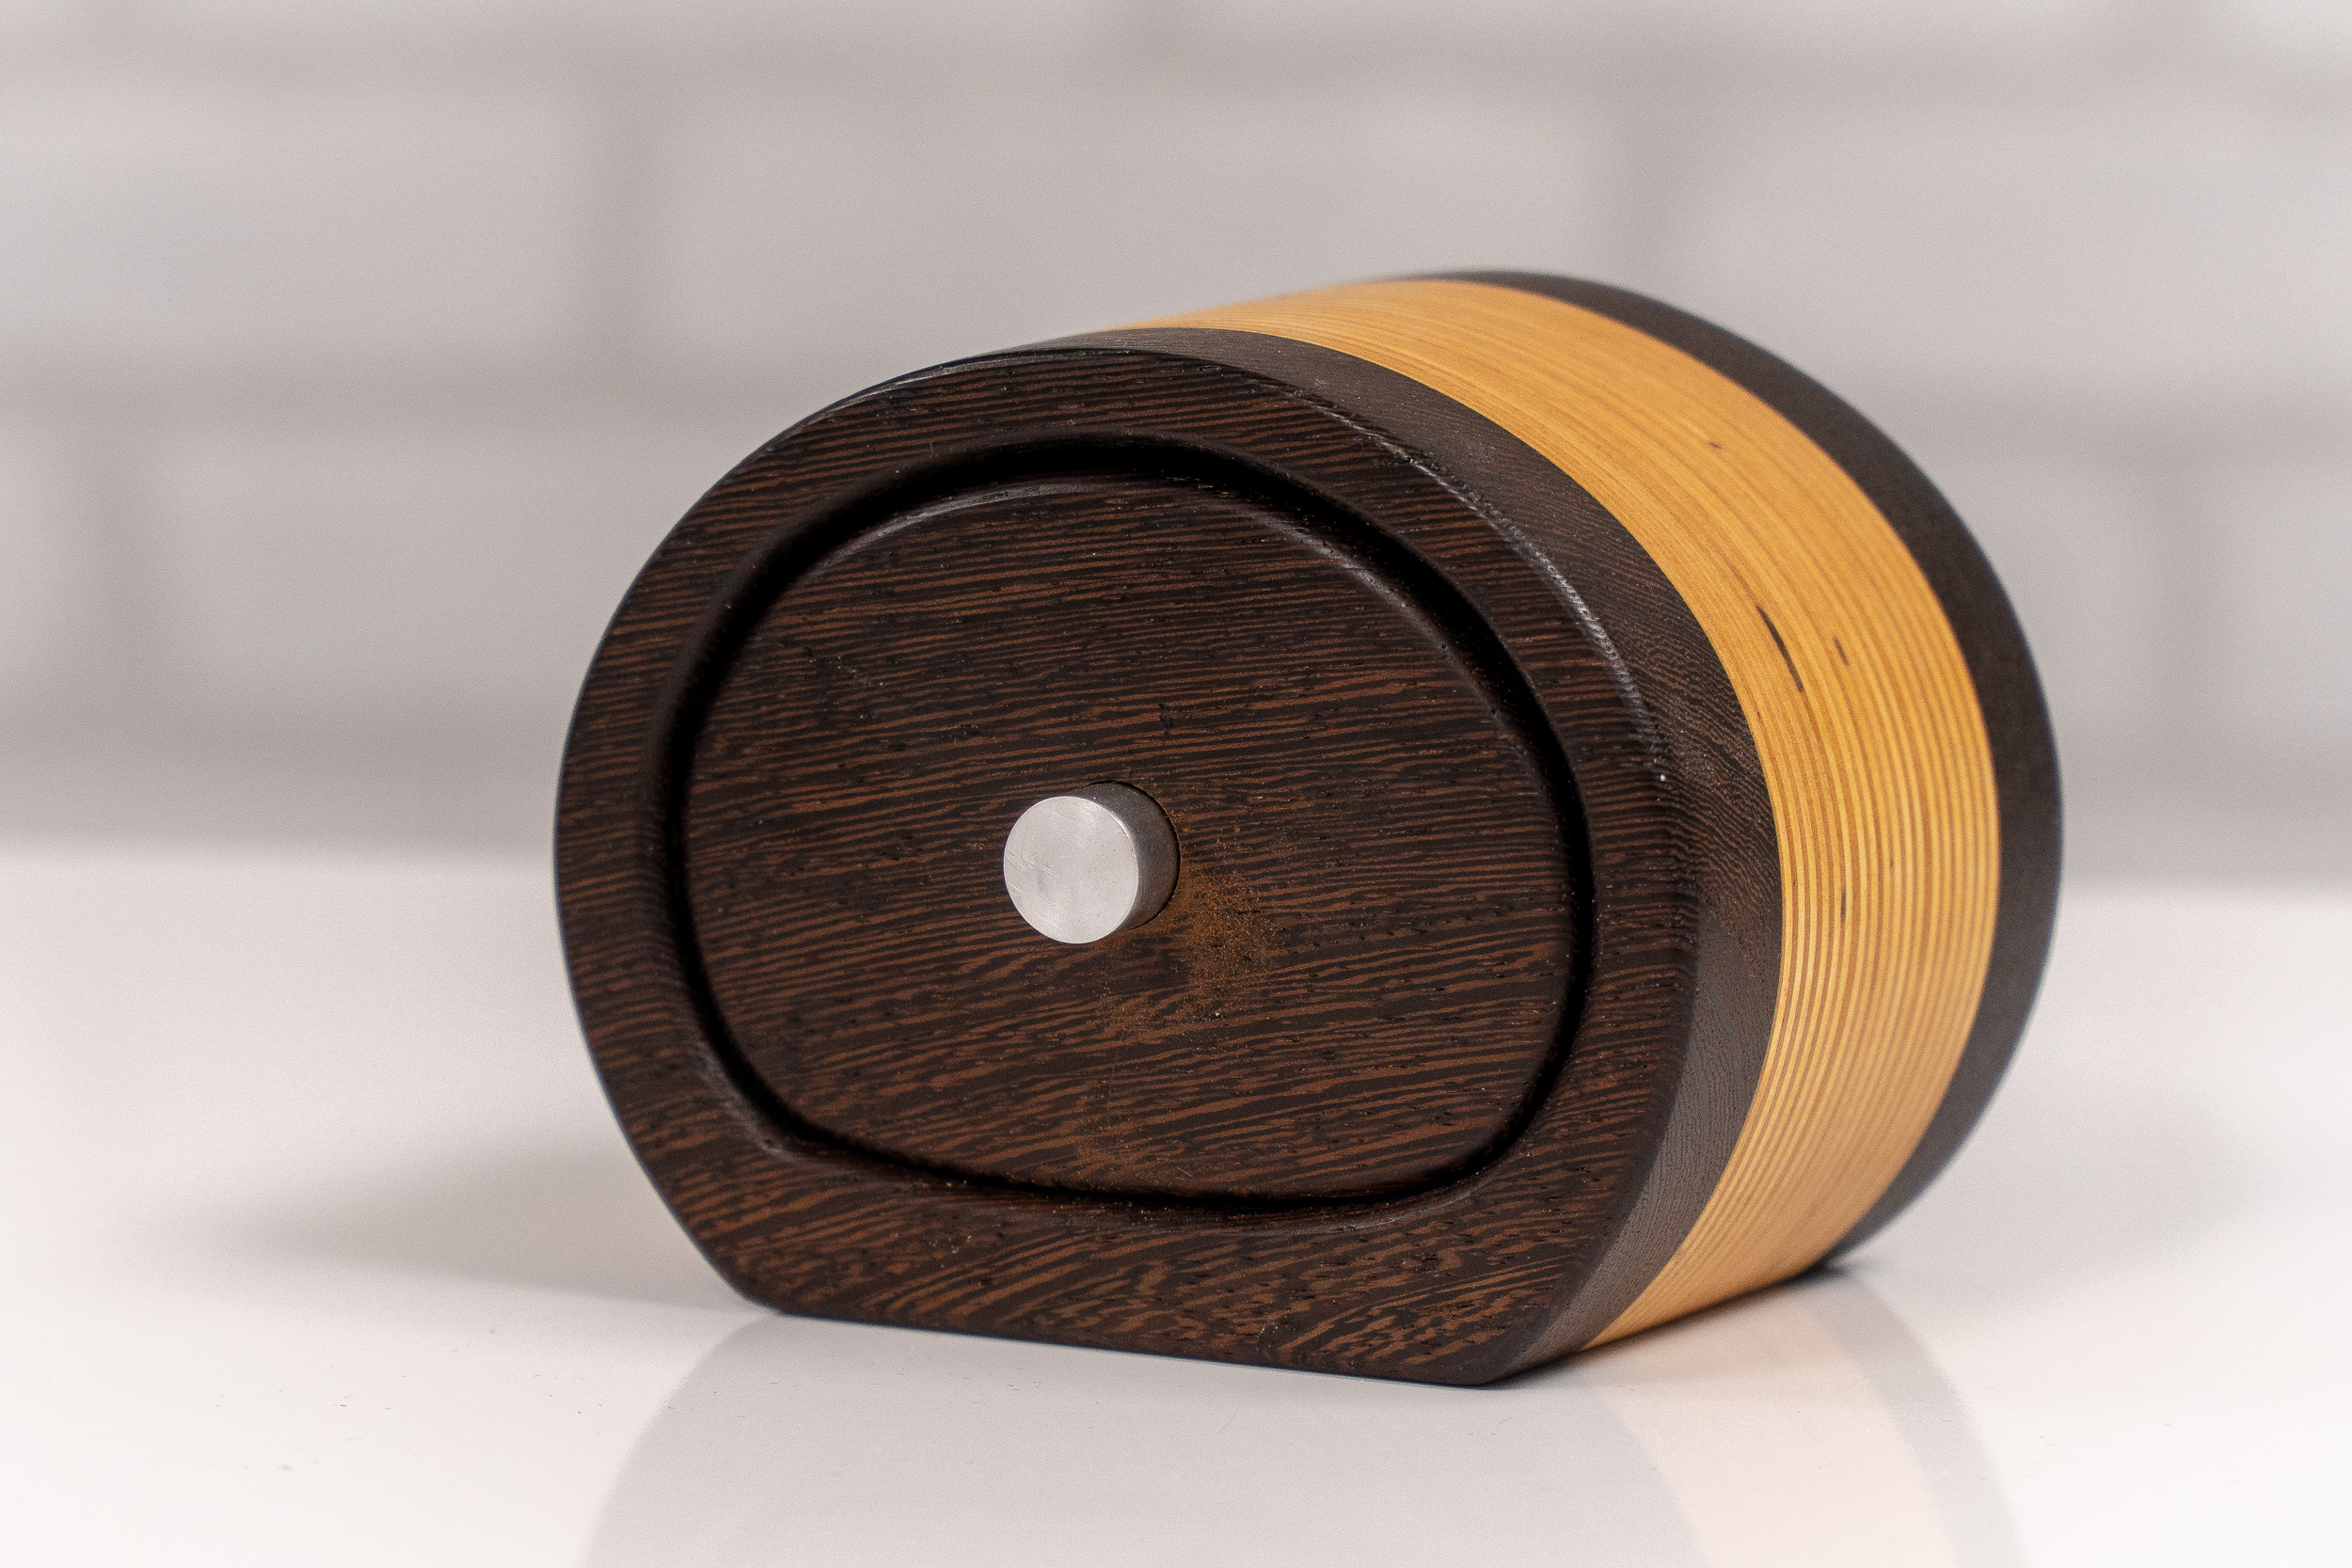
How to Make Dice Pencil Holders
How to make a pair of dice pencil holders.
Easy Woodworking Project.
How to make a pair of dice pencil holders out of maple. This is a fun weekend project you can make for yourself or batch out for selling at crafts shows and online. Get the plans here!


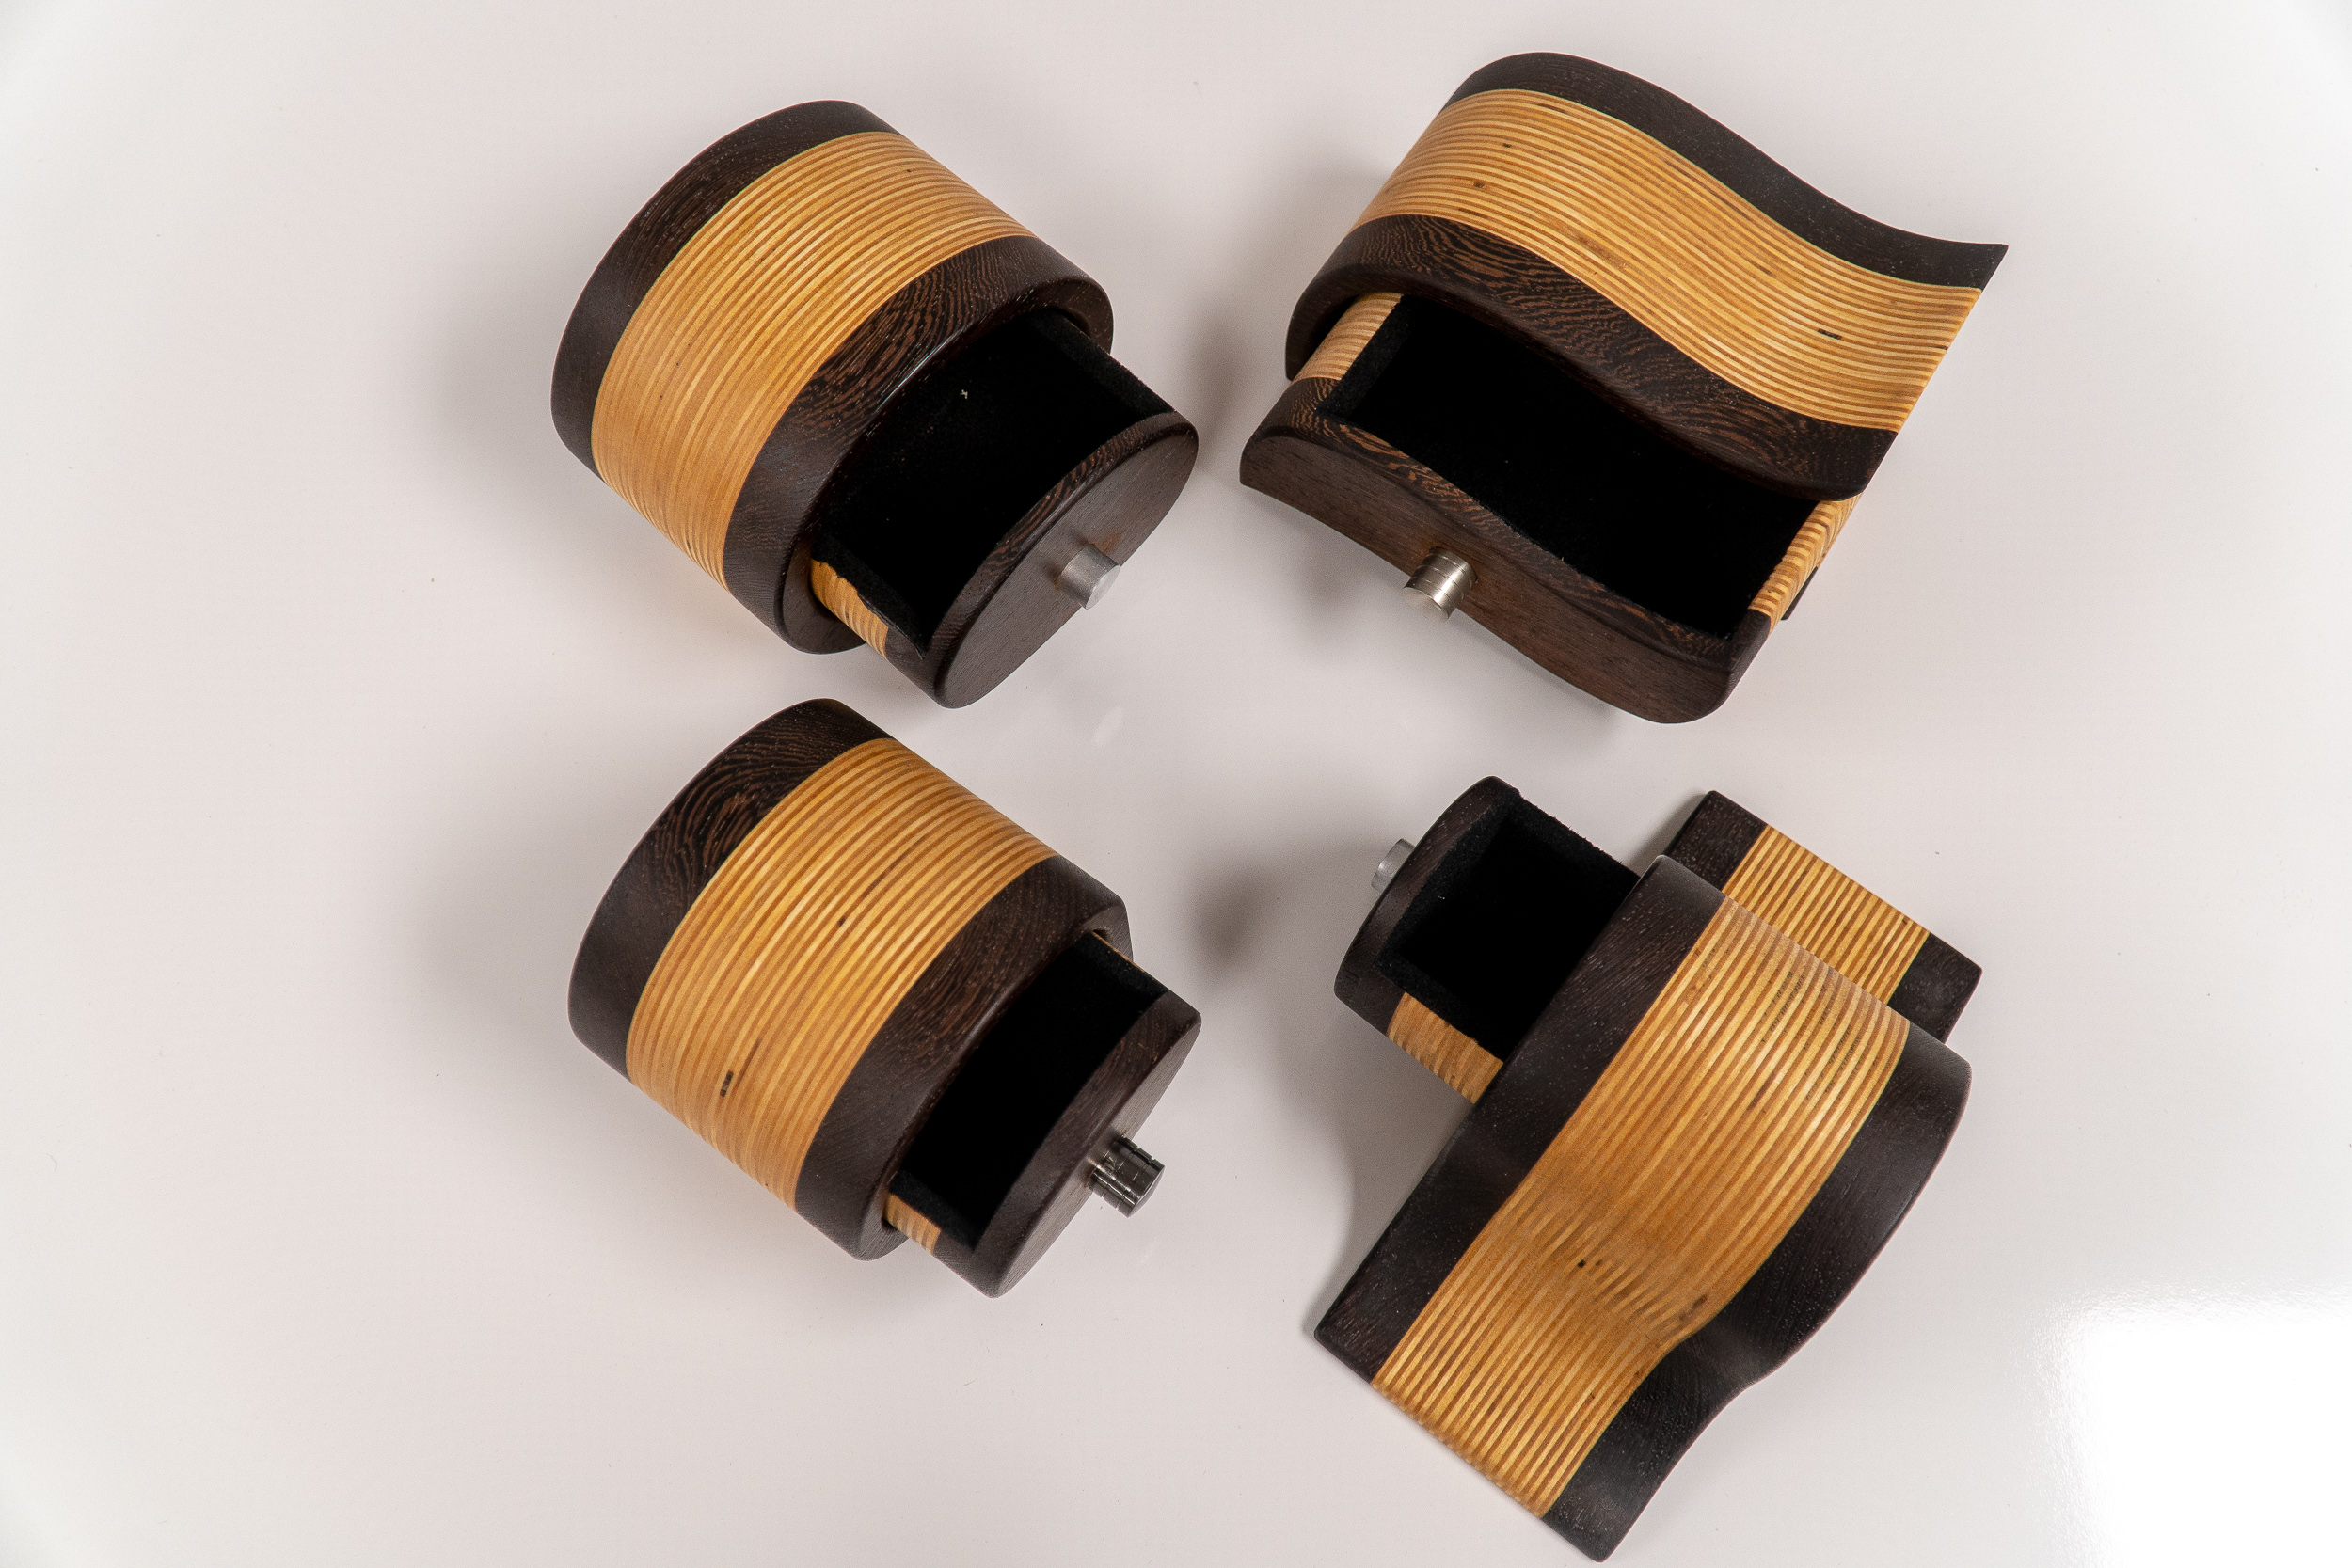
Everything You Need to Know on Making Bandsaw Boxes
Step-by-step tutorial on how to make bandsaw boxes with templates and plans. Easy and fun woodworking projects!
Making bandsaw boxes is what got me excited about woodworking! You can make them out of scraps in a day and they make for a great handmade gift. There are endless possibilities in shapes and sizes and you don't need and entire shop full of expensive tools or years of experience.
Bandsaw Box Templates and Plans
Looking to get started in making bandsaw boxes? I’ve got PDF templates for 4 simple but elegant bandsaw box designs as well as a book full of unique styles. You can find the book in all major book stores and public libraries or you can get a signed book directly from me!


The Best Blade For Making Bandsaw Boxes

I’ve made dozens of bandsaw boxes in my day and I’ve tried many blades. You need a blade small enough to cut tight curves. Generally the more teeth per inch the smoother the cut you’ll get. But when it comes to making bandsaw boxes a smooth cut is not necessary. What’s more important is large gullets between the teeth to remove all the waste dust that’s created when cutting a big 4" thick bandsaw box blank. If you have too many teeth you’ll have issues with burning and not being able to cut the curves because of all the saw dust trapped between the blade and the wood. I’ve come to the conclusion that a 3/16" blade for 4 teeth per inch is the perfect blade for these bandsaw boxes. I like this 3/16", 4 TPI, Skip Tooth blade from Highland Woodworking.

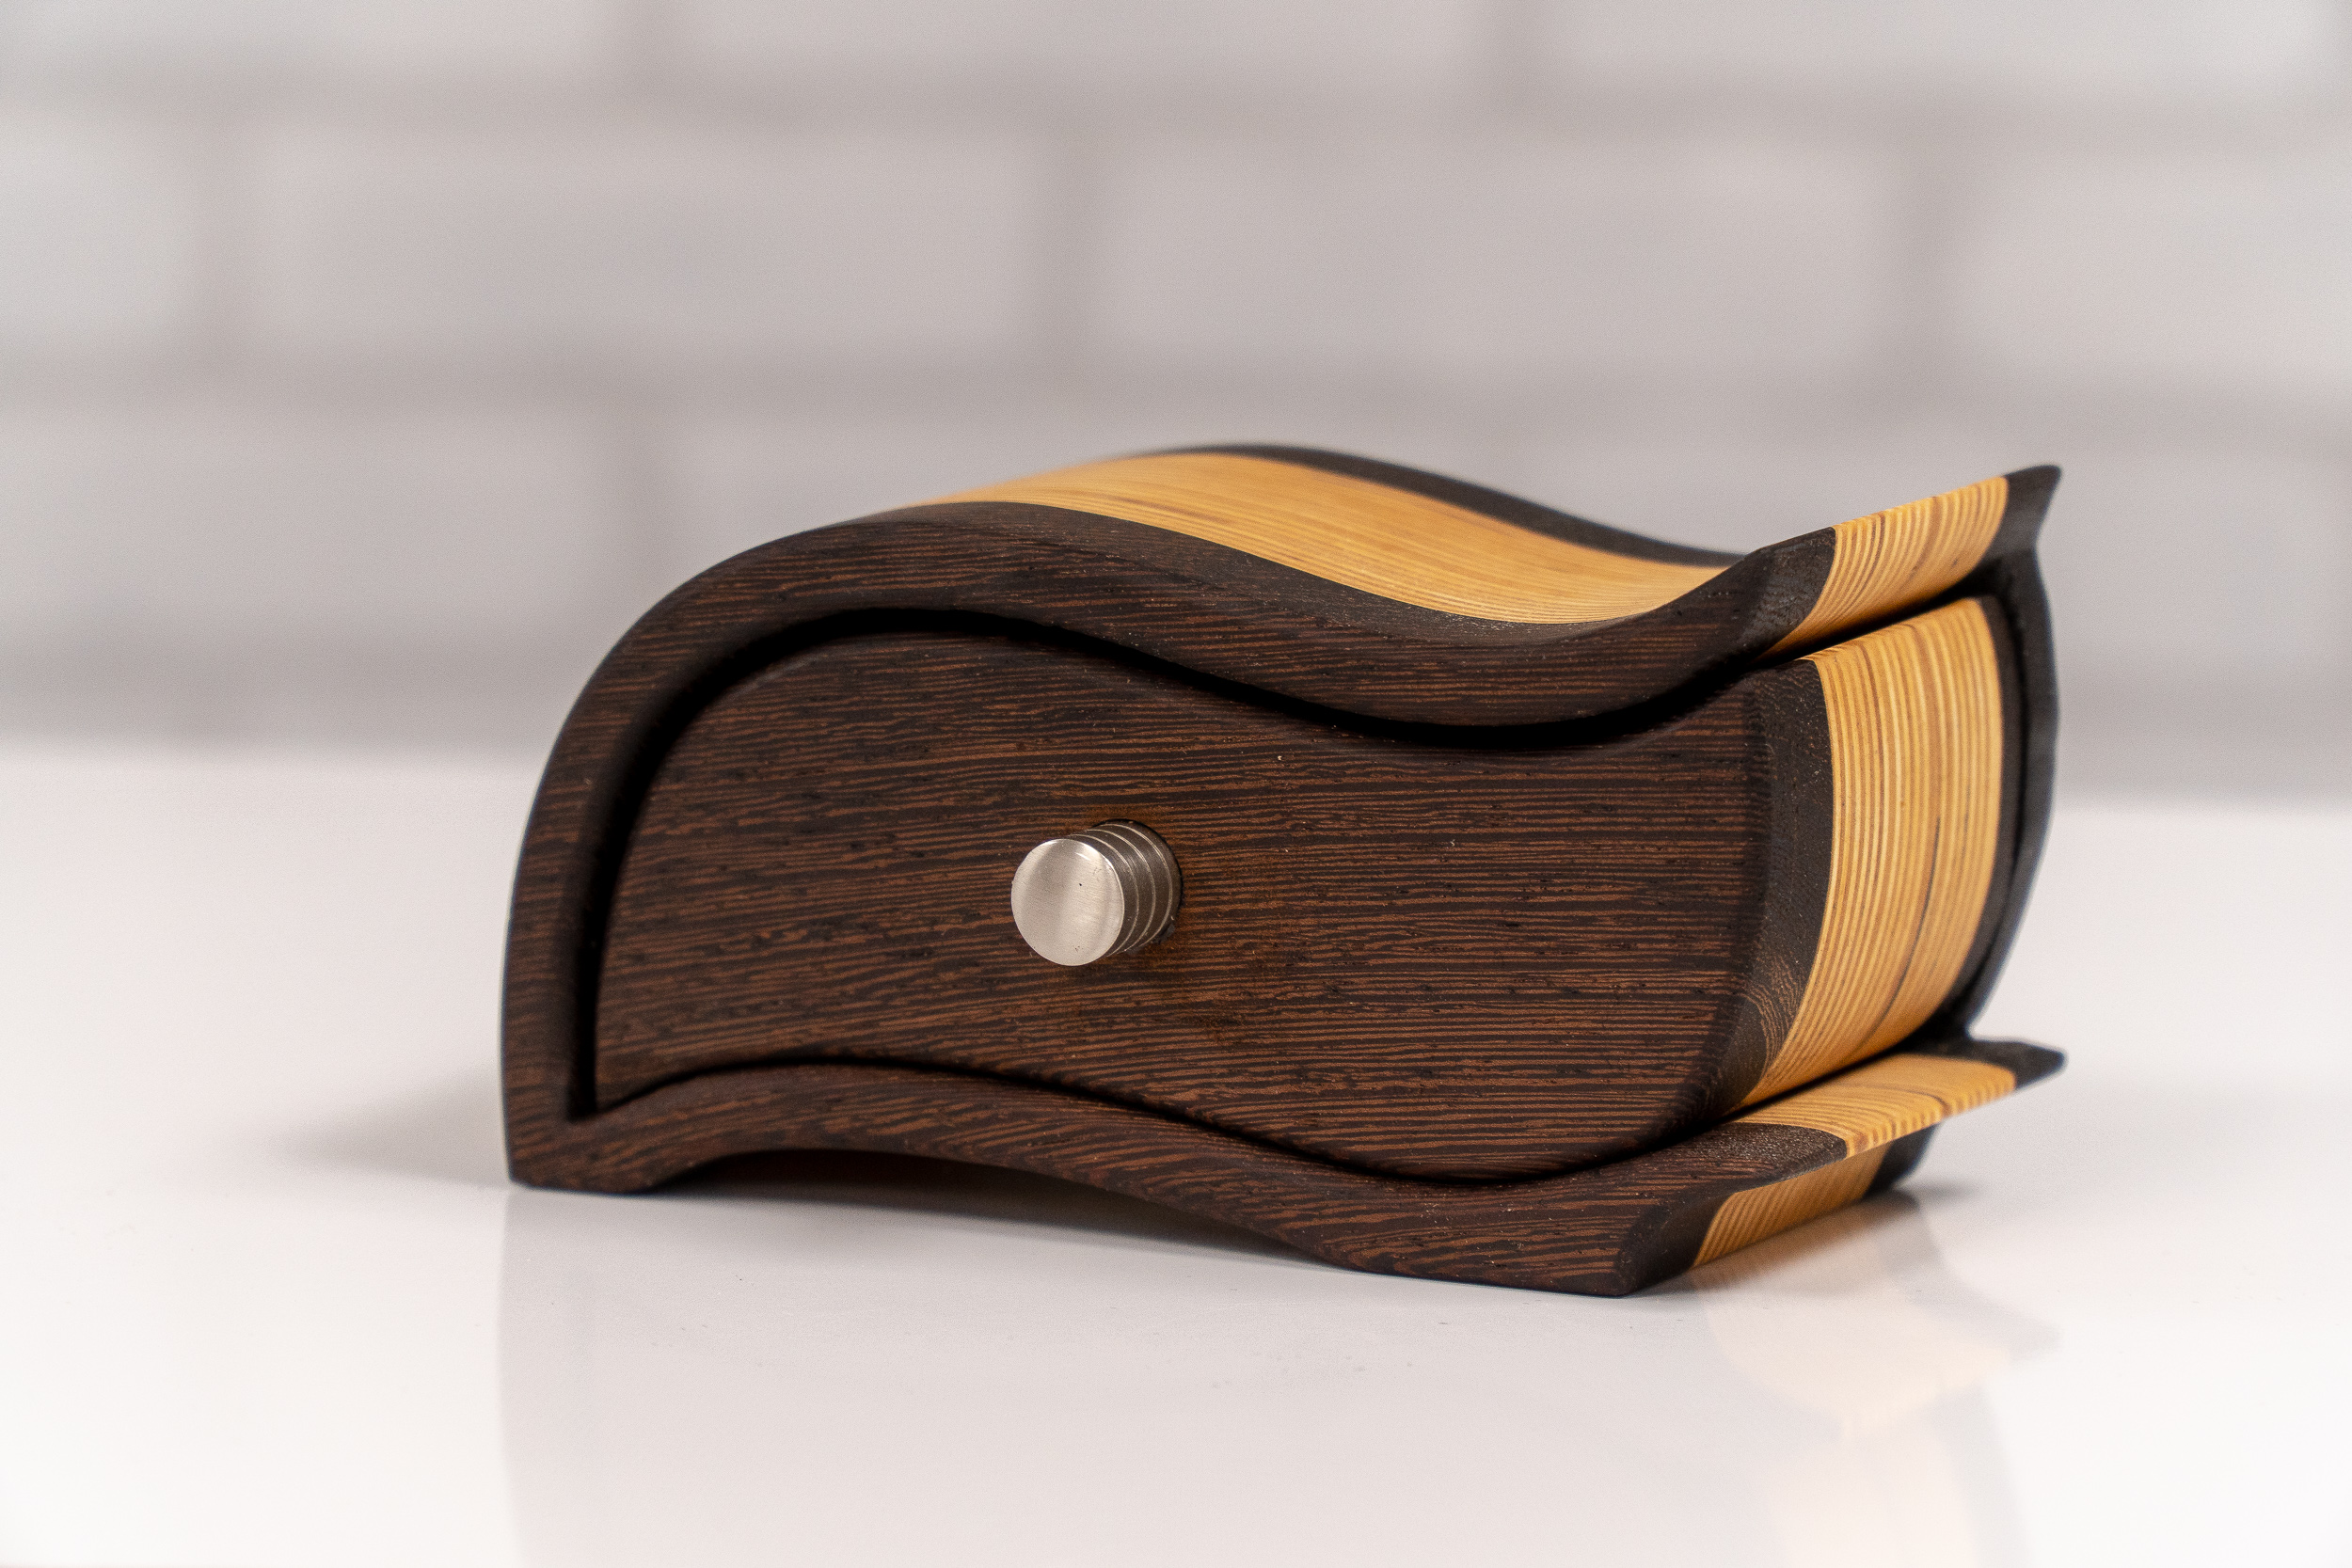
Step 1: Bandsaw Box Blank
The first thing you need to do is cut up the boards that'll make up your bandsaw box blank. The height and width will depend on which template you choose to work with. The depth can vary but I like mine to be about 4" thick. In this example I'm using Baltic birch plywood as my core with an exotic wood on the faces. You'll glue up all the pieces with wood glue on the faces of each piece. Use plenty of wood glue make sure the entire surface is covered.

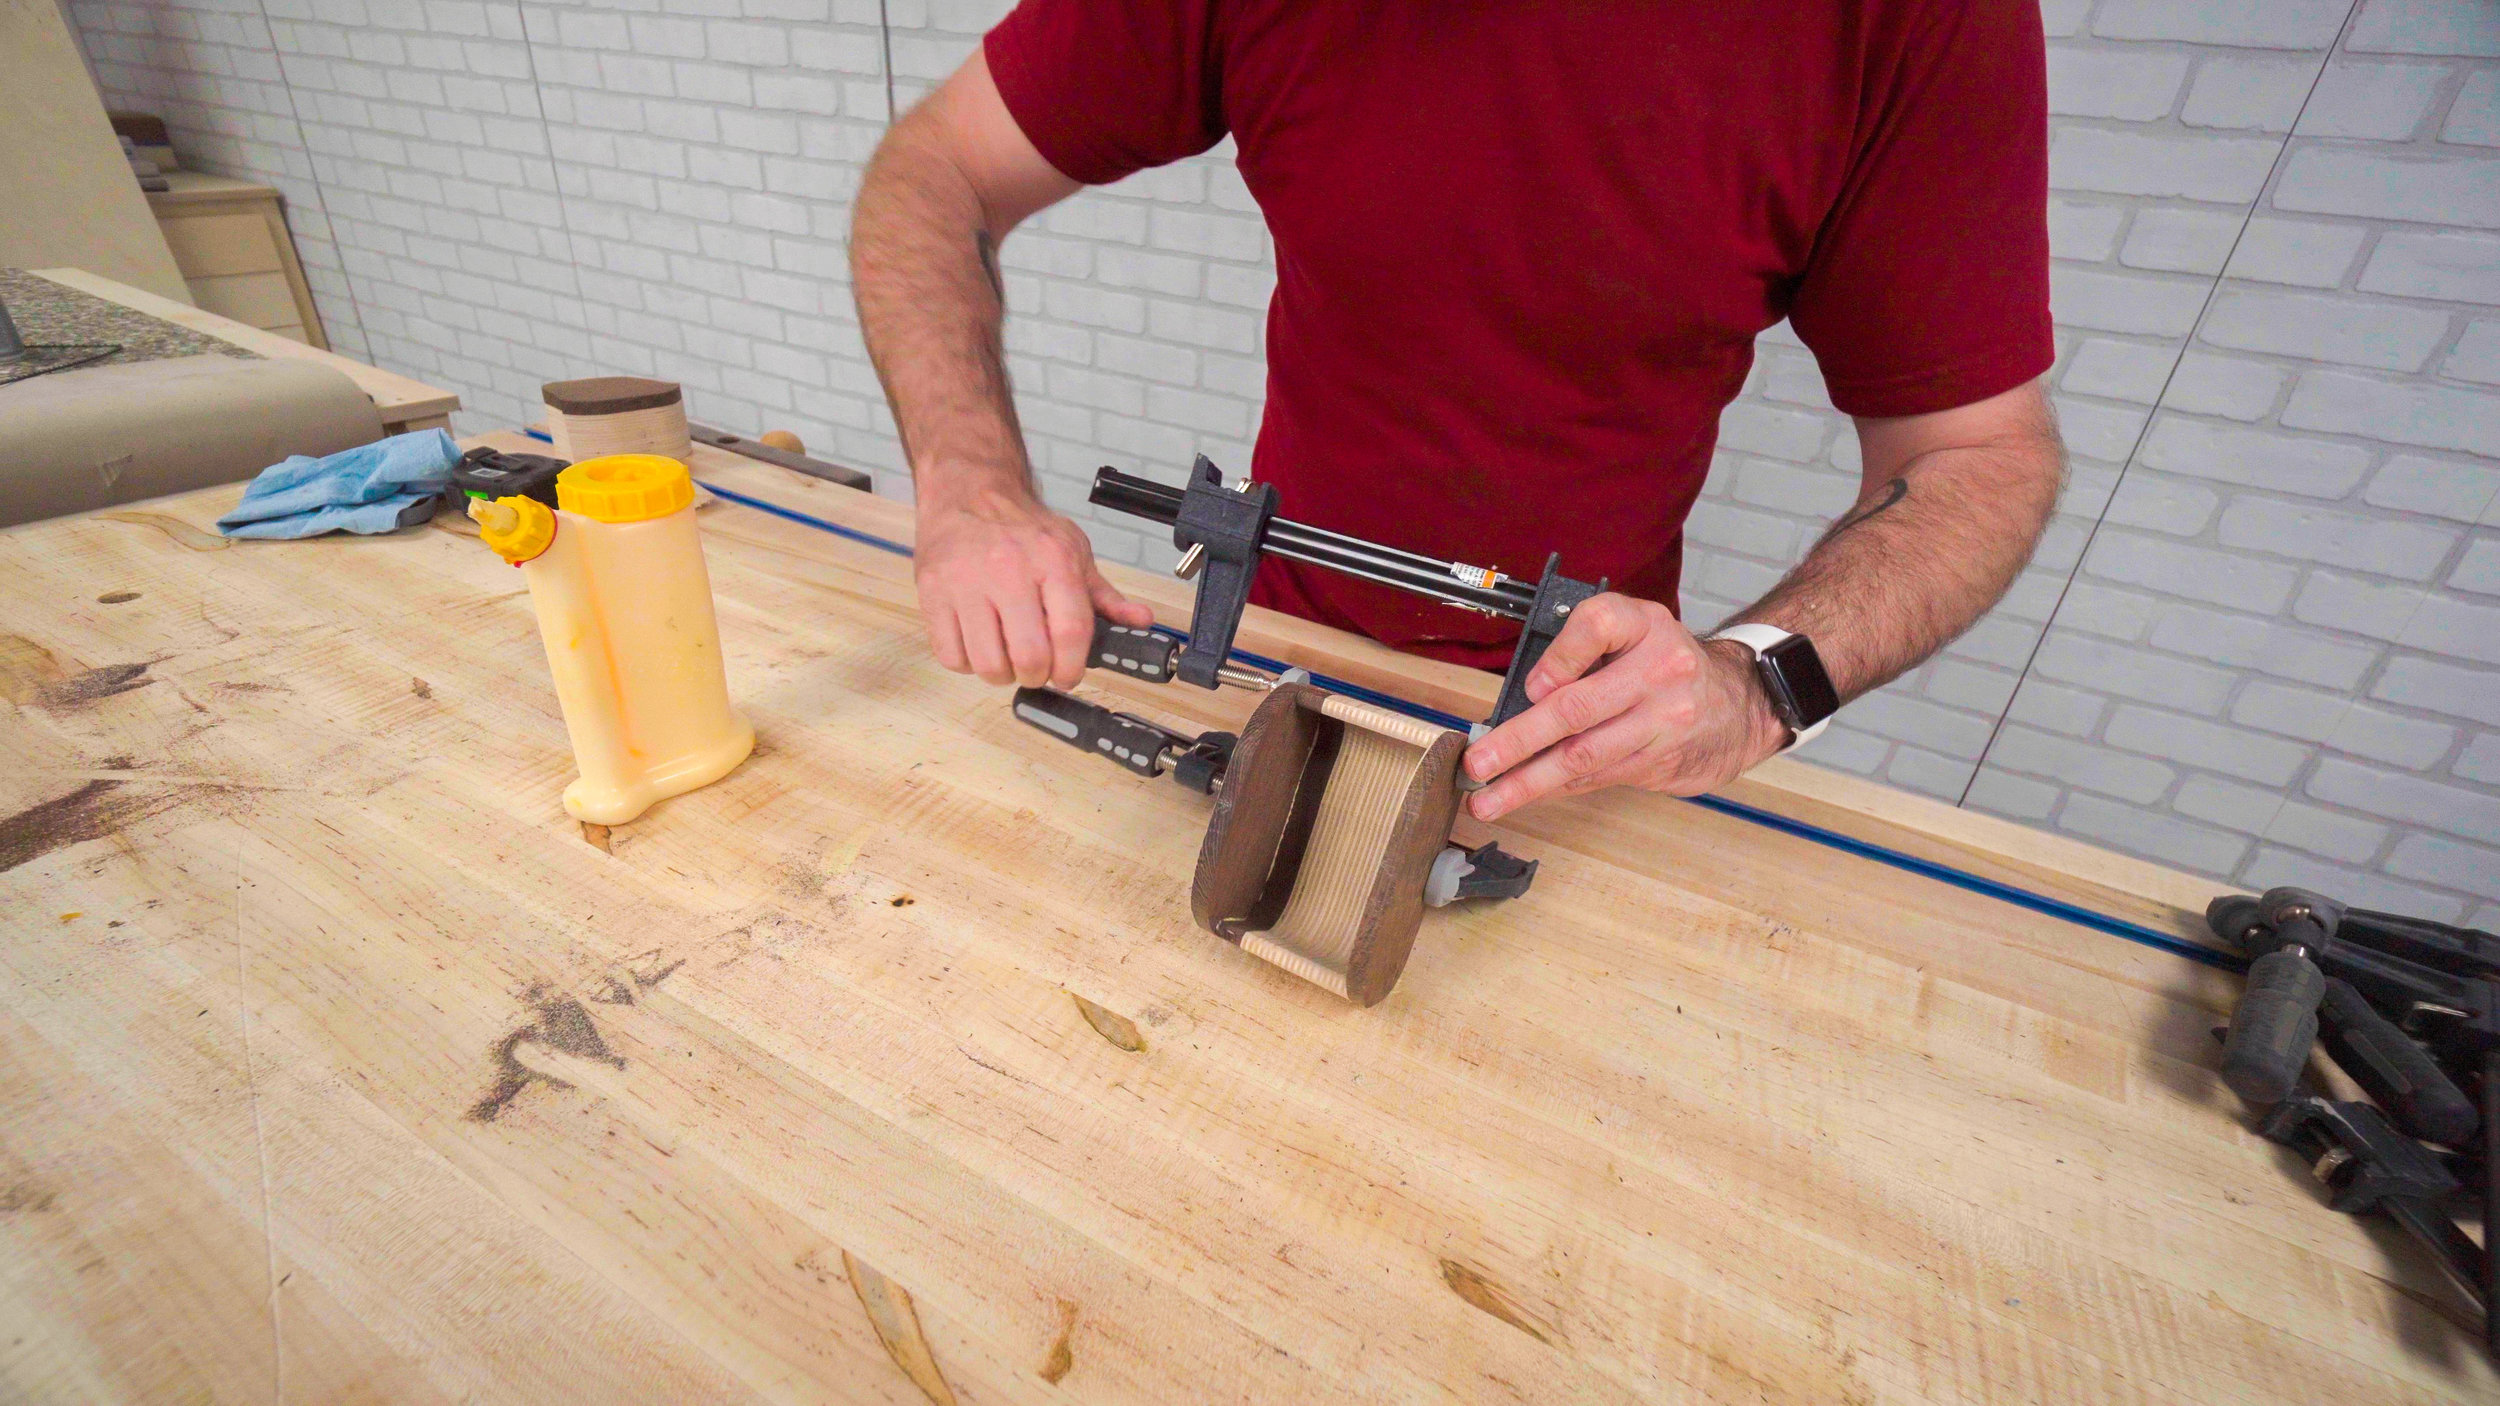
Step 2: Bandsaw Box Glue-up
Now you'll clamp everything up with plenty
of F-style clamps. You should see some glue squeeze out all around. Let this sit and dry for a few hours.
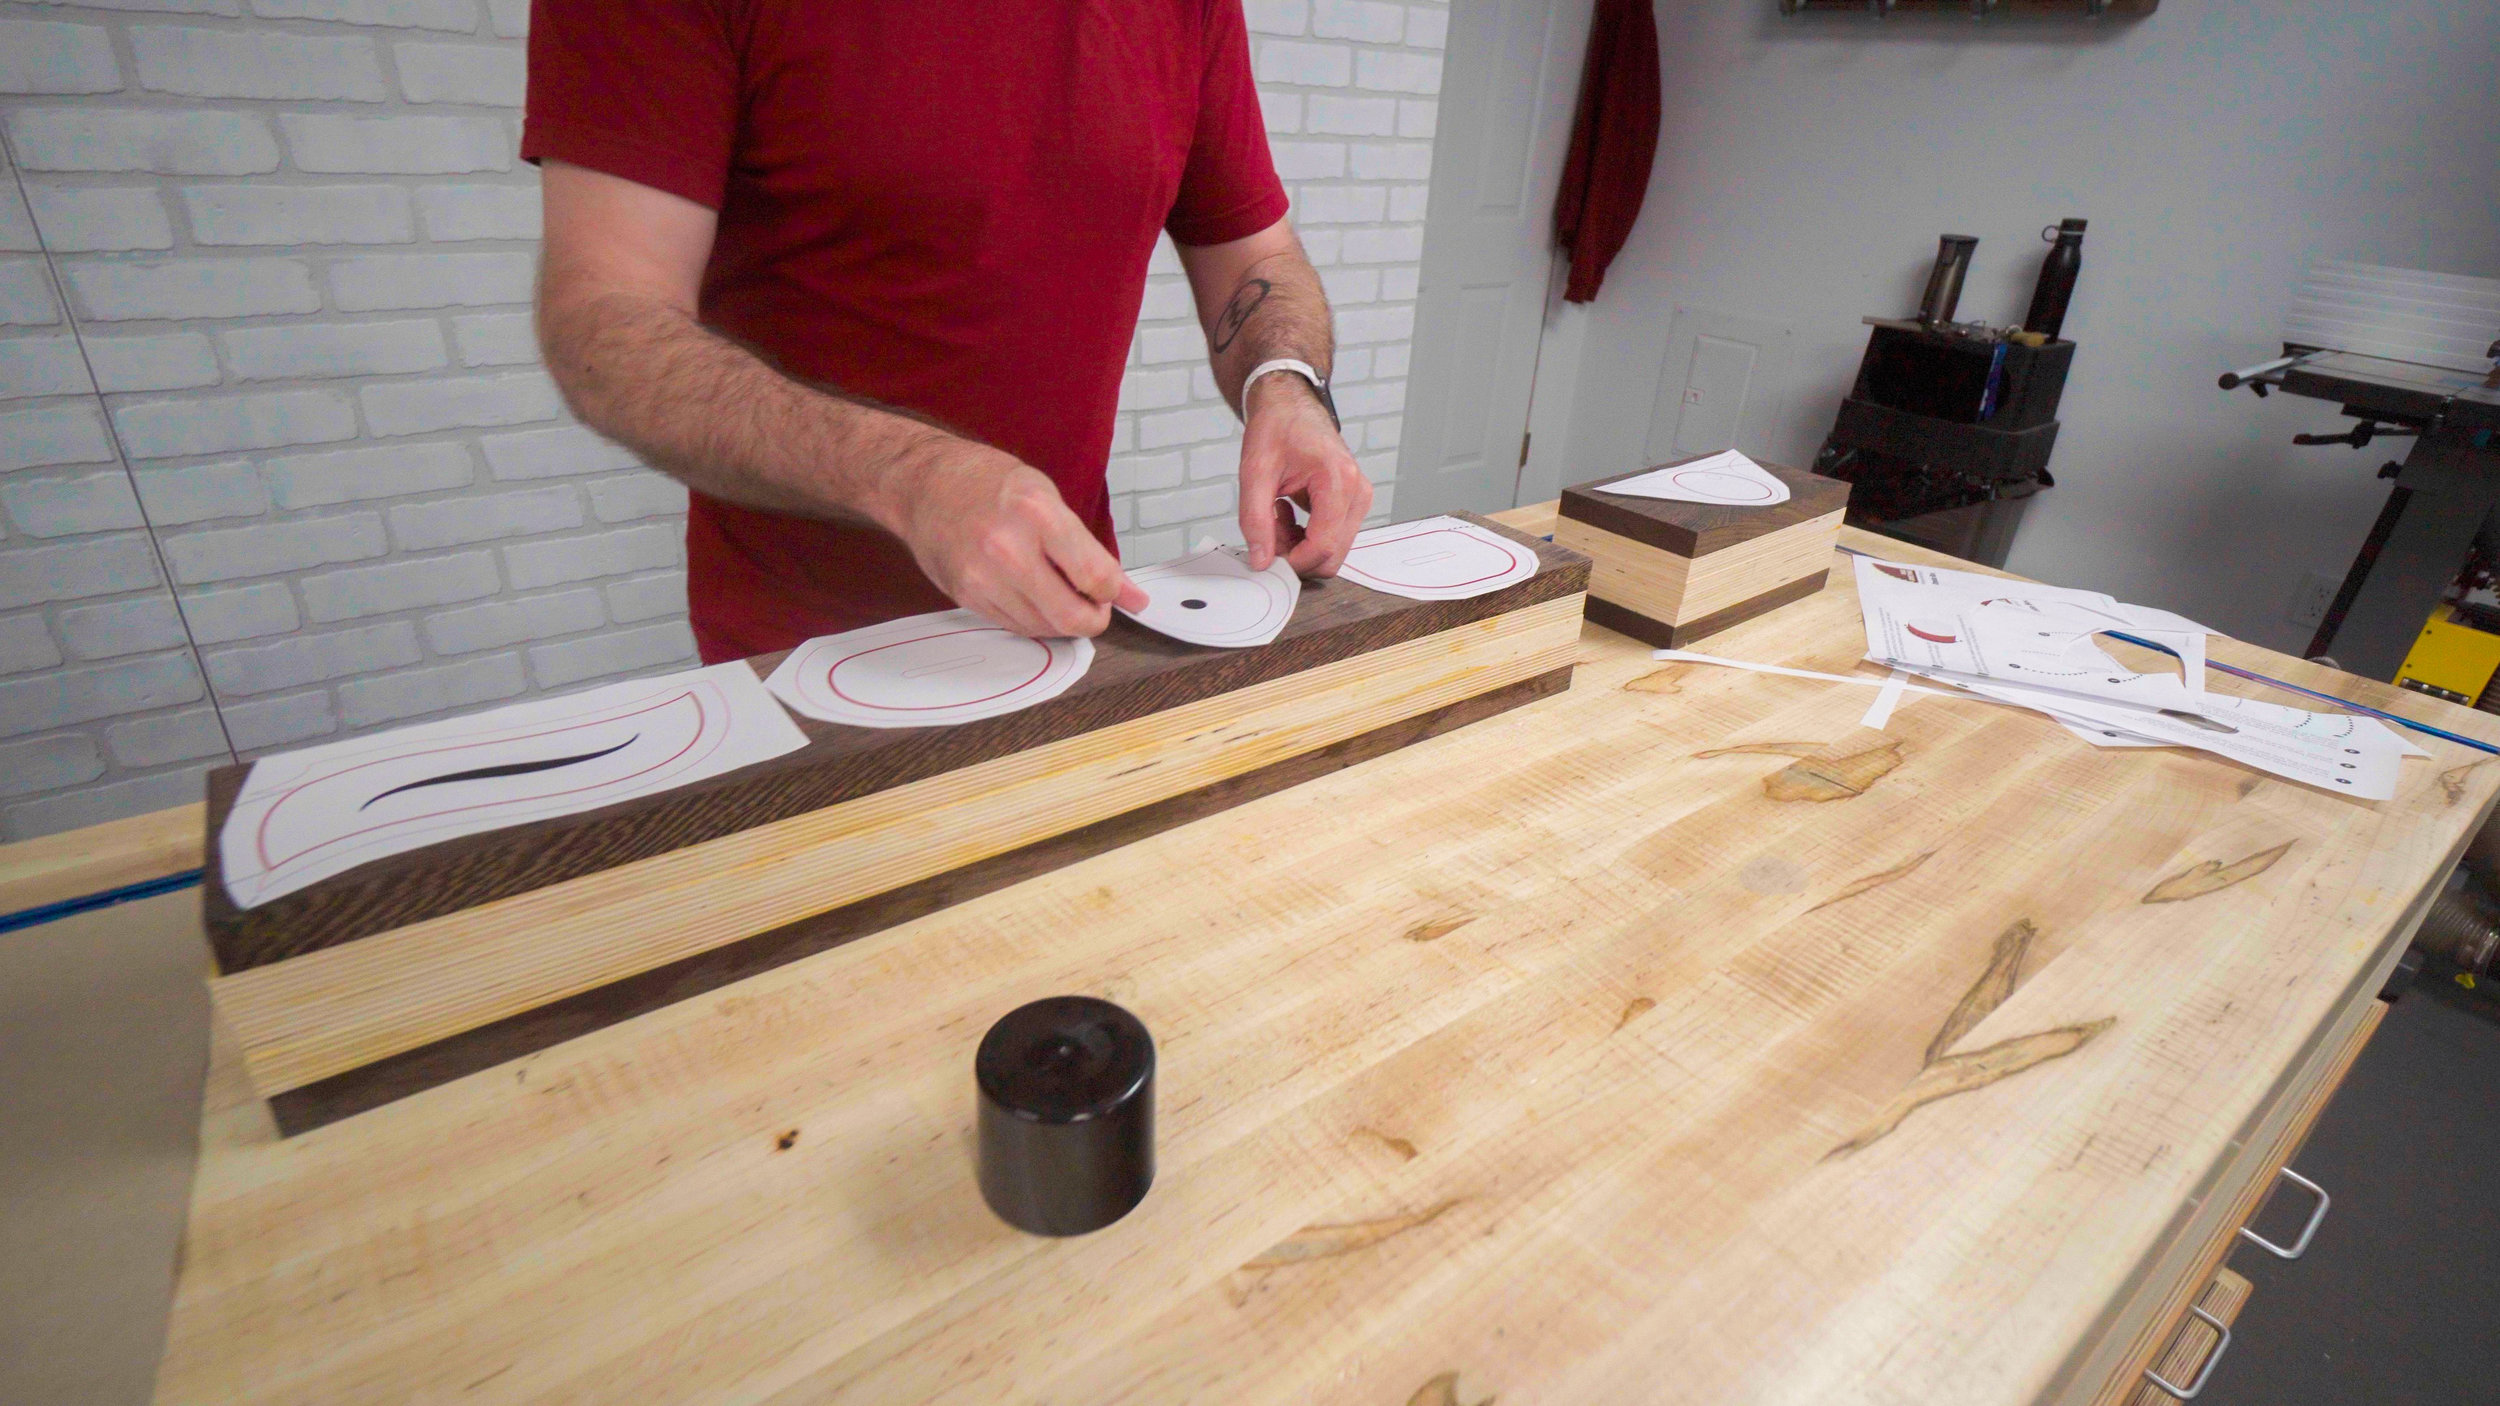
Step 3: Bandsaw Box Templates
Print out your template at 100% size (do not fit to scale) and spray the back with spray adhesive. A light even coat is all that's needed. Let it sit and get tacky for 60 seconds. Place your template and push out any air bubbles.
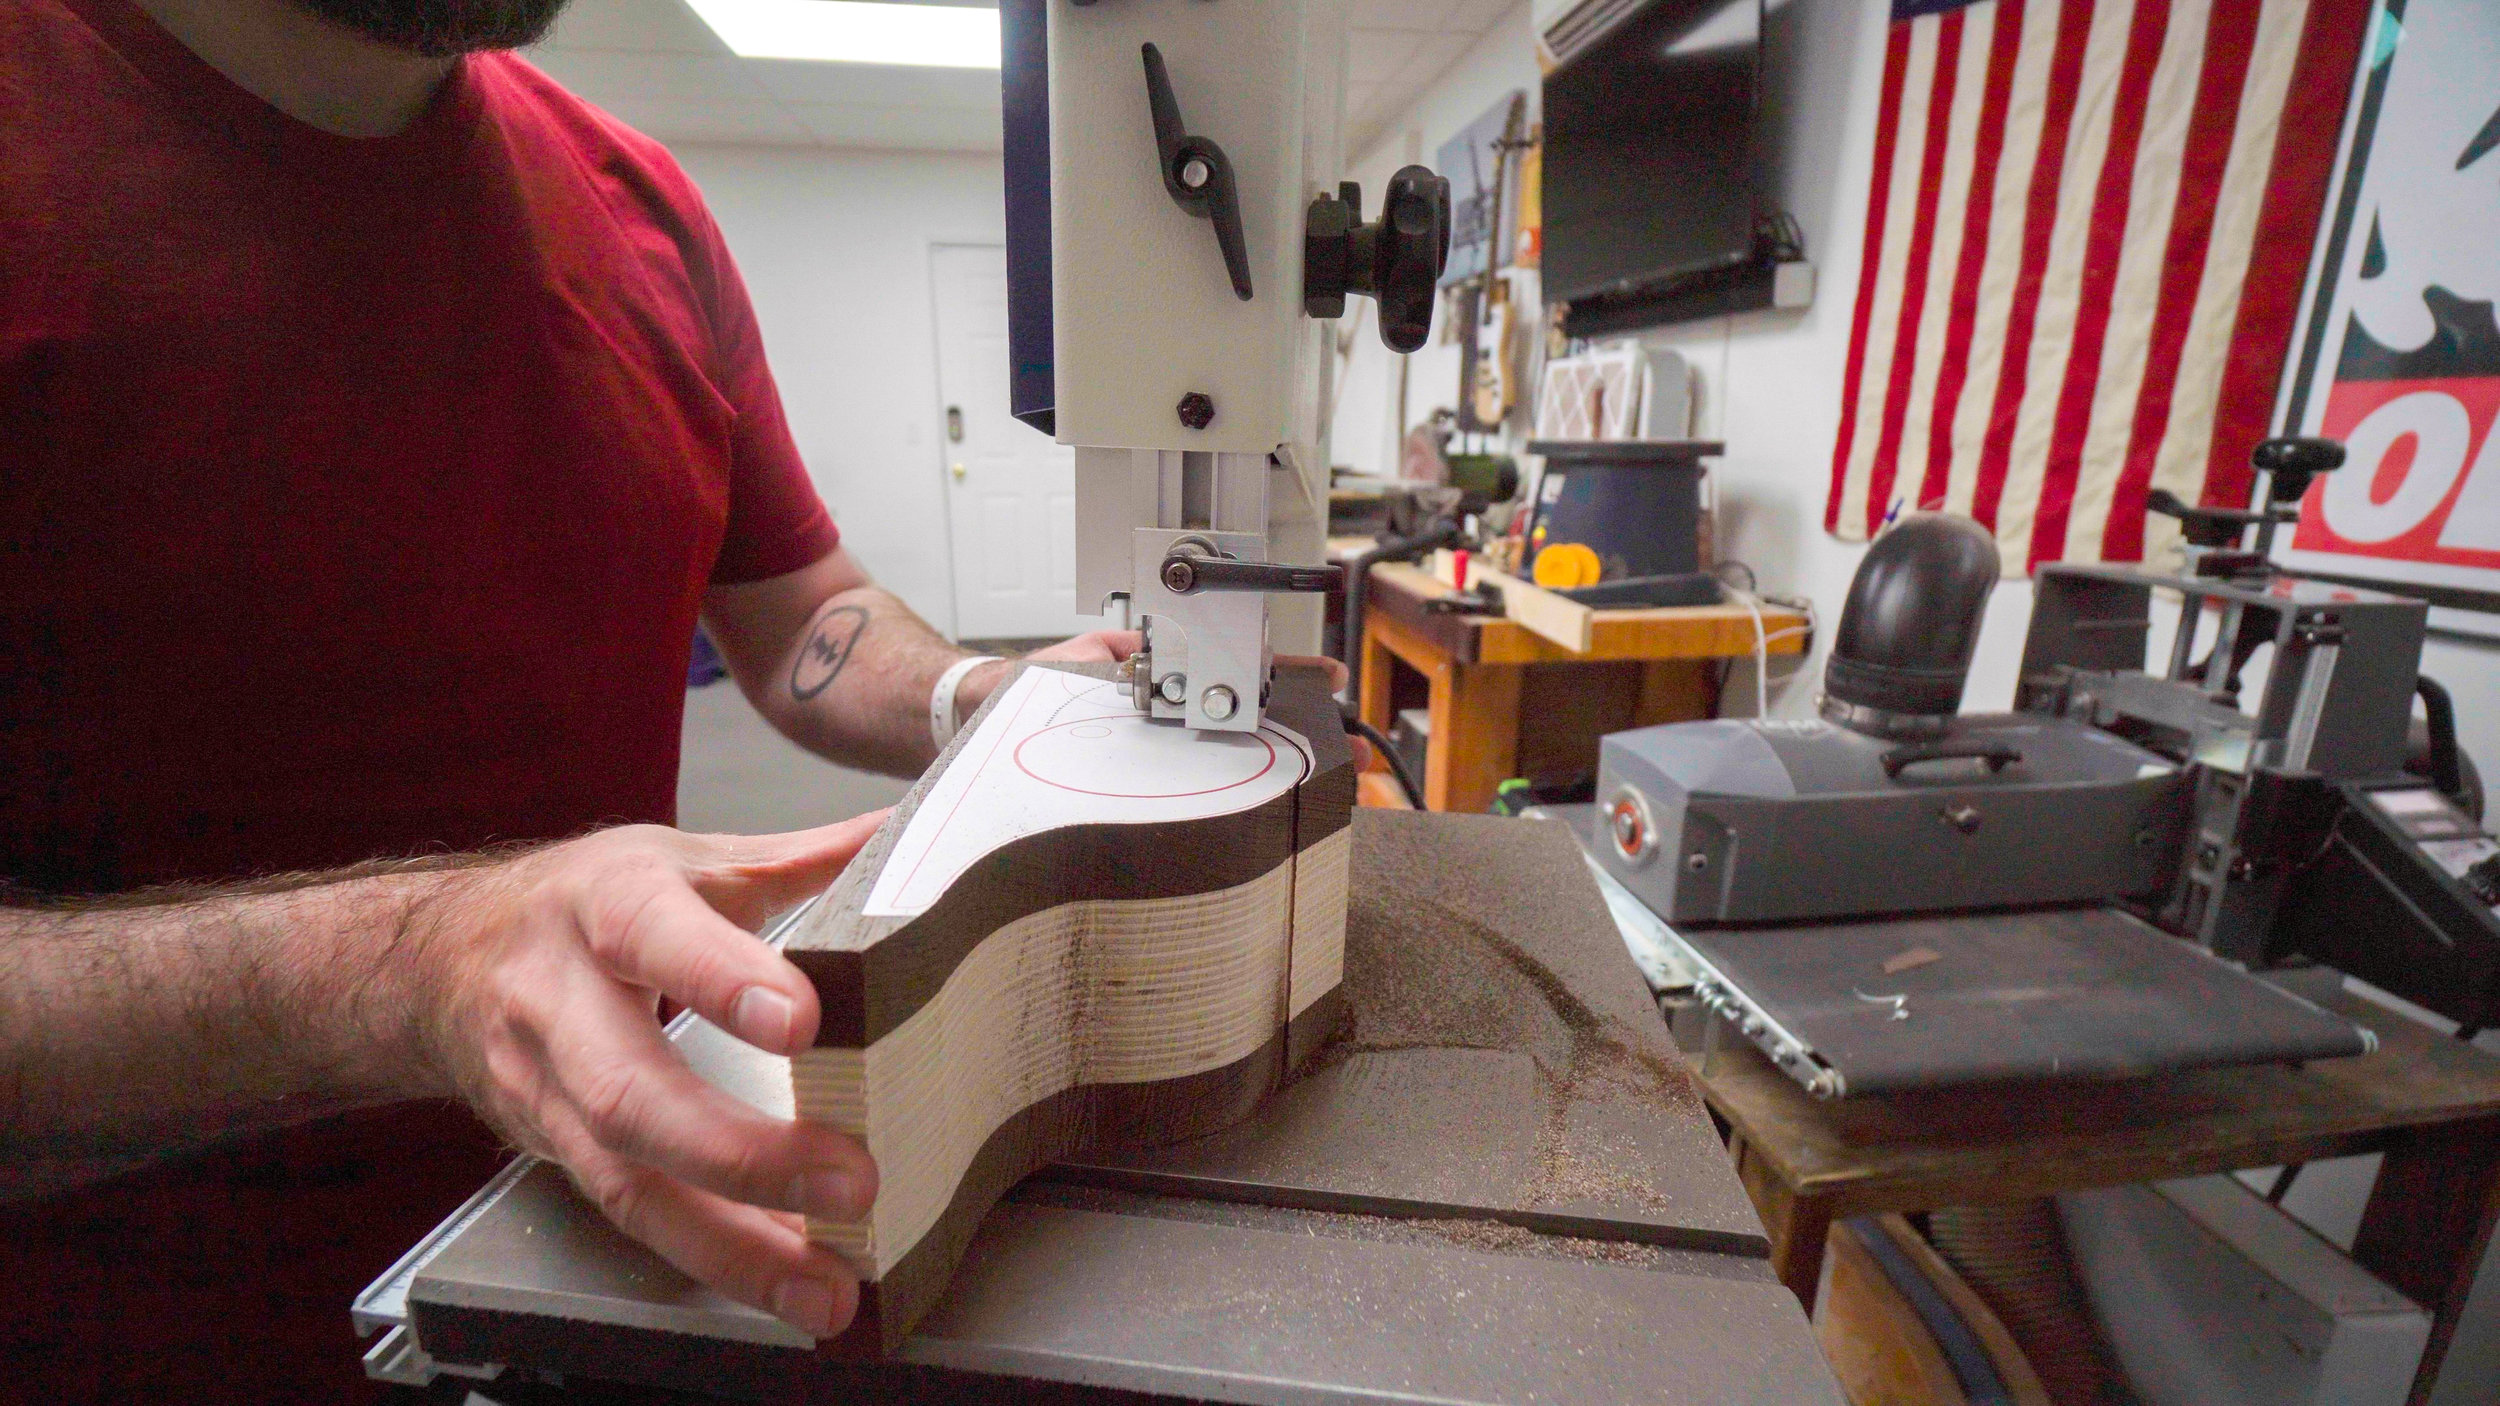
Step 4: Cutting the Bandsaw Box Shell
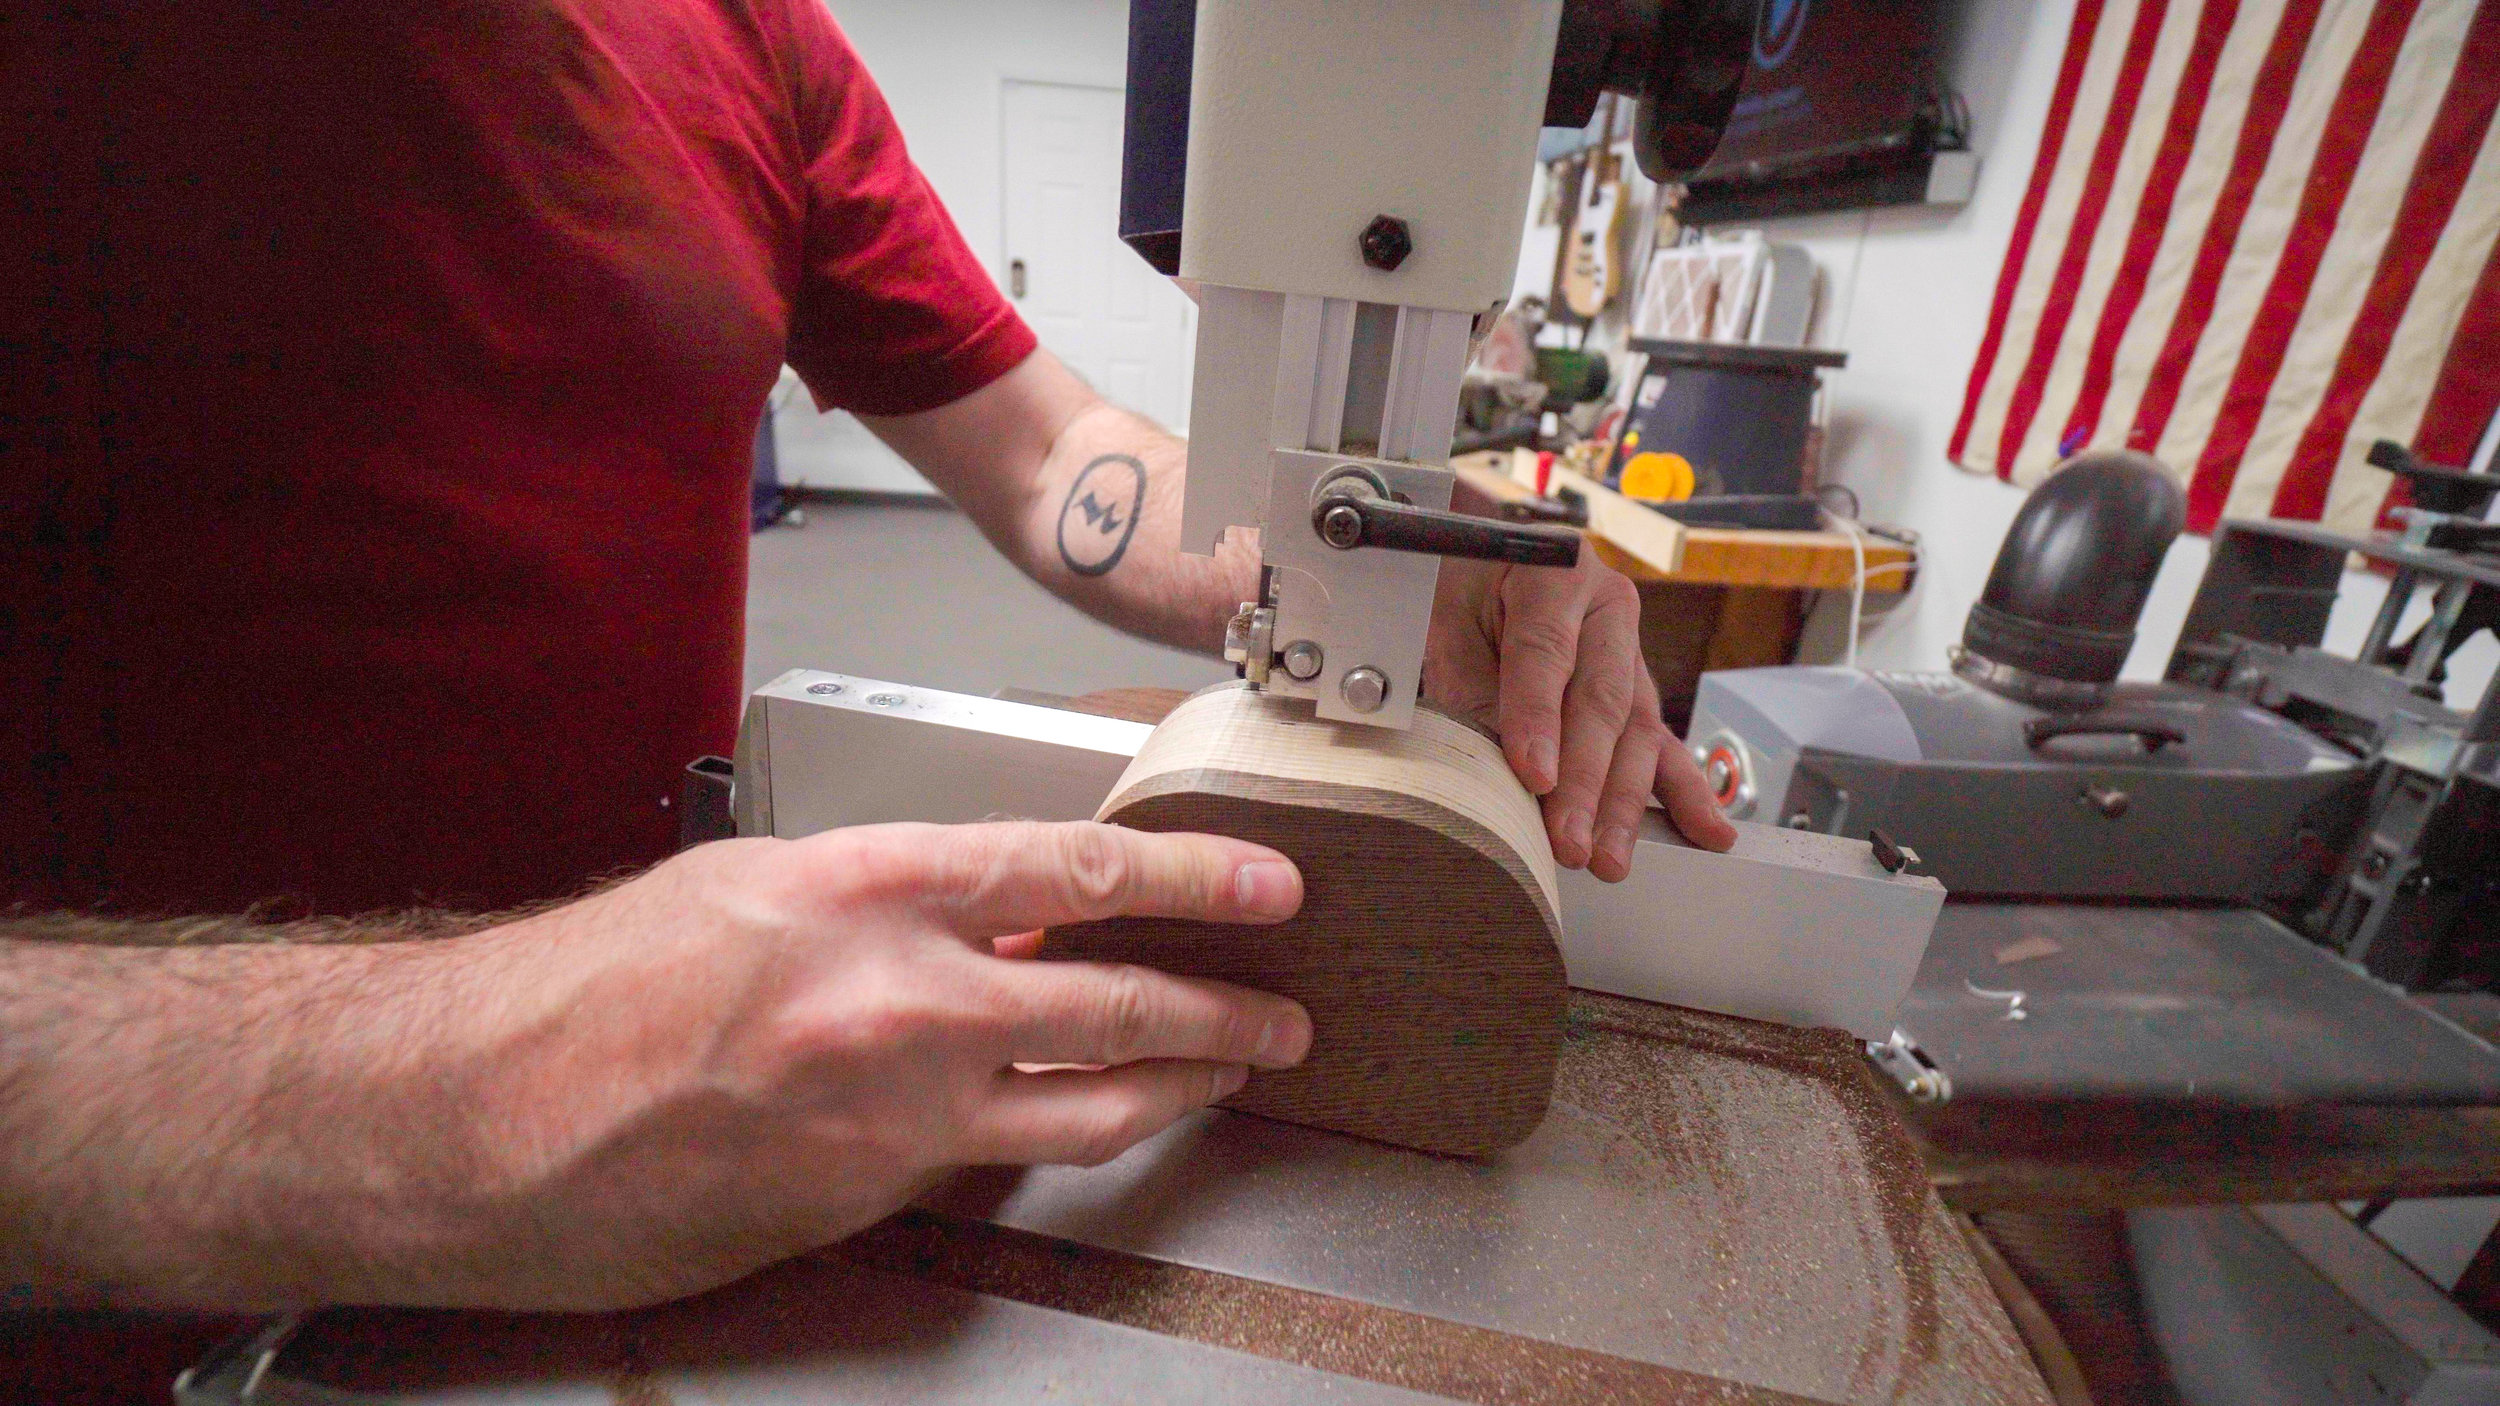
Next you'll cut the outside shape out on the bandsaw. Cut as close to the line as you can without touching it. In a later step we'll sand down to the line. Cut slow and let the blade do the work. You should not have to push hard if your blade is sharp. Don't worry how rough the cuts are at this point. We'll clean it up in a future step.
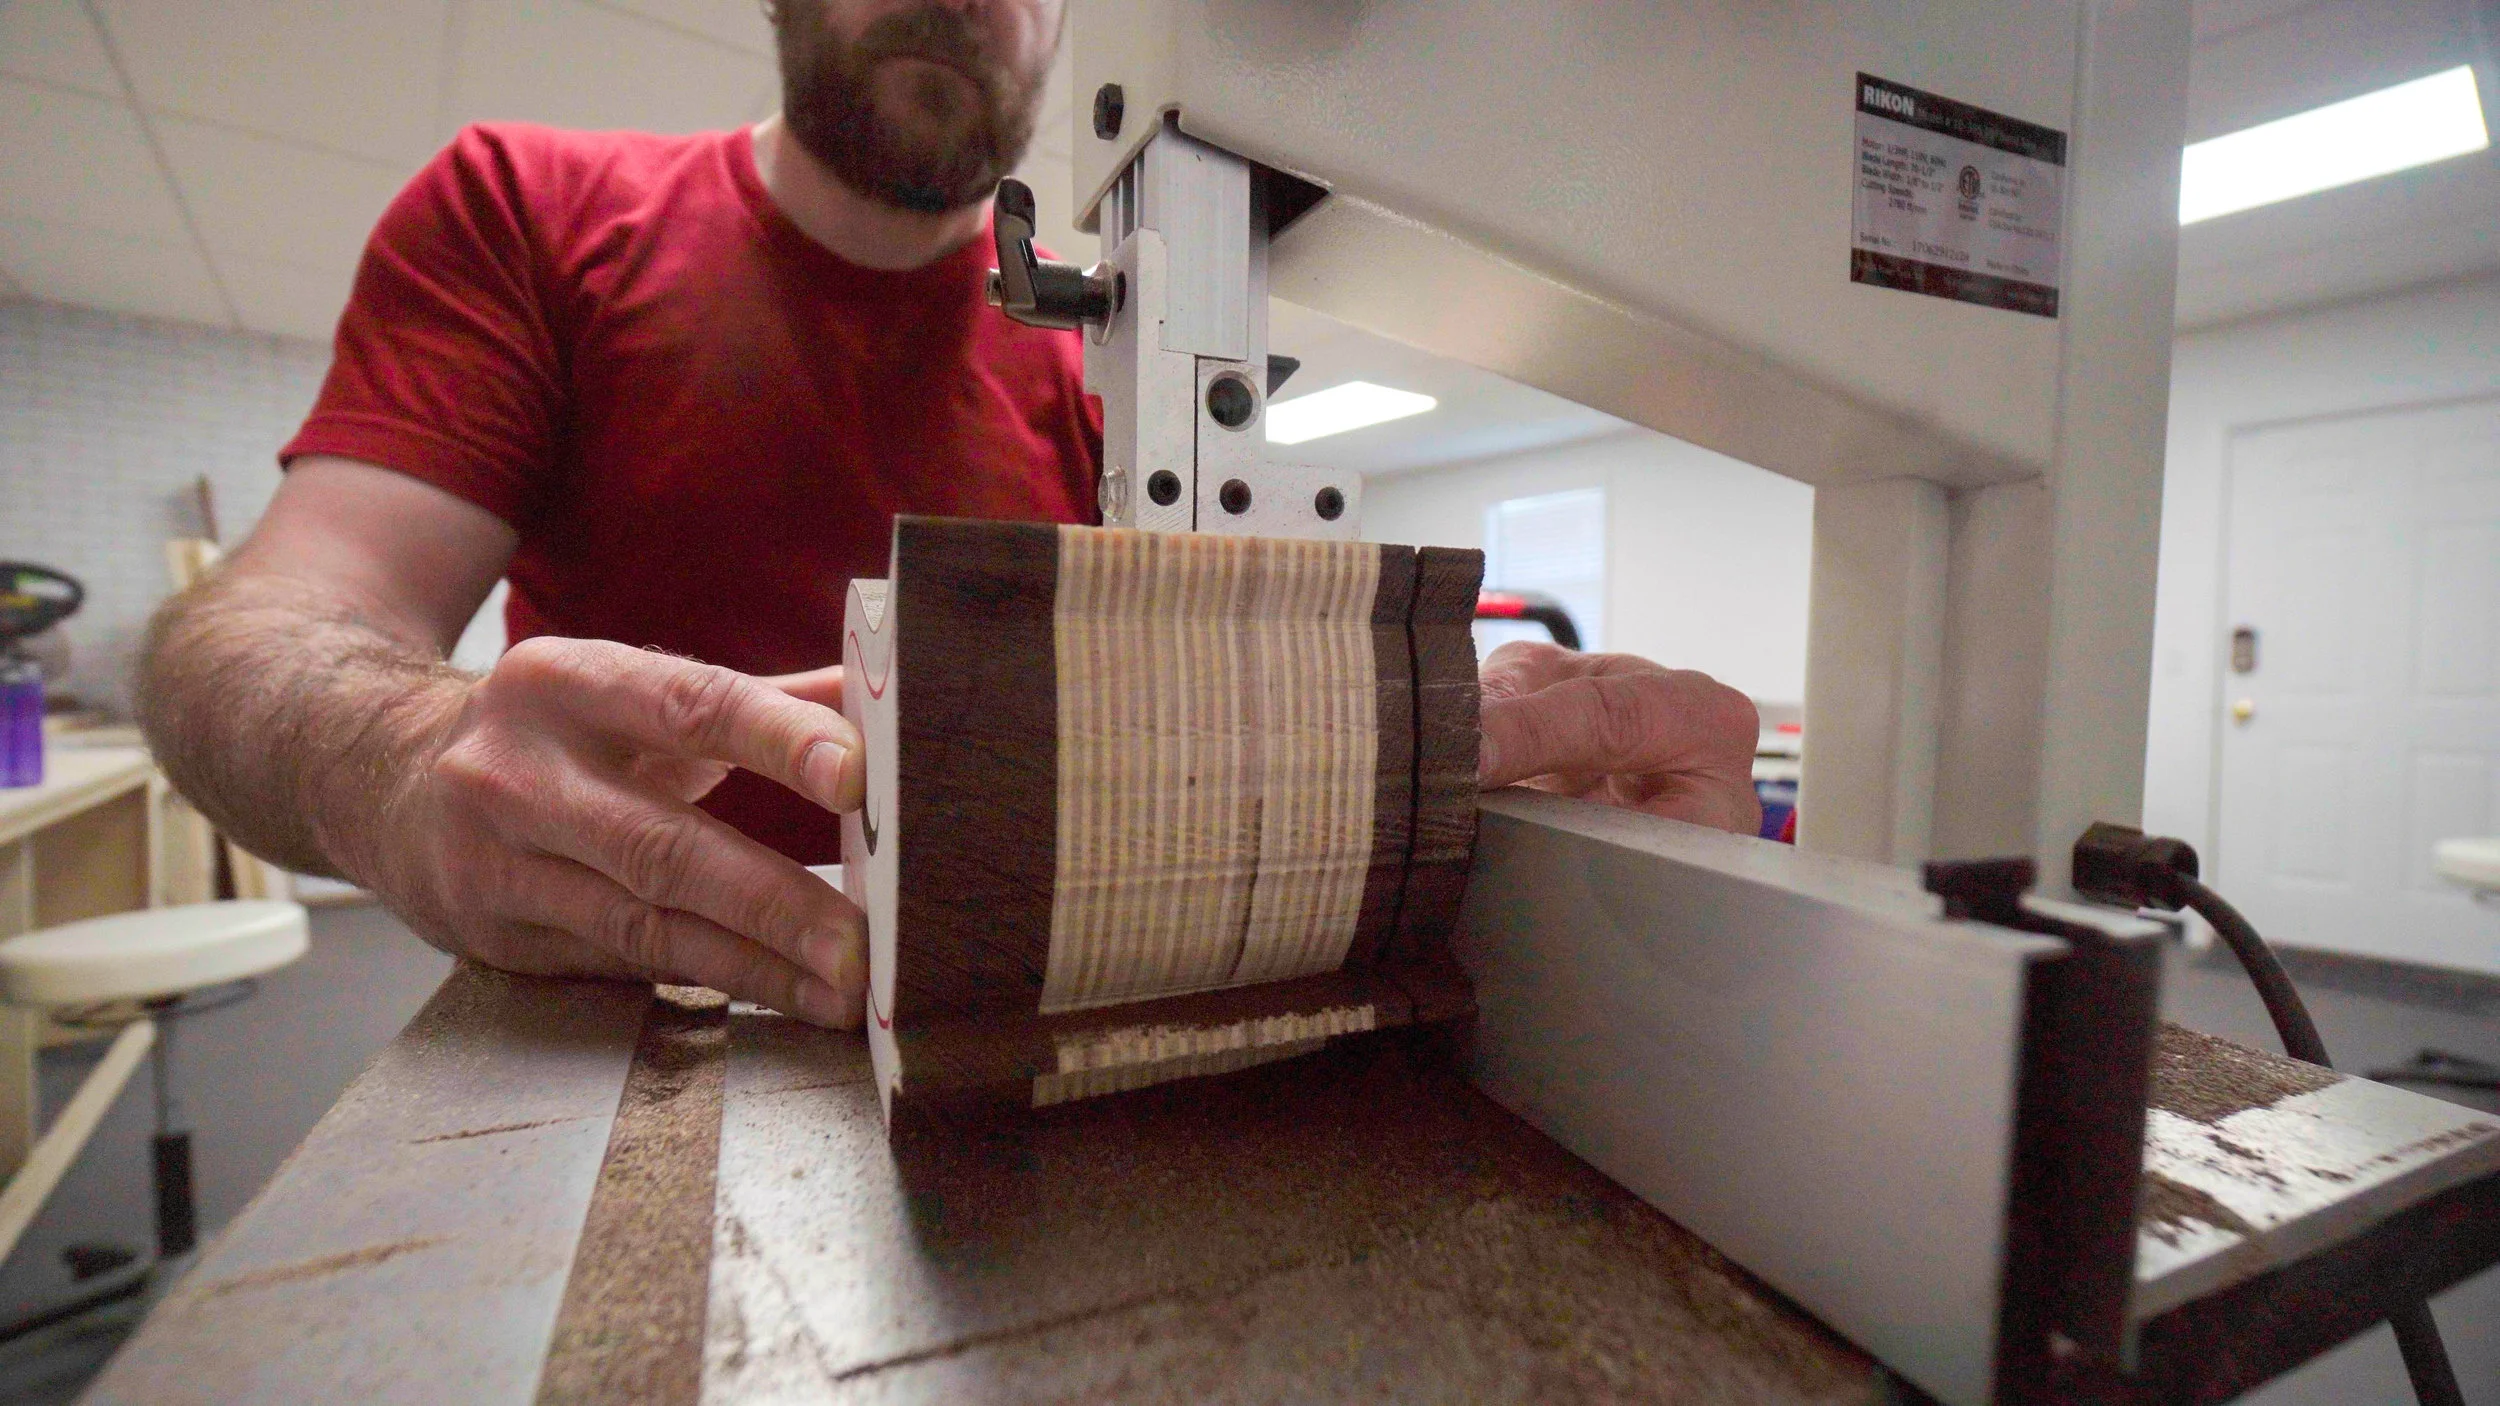
Step 5: Cutting the Bandsaw Box Back
Now you'll cut off the back using your bandsaw's fence set to about 1/2" from the blade. Again, take this cut very slow to allow the blade enough time to remove the waste.
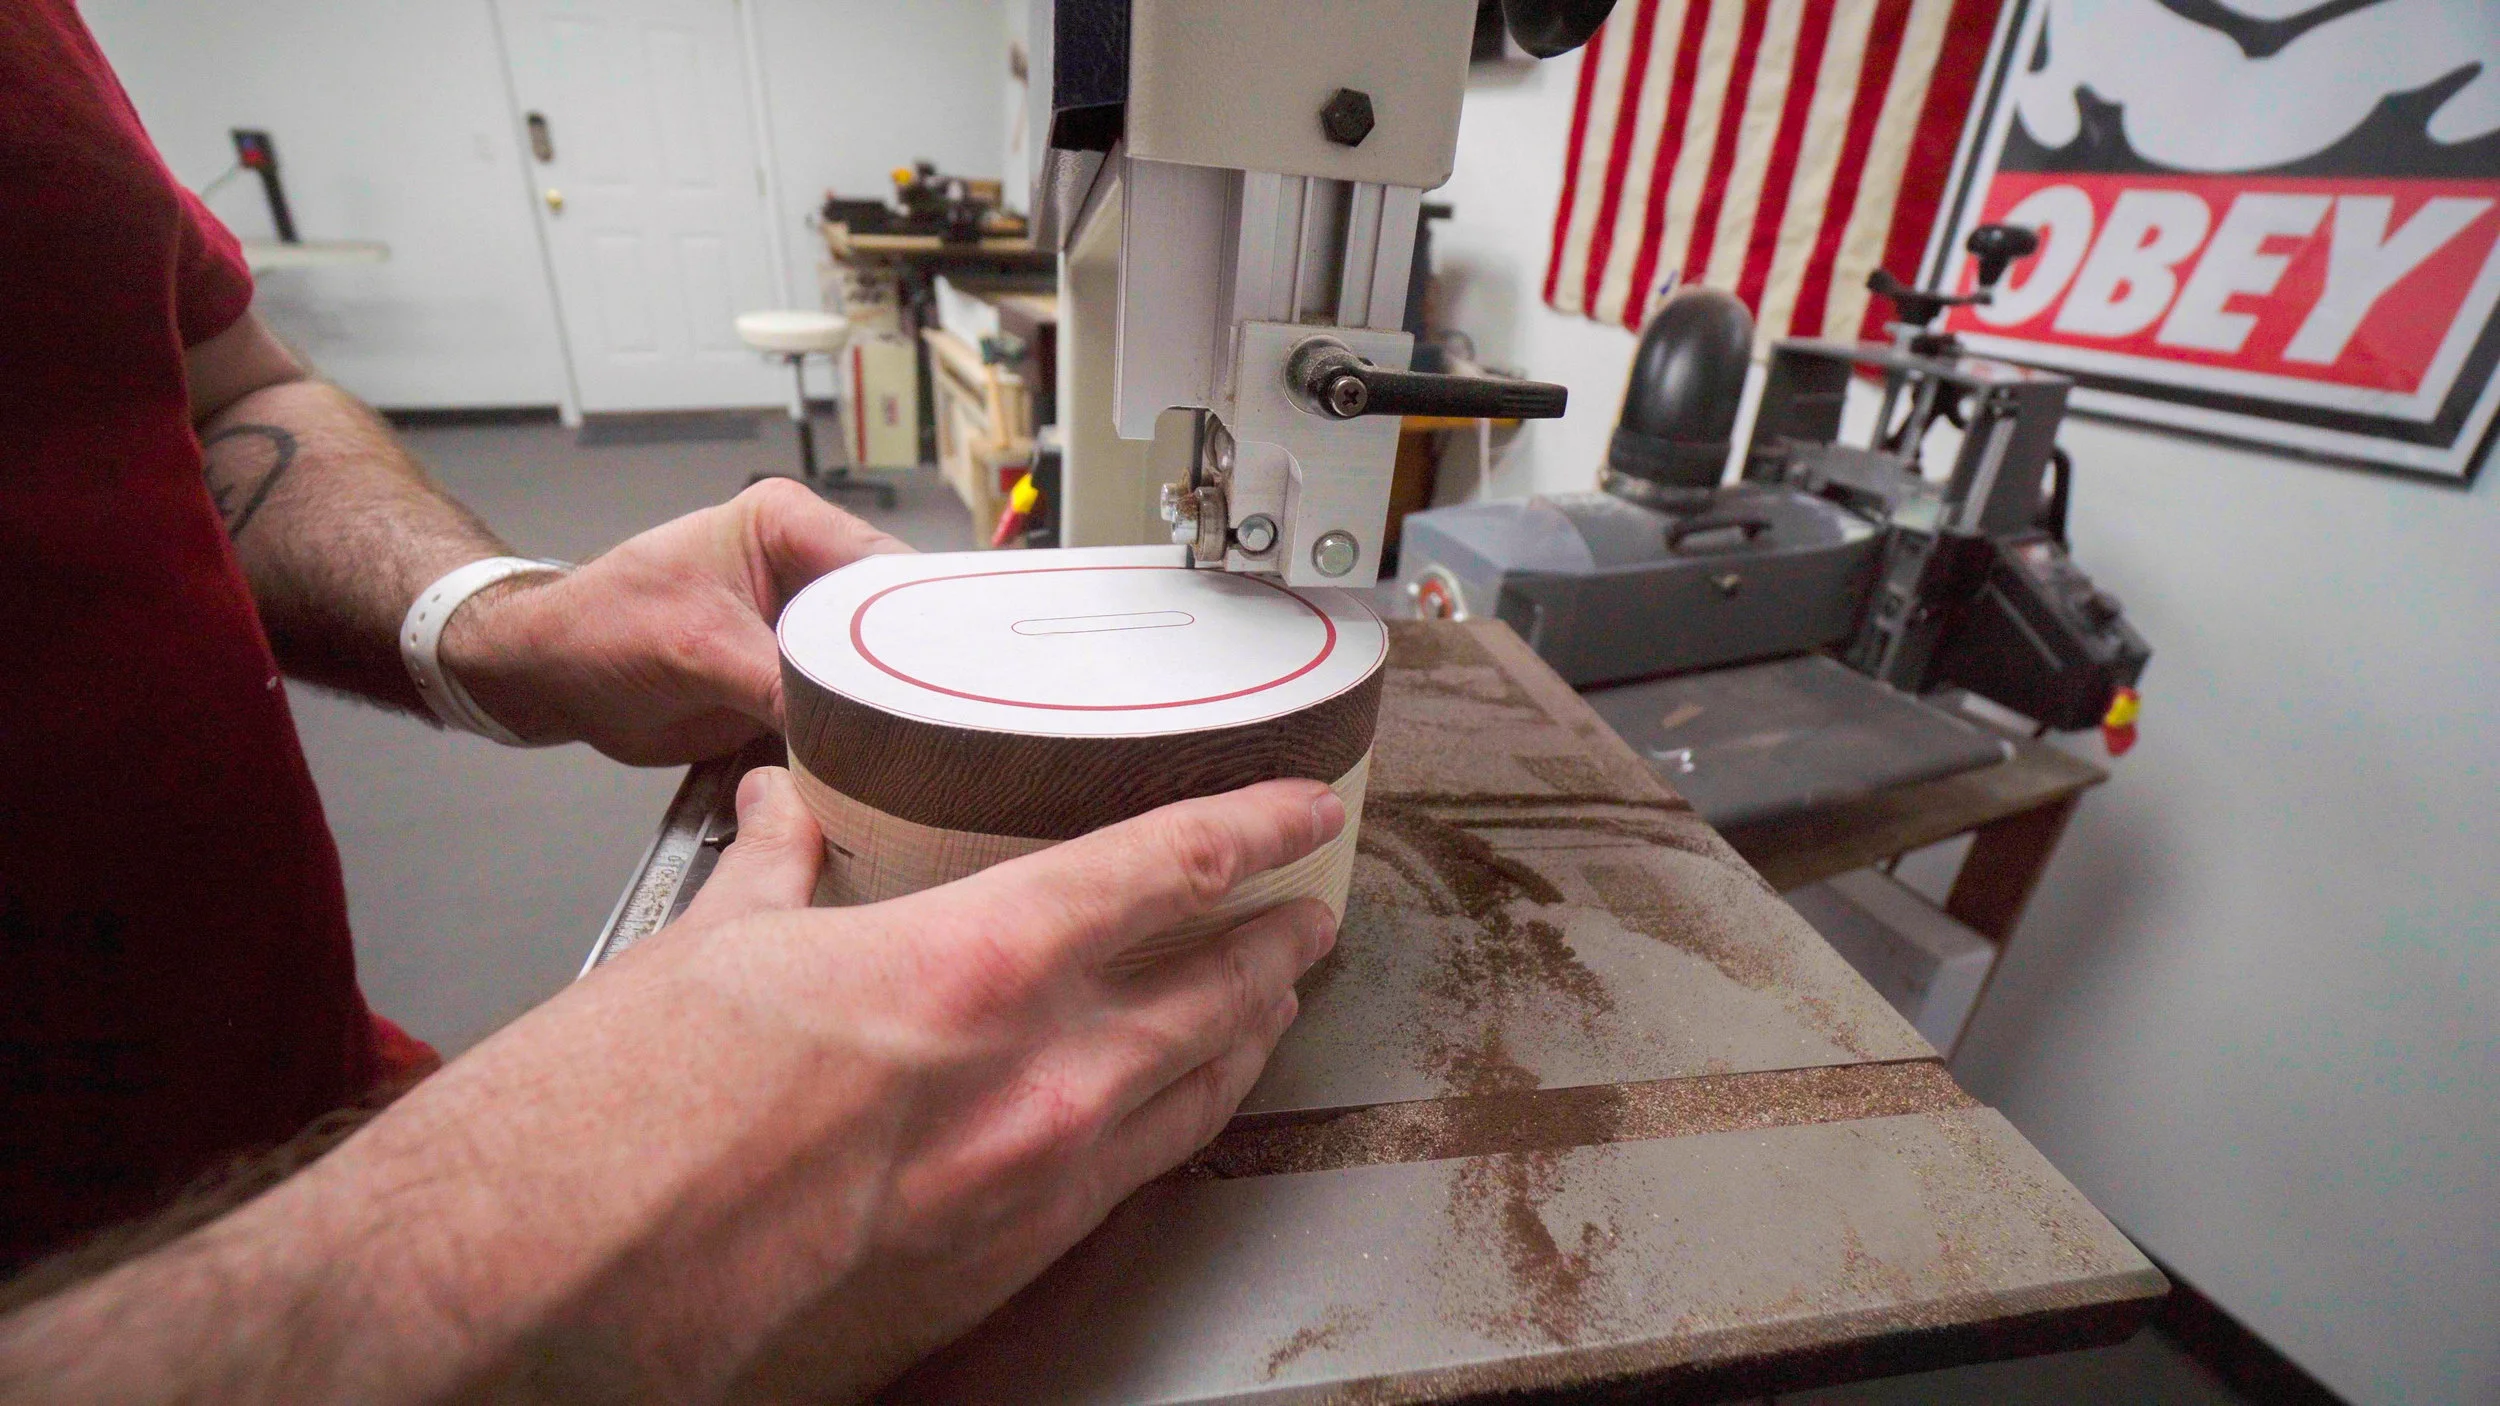
Step 6: Cutting the Bandsaw Box Drawer
Set aside the back that you just cut off and we'll now cut out the drawer from the shell. Enter from the side as indicated in the template. This time you'll cut right down the middle of the thick line. Do your best to split this line in two. Take your time and let the blade do the work.
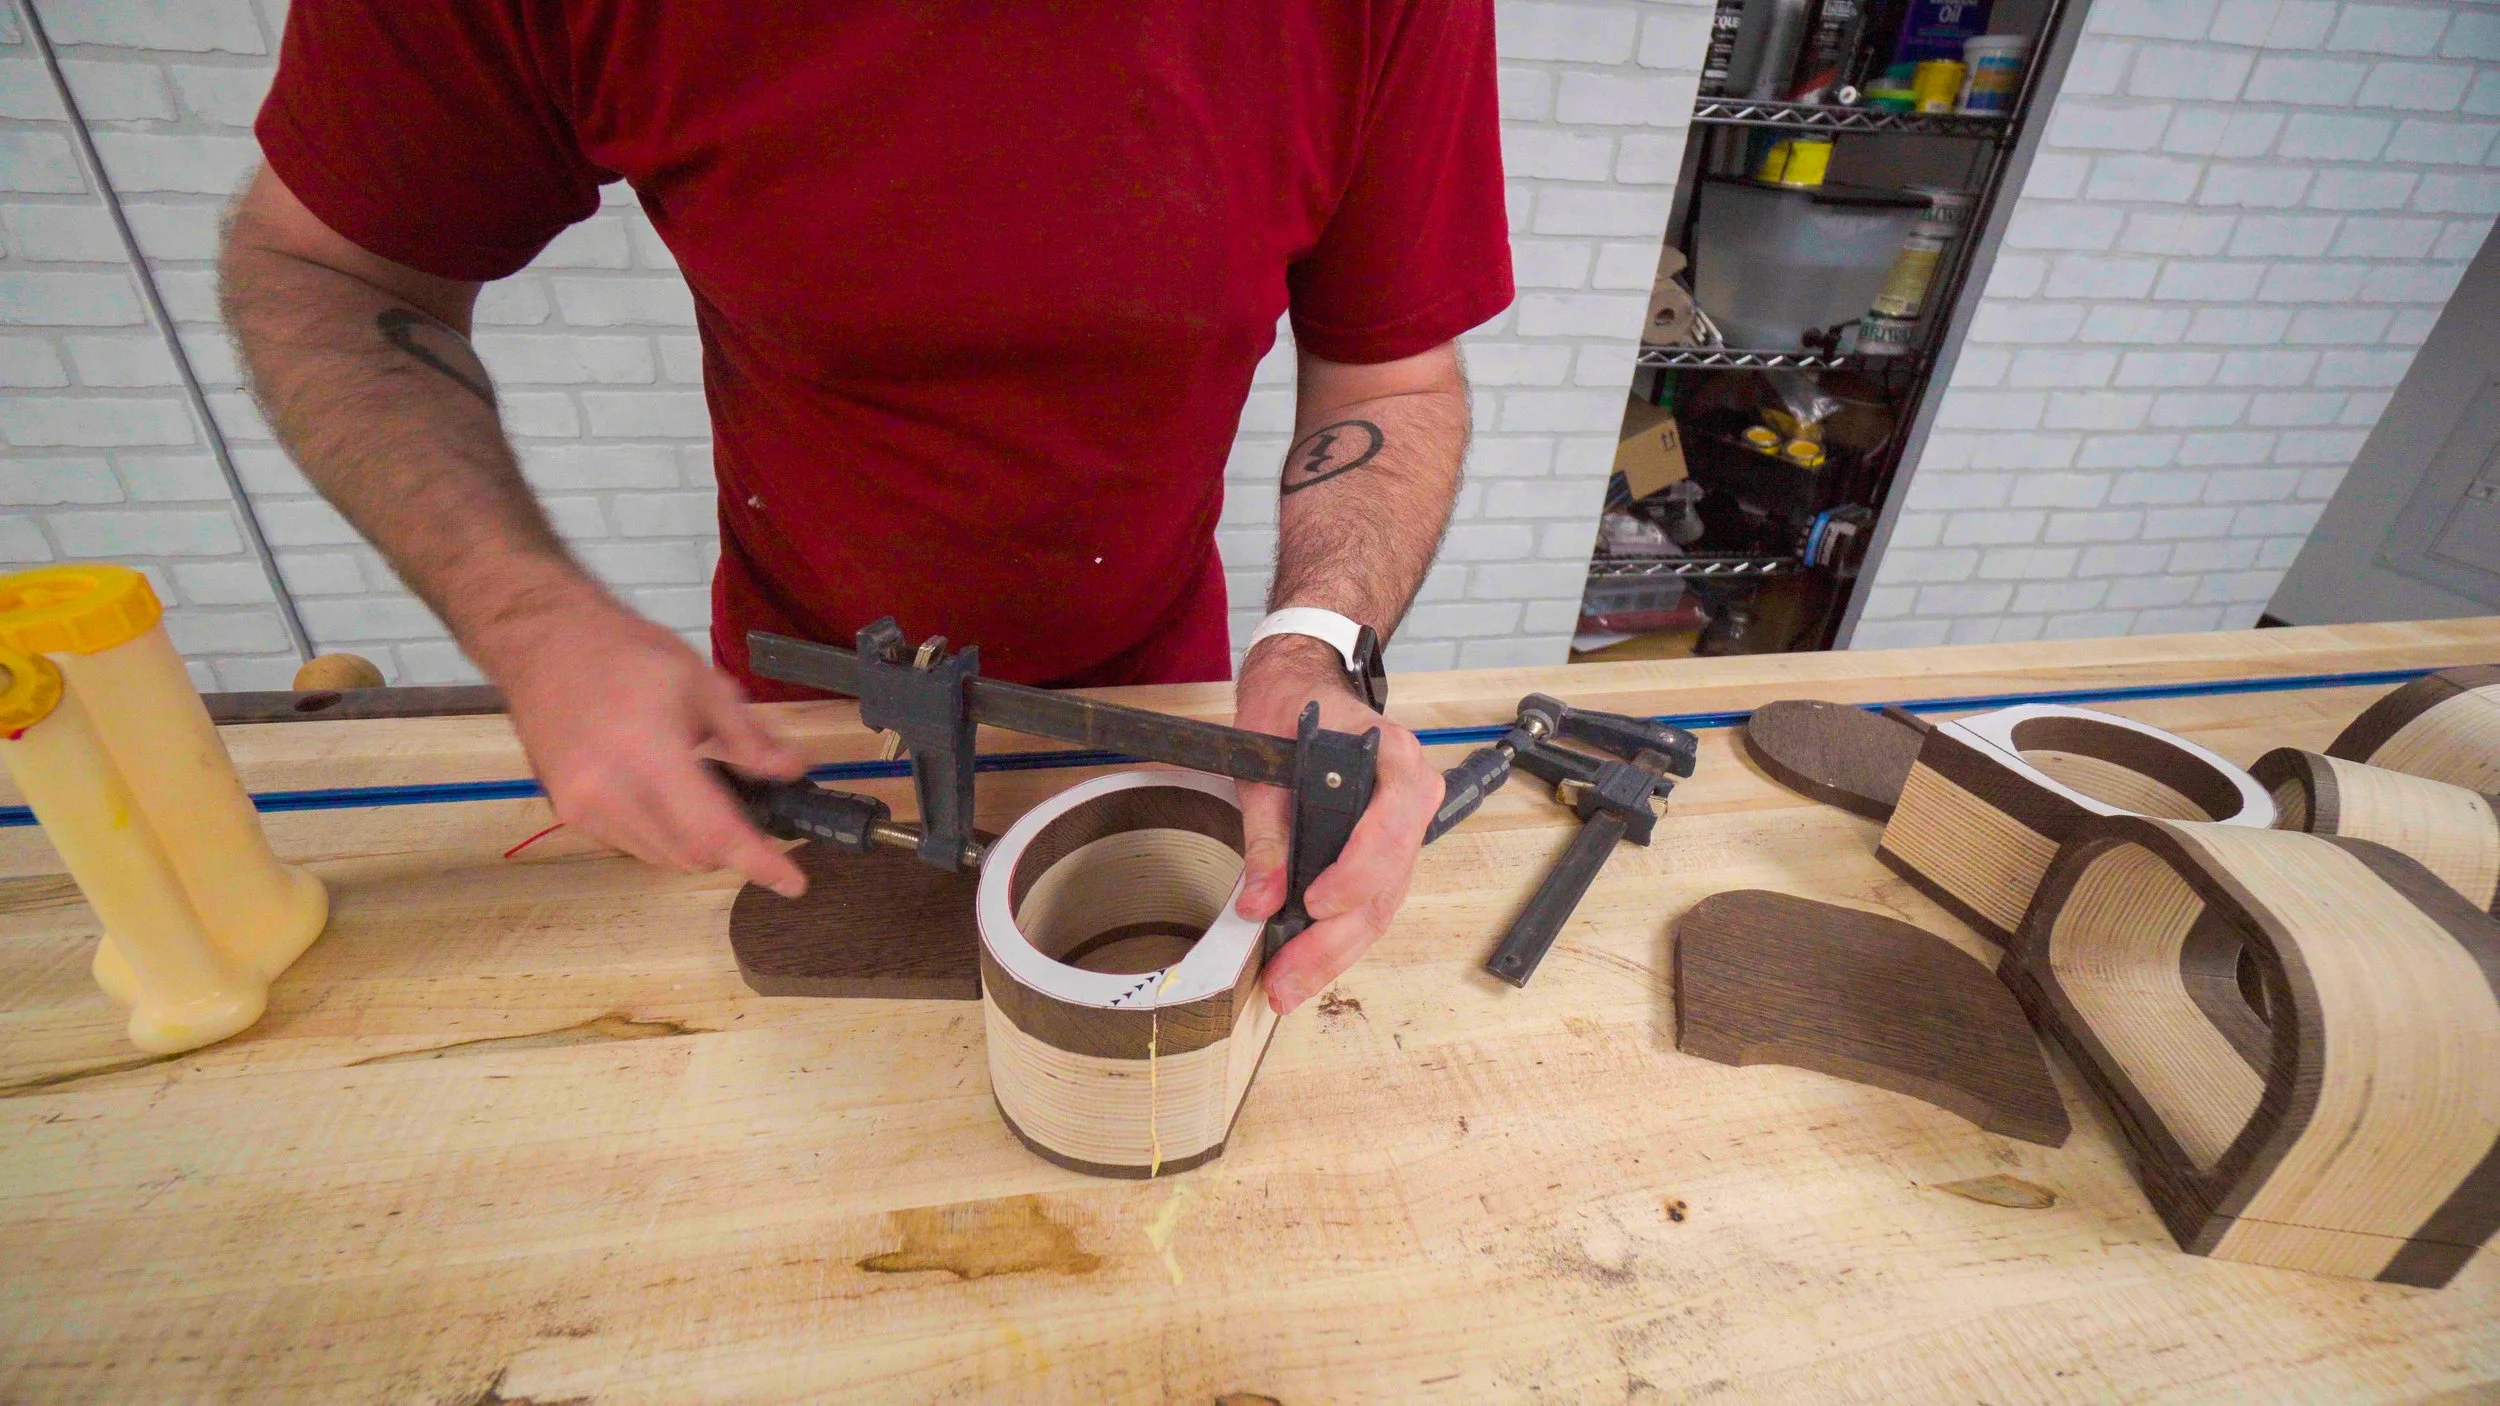
Step 7: Completing the Bandsaw Box Shell
With the drawer blank and shell back set aside, glue together the entrance cut with a couple of F-style clamps. Let this sit and dry for a couple of hours. Be sure to not remove the template just yet. Once the glue dries on the entrance cut you can glue on the back. Try to align the grain of the two pieces before tightening down the clamps. If properly aligned the seam will be invisible when dry. After the glued on the back is dry you can take off the clamps and sand the outside shape. This is easiest at the disc and spindle sanders. Sand down to the line. There's no need to sand inside the shell as we'll be covering that up with flocking. After this you can remove the papertemplates.
Step 8: Making the Bandsaw Box Drawer
Now take your drawer blank and cut the front face and back face off at the bandsaw. Set your bandsaw fence to about 1/2" from the blade and cut slow. Next you'll take that middle drawer piece and draw out the bottom and side walls. I like to use a black marker as it's easier to see the line. This wall should offset about 5/16". Then back at the bandsaw you'll cut this out. Like before, nice and slow and keep your fingers away from the blade!
Step 9: Bandsaw Box Drawer Glue-up
You should now have three pieces to your drawer. Glue them up and clamp them with F-style clamps. Again be sure to align the grain to hide the seams. Once the glue dries you can then sand the drawer's outside shape. At this point there may not be template lines to follow so only sand off the bandsaw marks until smooth. Try to avoid sanding too much to maintain a tight fit into the shell.
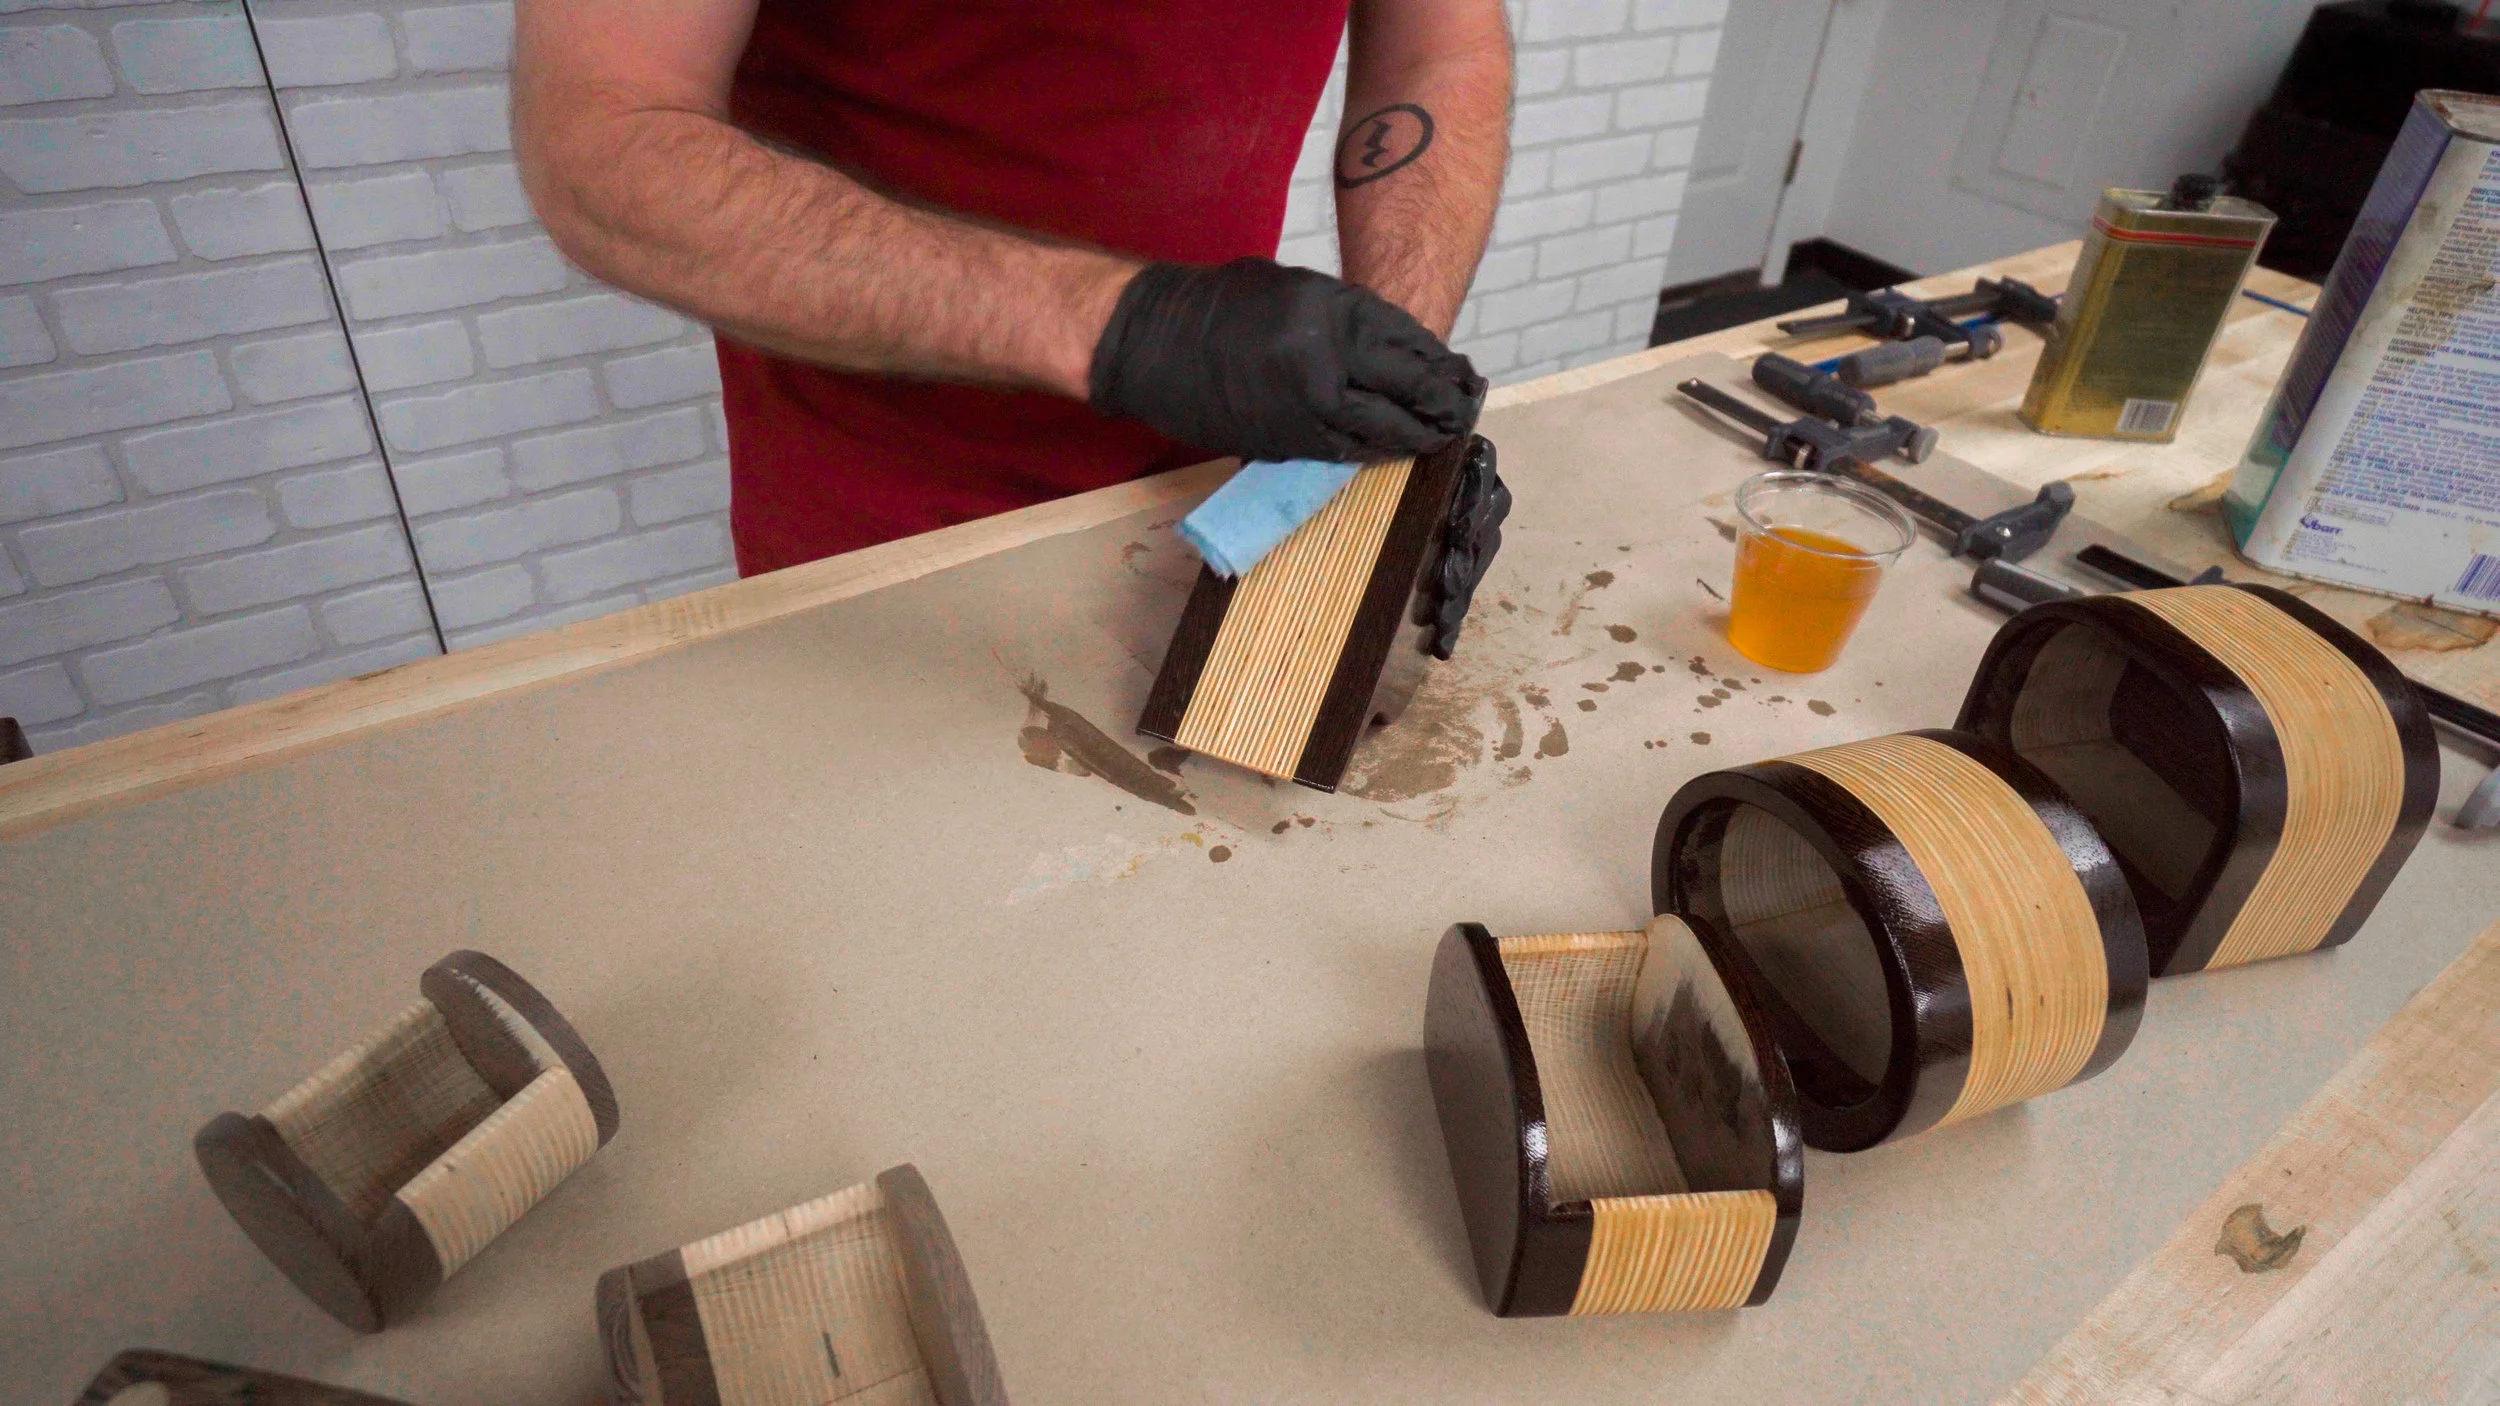
Step 10: Finishing Touches
For a finished look I like to round over the face of the drawer and all edges of the shell with a 1/8" round over bit. Sand the outside of the shell and the outside of the drawer and finish with a rub-on oil. Flock the inside of the drawer and shell and add a pull.


Making a Super Custom Workstation Desk
Making a custom desk out of walnut and plywood.
Making a custom desk out of walnut and plywood. I’m using the wood file cabinets I made previously as the base and building a custom top and shelves for all my audio and video equipment.
Tools and supples used in this project


Closet Door Makeover w/ Changeable Panels for Customizing!
Bring some style to an element of your room that’s too often overlooked.
Bring some style to an element of your room that’s too often overlooked.
This woodworking tutorial takes your basic hollow-core interior doors and turns them into something cool. Plus, you can easily change them out as the spirit moves you.
Let’s face it — no matter how cool your house is, there’s a good chance your doors are a little drab. And when we’re looking at ways to fancy up our living space, we tend to overlook the doors as an option. In this step-by-step how-to, I’ll show how to add some flair that you can customize to suit your personal style.
We started with your standard mahogany hollow-core doors, which we sanded down and painted. Then, with a few fairly straightforward woodworking techniques, plus some acrylic and cardstock, we created a mid-century modern look that makes the room pop. Not into mid-century modern? Play around with the design a little bit, or create panels more to your liking.
Plus (plot twist), there’s a special touch in this design that makes changing out your panels quickly and easily. What is it? Watch the video to find out.


Making a Footstool With Woodworking and Basic Upholstery
Build the perfect office accessory using fabric, foam rubber, walnut and your own ingenuity.
Build the perfect office accessory using fabric, foam rubber, walnut and your own ingenuity.
Tools and Supplies Used in this Woodworking Project
Part of the fun of woodworking is experimenting with various techniques and design elements. It’s a great way to learn new tricks and expand your woodworking repertoire. For this how-to video, all I knew was I needed a footstool to put under the desk in my awesome new office. From there, I decided to make my first-ever attempts at basic upholstery. This tutorial video walks you through it step-by-step.
Because I was taking a trial-and-error approach, the top box of the footstool is just screwed together without glue. If you’re more confident in your design, you may want to adjust accordingly. For the legs of the footstool, I experimented with angles to create something with a distinctive look. Once I had something I was happy with, I shellacked and waxed the walnut that works well with the distinctive, vibrant look of the fabric I’ve used.
So did this experiment in designing something upholstery pay off? Am I the Jack White of woodworking? Watch the video and find out!


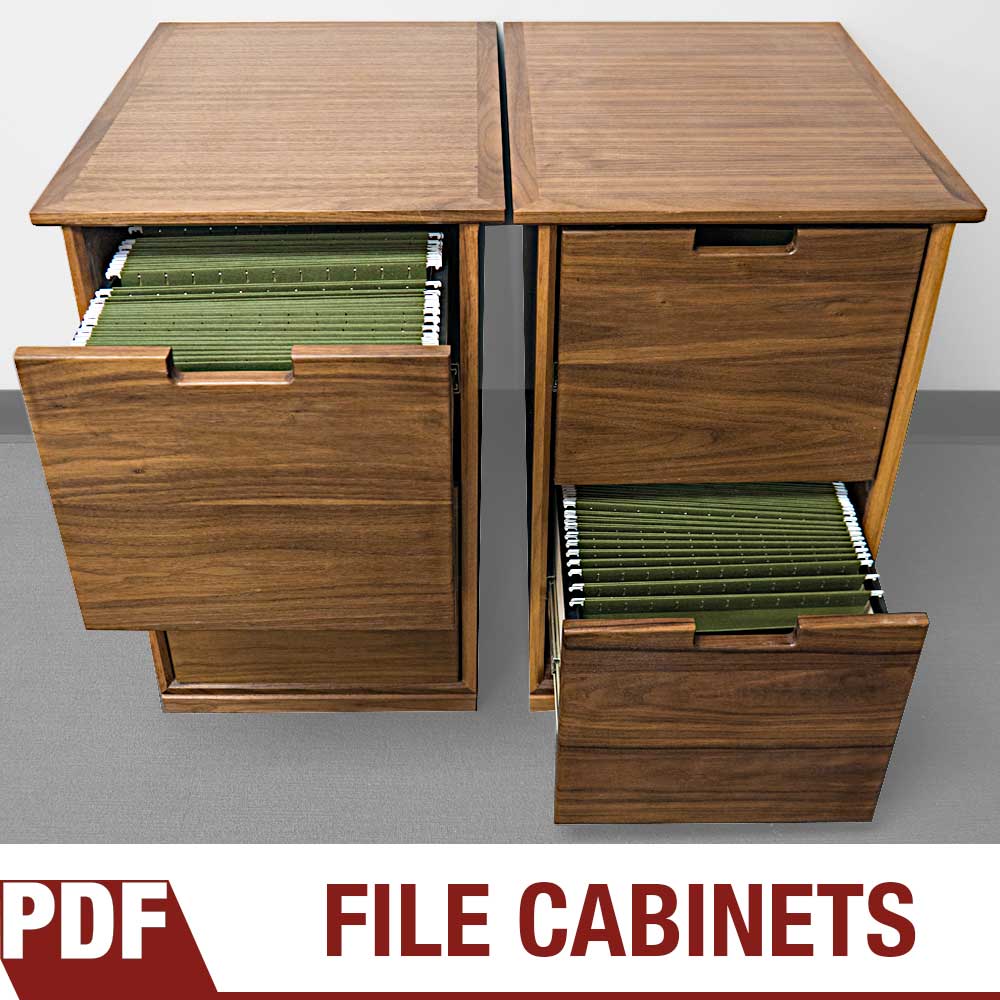
How to Make a Filing Cabinet Using Walnut Plywood
Making a pair of walnut file cabinets out of plywood and solid wood.
Woodworking Tutorial on Making a Modern File Cabinet
I’m working on building my dream office here at Make Something HQ, and this tutorial is the latest installment in that series. The two walnut file cabinets I’m making in this video are going to serve as the base for my desk, but the plans also allow them to be built as free-standing units.
This how-to walks you through every step of the build using basic woodworking tools, from cutting the carcass to specs to putting the file folder slip-ons in place. I’ll be using walnut plywood for the top, sides and drawers, as well as creating a bottom footer with a router profile. Because you want your drawers to slide with maximum precision, I’ll also show you how to use a universal drawer slider jig.
Along the way, I’ll give you a quick glimpse into my shellacking process, so you can get just the right finish for your filing cabinets. Plus (spoiler alert) I’ll even show you how to work through a minor woodworking mistake. Whether you’re planning to use hanging filing folder cabinets as the base for an awesome dream office desk or just create a place to put all those papers that are piled up all over your floor, this is the tutorial that can get you started.
Tools and Supplies Used in the Woodworking Project


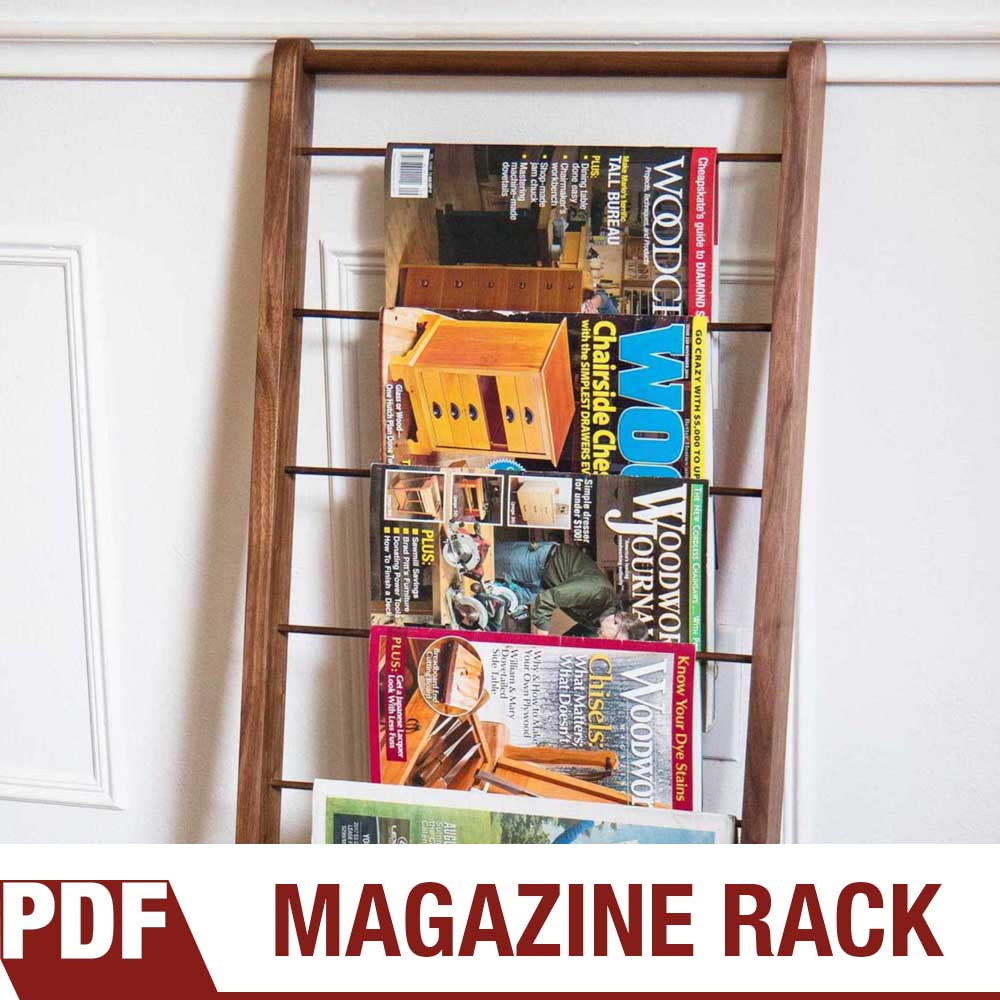
How to Make a Modern Retro Magazine Rack
How to make a vintage modern magazine rack. Easy woodworking project that can be made in a couple of hours with very few woodworking tools.
Simple Woodworking Project with Limited Tools
Detailed, step-by-step instructions on how to make a simple magazine rack. Requires very little wood and a few pre-made dowels. Watch the video below to see how easy it is!
How to make a vintage modern magazine rack. Easy woodworking project that can be made in a couple of hours with very few woodworking tools. Even though we live in a digital age I’m a firm believer in holding physical books and magazines. There’s something special about turning through the pages and the effortlessness about picking up a magazine and flipping through it. Here’s a great way to showcase and store your favorite newspapers and magazines!
If you’d like the free plans for this woodworking project, fill out the form on the bottom of this page and you’ll get immediate access to the 8 page PDF with step by step instructions.
Tools and Supples Used in This Woodworking Project


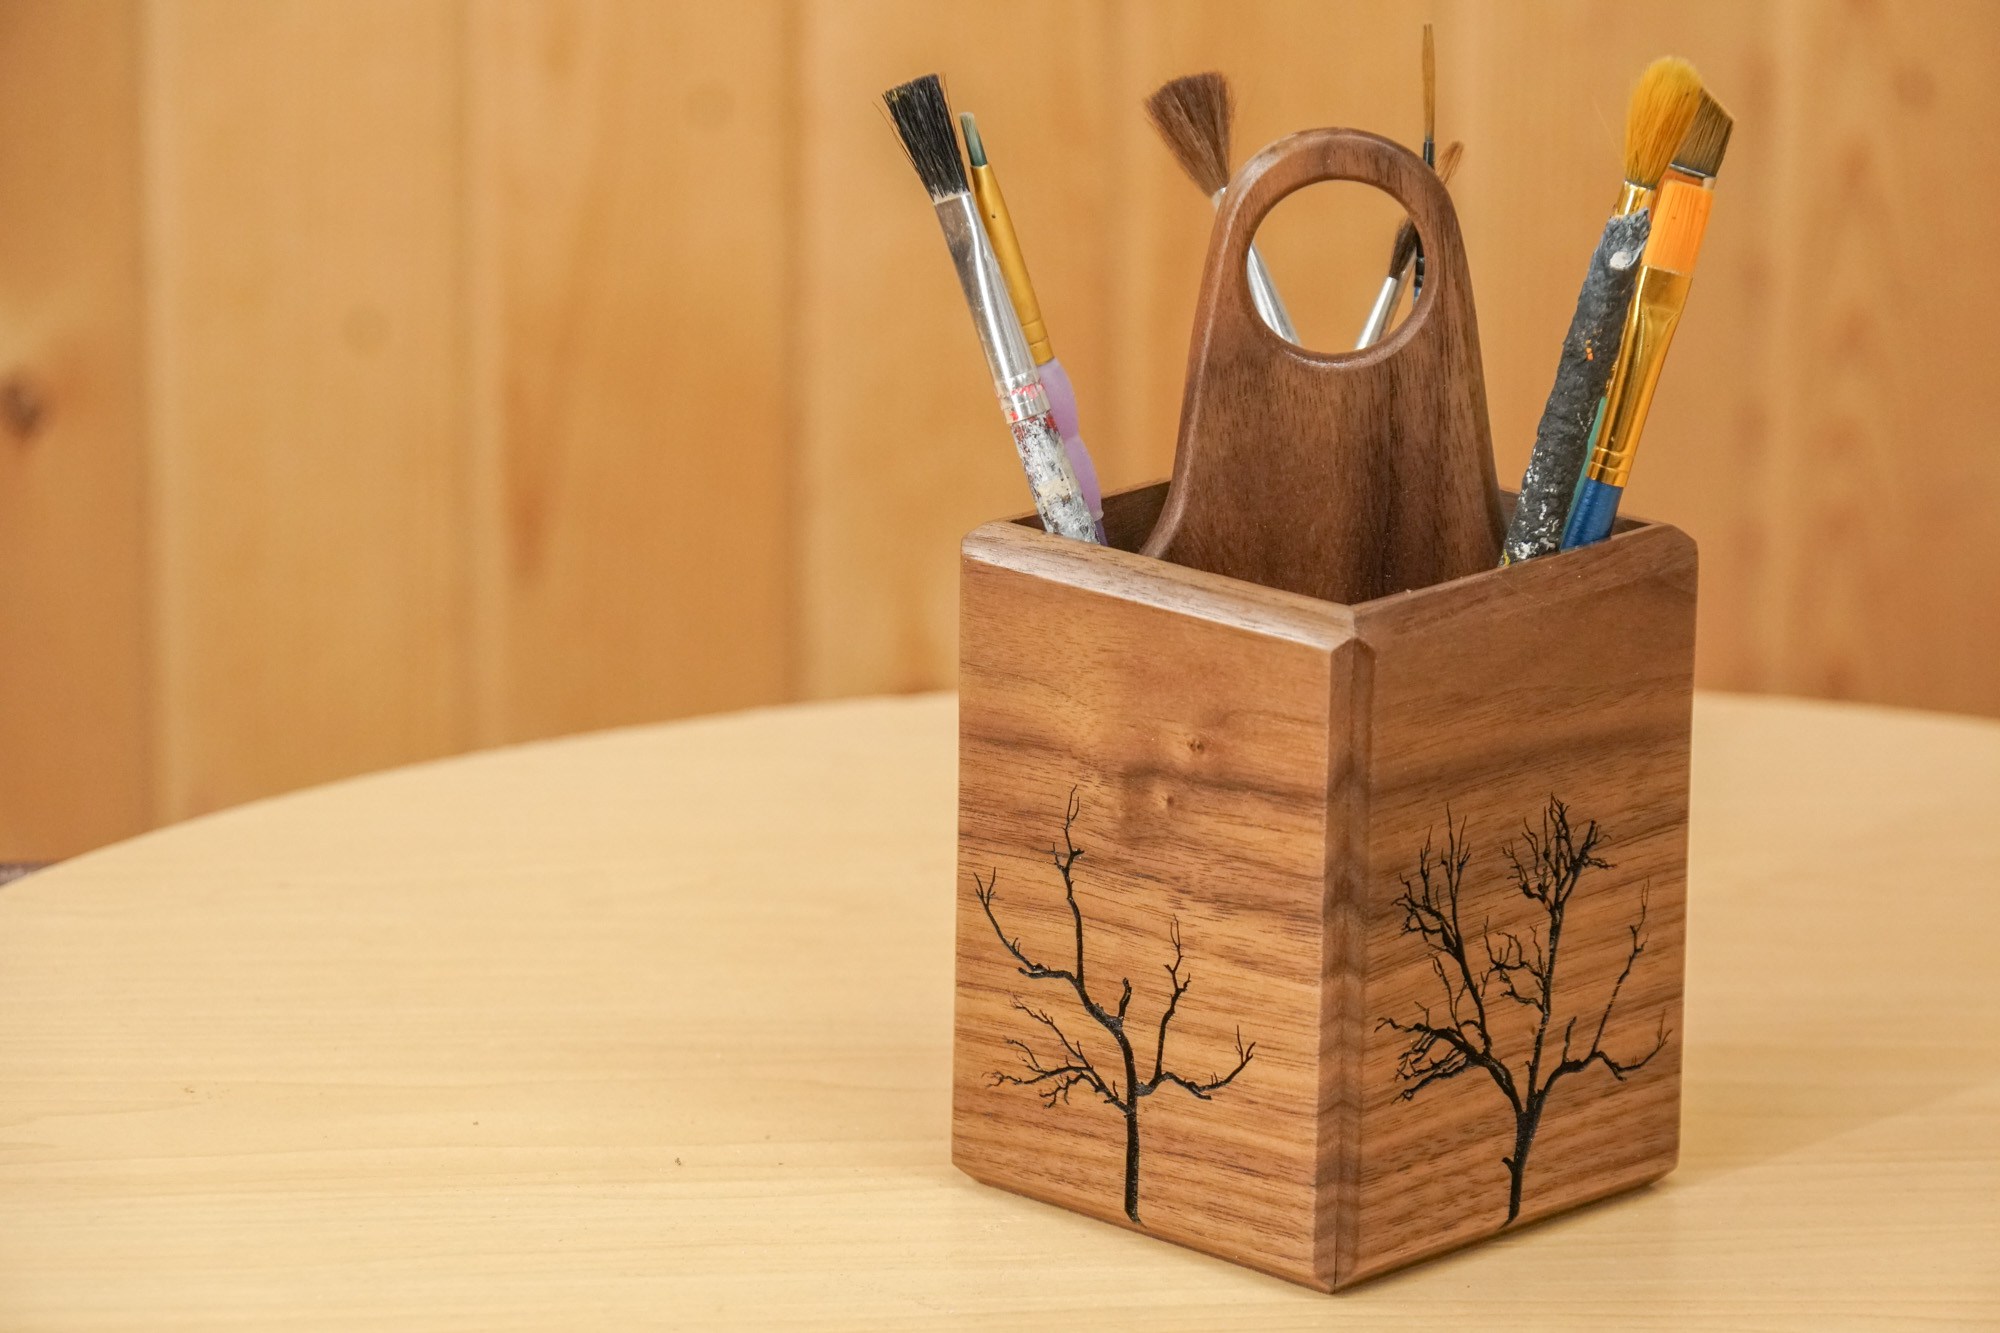
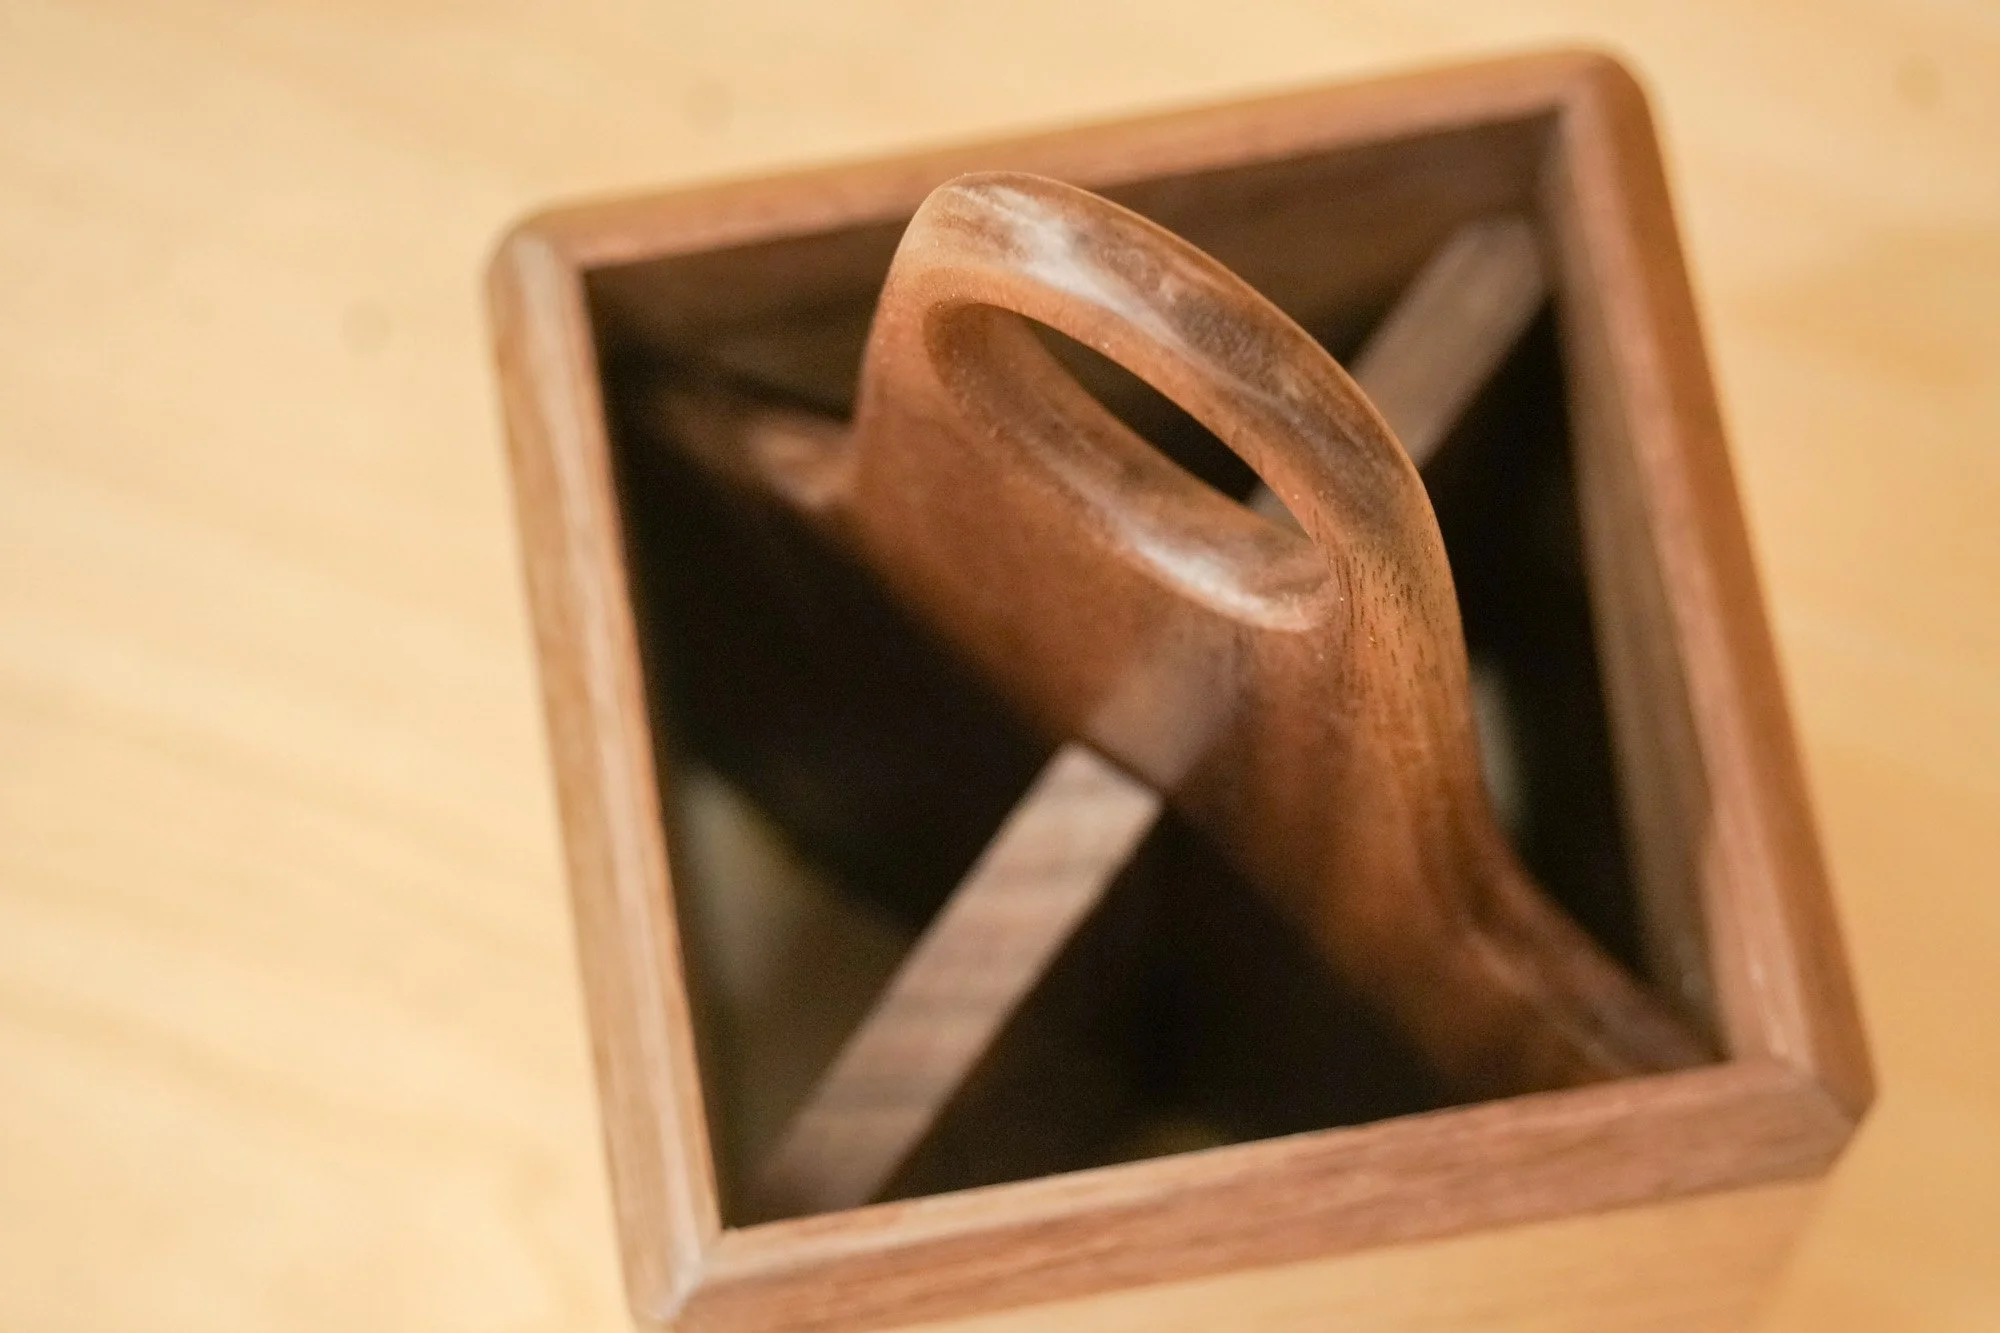
How to make a Pencil Holder/Art Caddy
Making this pencil holder/art caddy is a quick and simple woodworking project that can easily be made in an afternoon.
Making this pencil holder/art caddy is a quick and simple woodworking project that can easily be made in an afternoon. I began my resawing some 3/4″ walnut in half to use for all the pieces. The 4 main side are all cut to the exact same size with a 45° bevel on all the edges for easy joinery. The pieces are glued together and clapped with nothing but blue painters tape. There’s an inserted divider to keep different utensils separated and everything is coated with 2 coats of shellac.


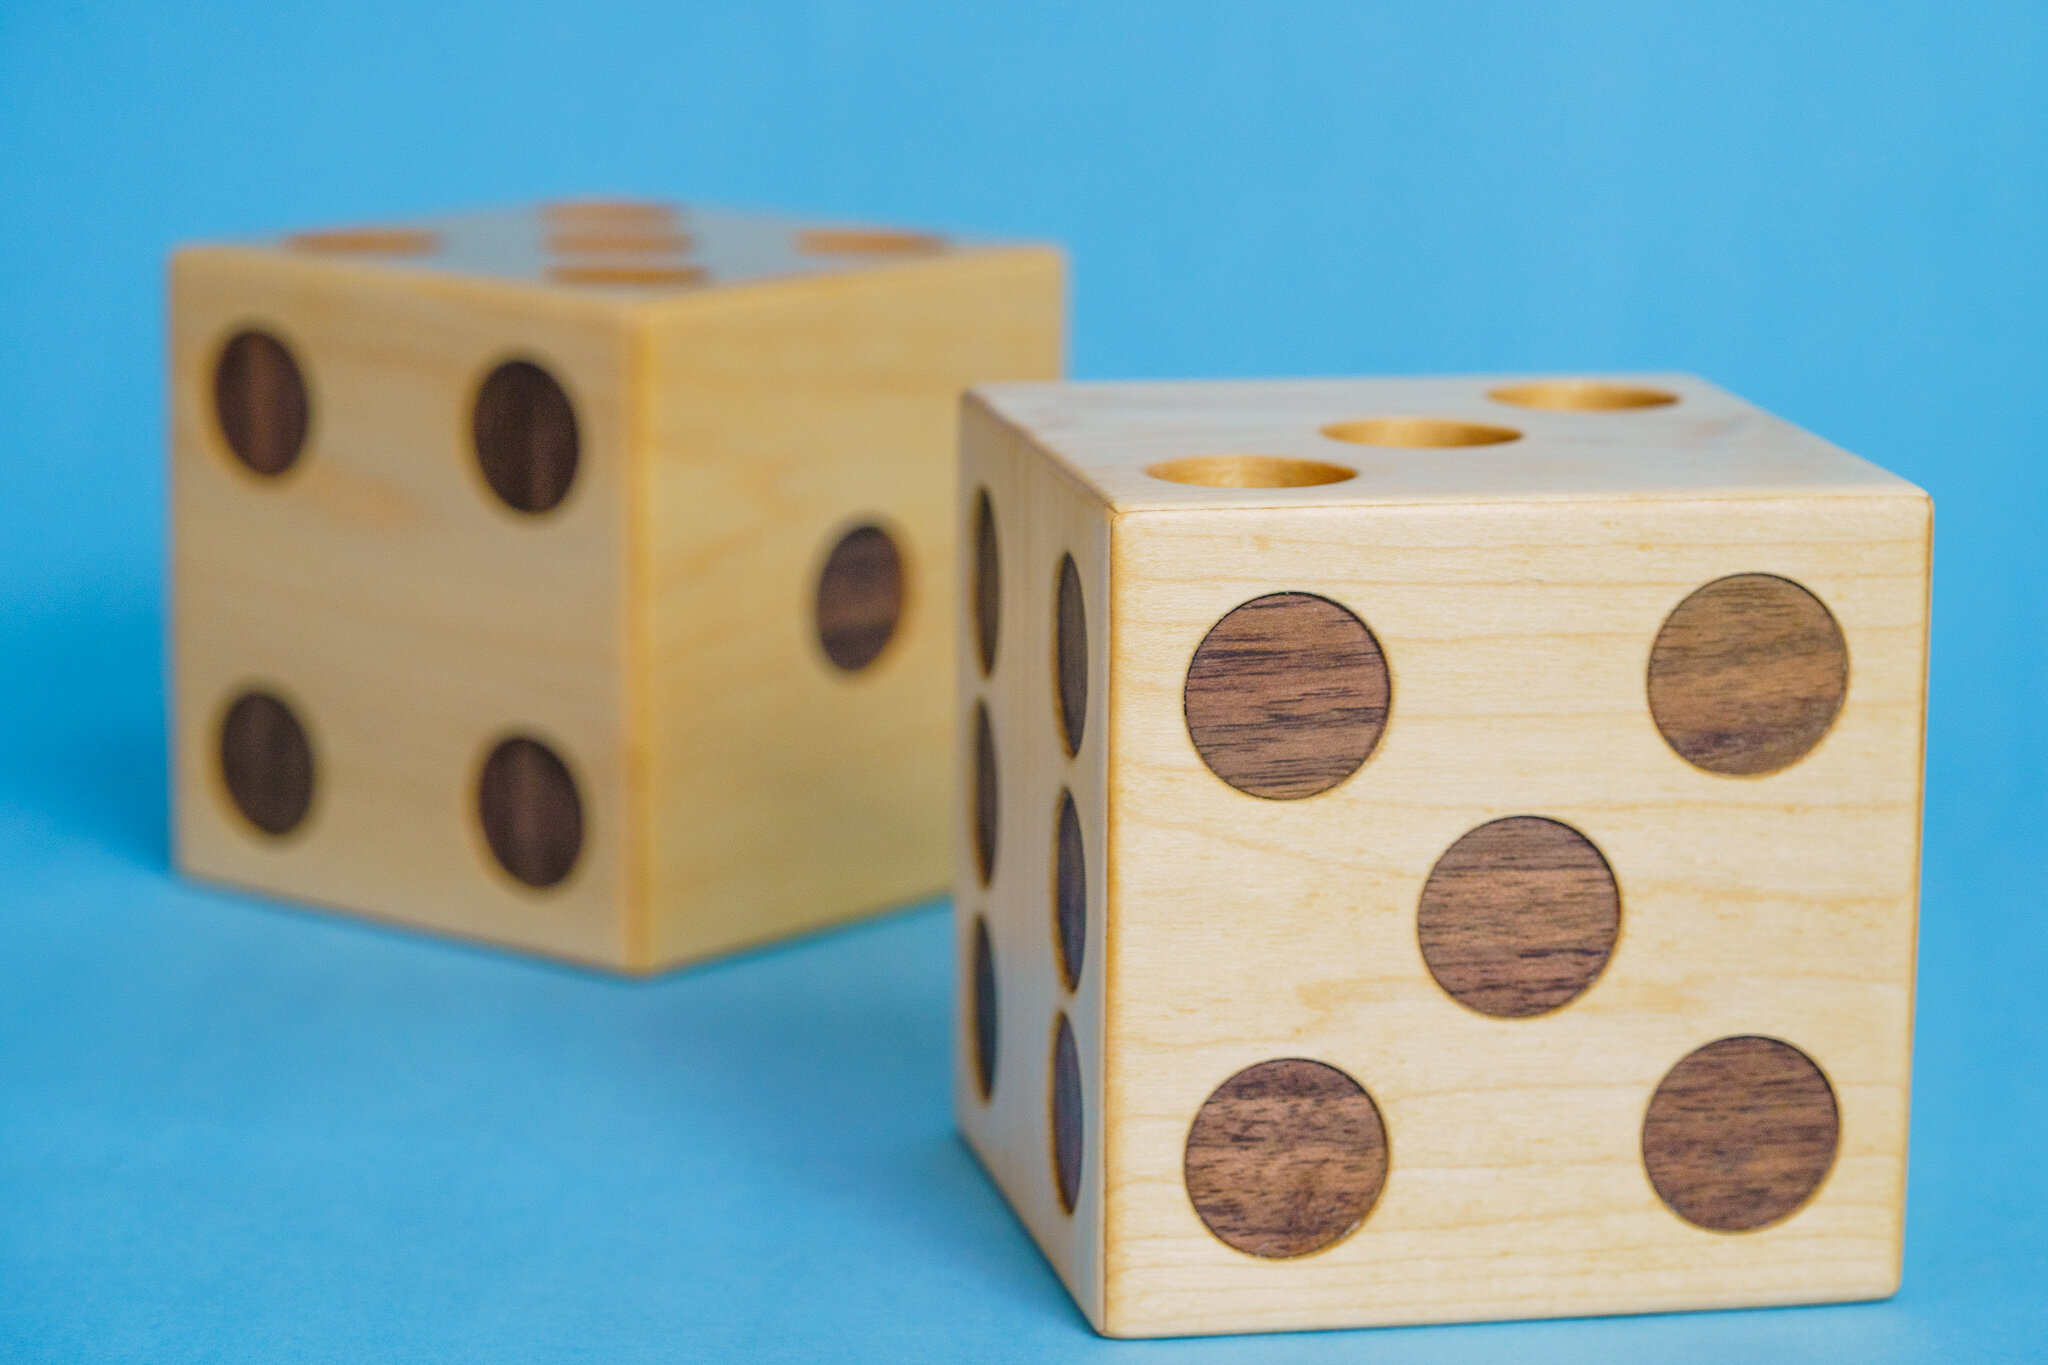
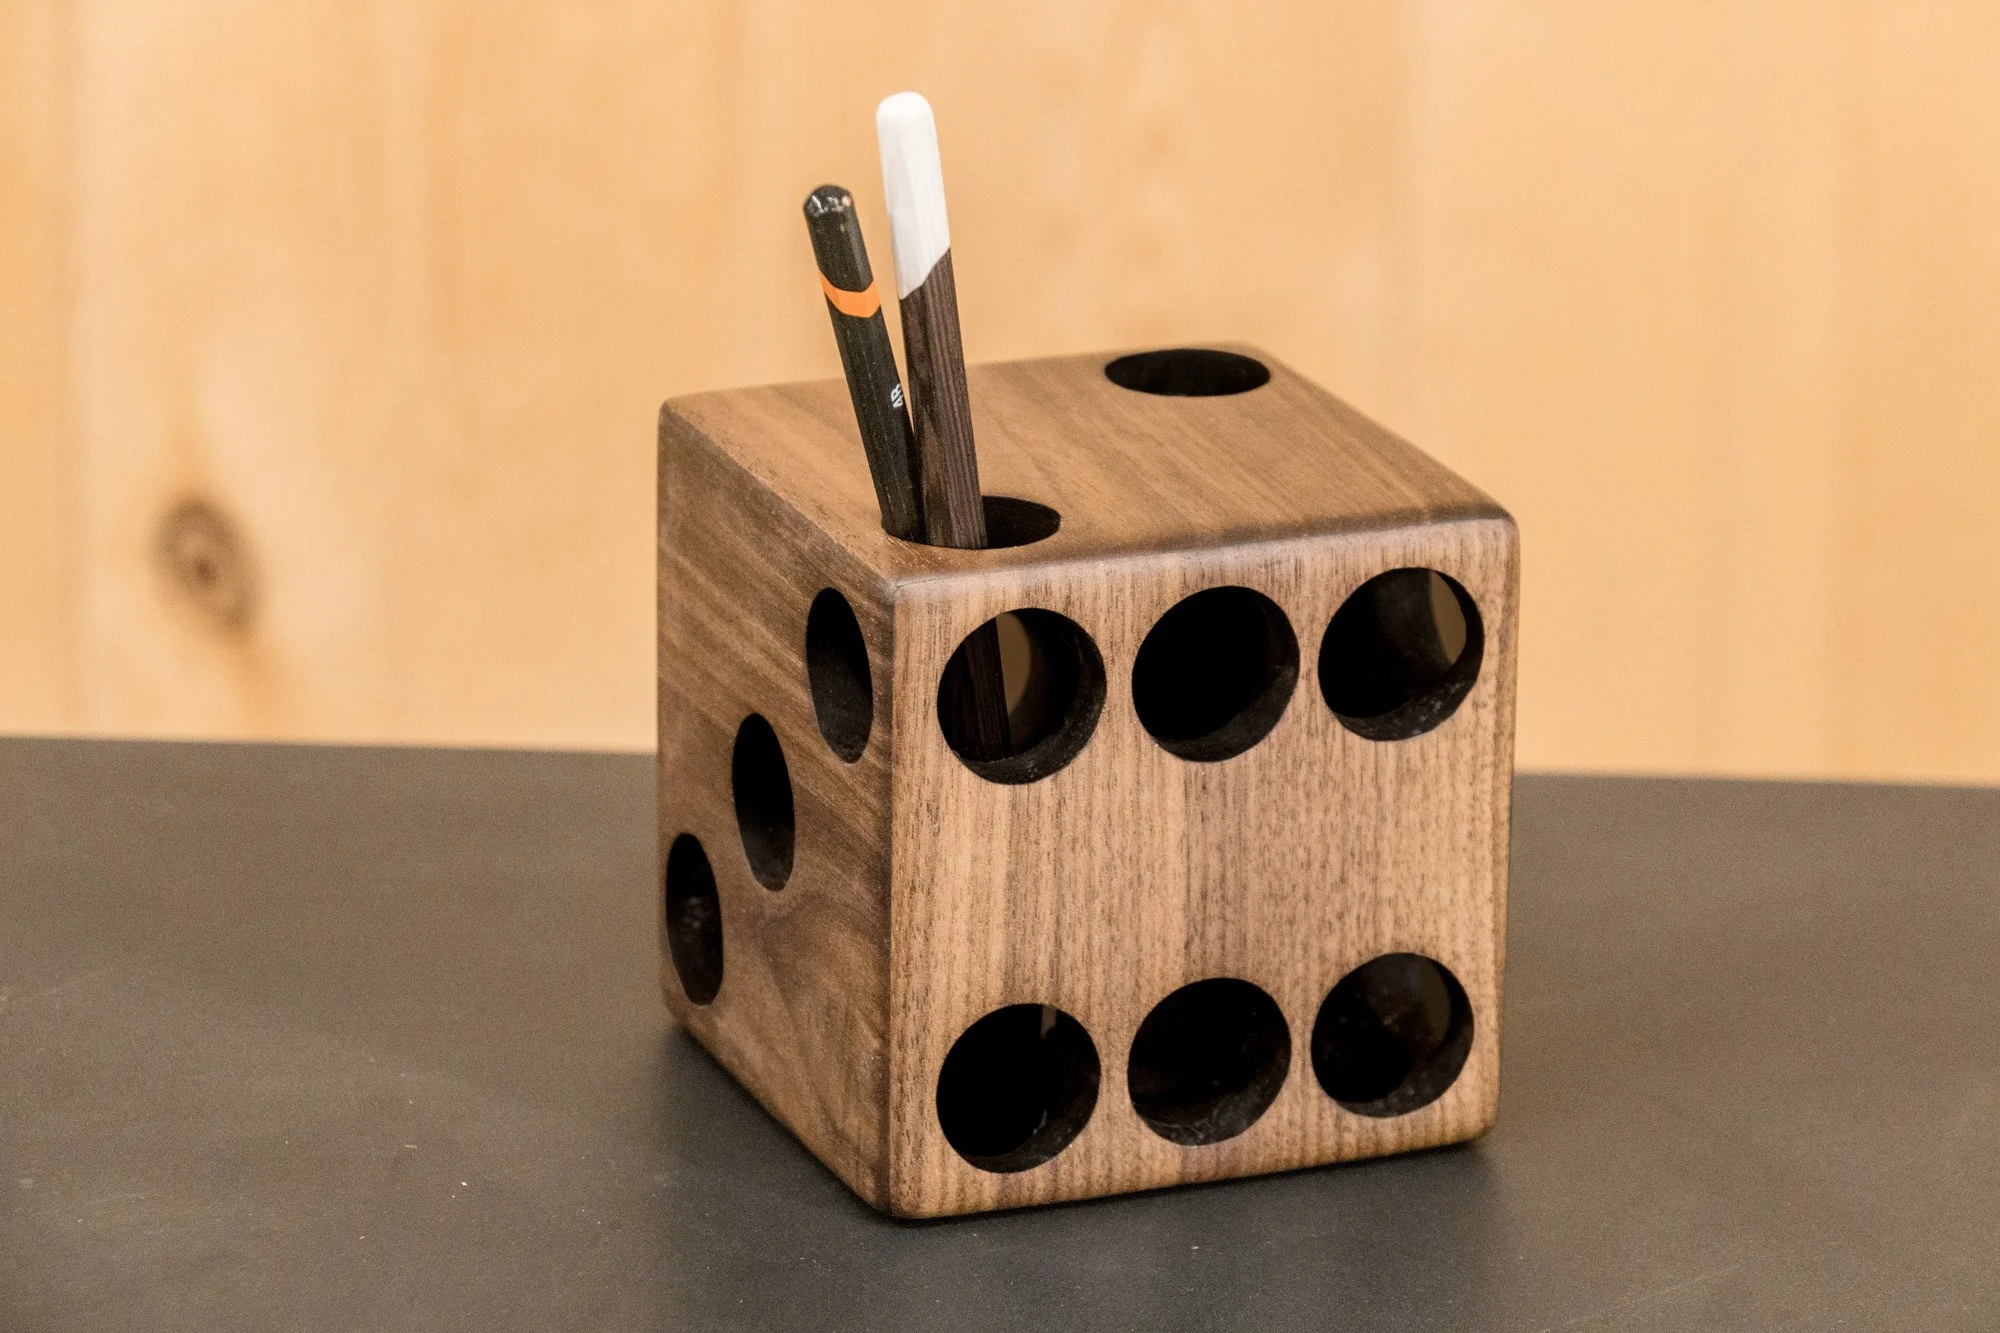
How to Make a Walnut Dice Pencil Holder
This is a simple and easy woodworking project that can be made with just a few tools.
Easy Woodworking Project. Great for Craft Shows!
This is a simple and easy woodworking project that can be made with just a few tools. I’m using walnut planed down to 1/2″ thick and cut in perfect squares on the tablesaw. All the edges are mitered for easy joinery with just some blue painters tape and some Titebond wood glue. Originally I had painted the inside black with white paint around the hole edges. Halfway through the project I decided I prefer the natural look of the walnut without paint and sanded everything back down to bare wood. Finished with boiled linseed oil and paste wax. You can find the templates down below by signing up for my email list.
Tools and Supplies Used in this Woodworking Project


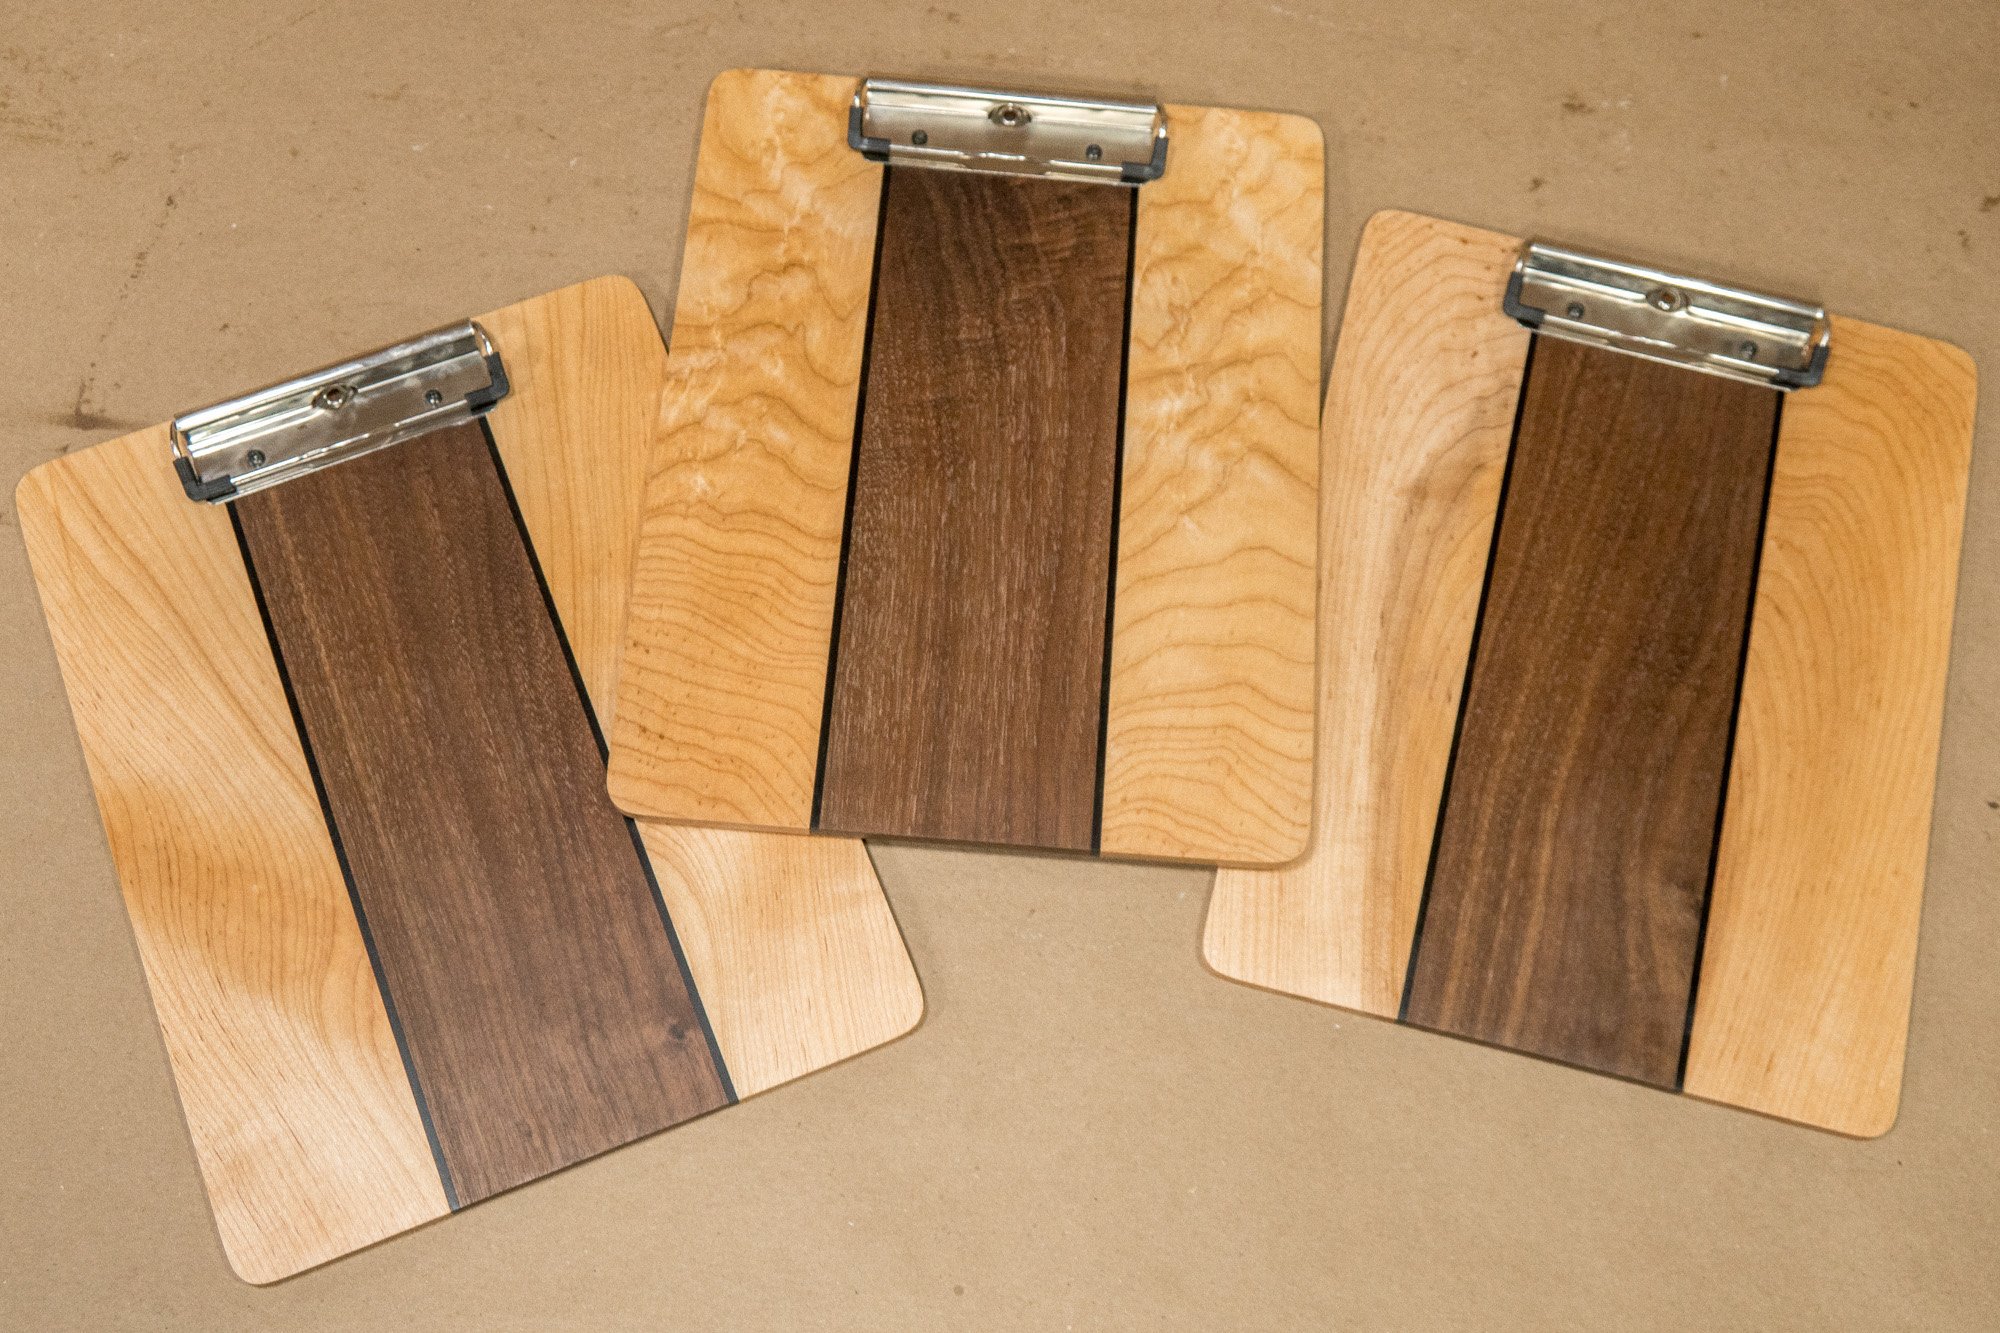
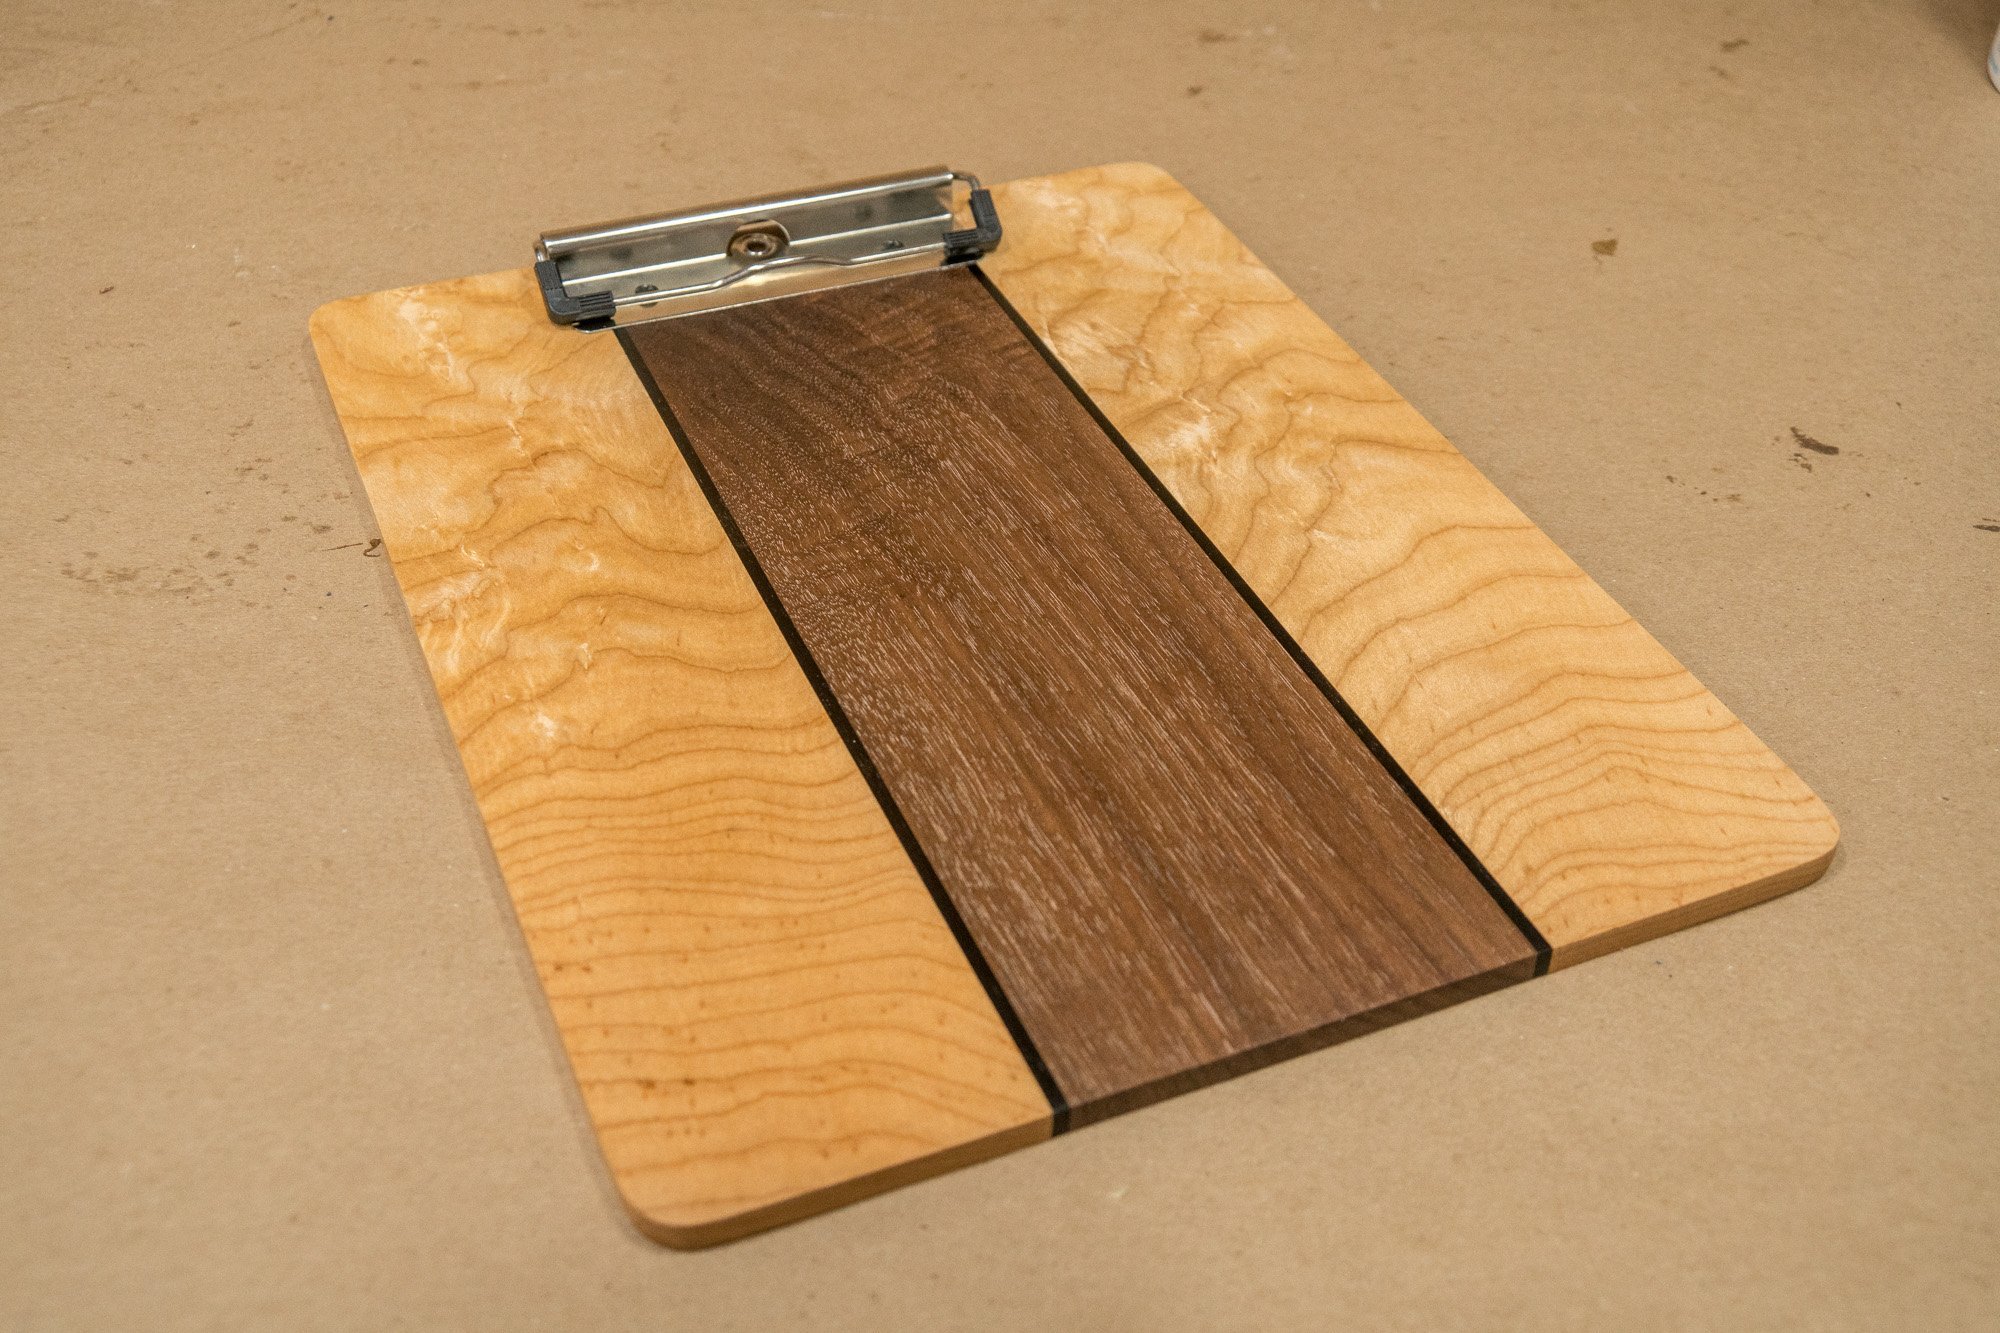
How to Make Wooden Clipboards
This is a real easy woodworking project anybody can do with a few basic woodworking tools.
Easy Woodworking Project For Beginners
This is a real easy woodworking project anybody can do with a few basic woodworking tools. It’s also a great woodworking project that you can easily redesign and make your own. These clipboards get planed down pretty thin so make sure you source well stable wood that’s not going to warp on you. You’ll also want to use closed grain or tight grain wood. And open grain is not a suitable material to write on. Using strips of multiple species will help keep everything flat. I also find that since they are so thin the screws that hold the clips down may need some help so I like to use a 5-minute epoxy as well. This is a great project that can be batched out and at the right price can sell well at craft fairs.
Final dimensions: 9″ x 12″ x 3/16″
Tools and Supplies Used in This Woodworking Project


Quick & Easy Pencil Holders That You Can Sell
Looking for a quick and easy project that you can batch out and sell at craft shows? These pencil holders are a great way to earn some extra cash.
Looking for a quick and easy project that you can batch out and sell at craft shows? These pencil holders are a great way to earn some extra cash.


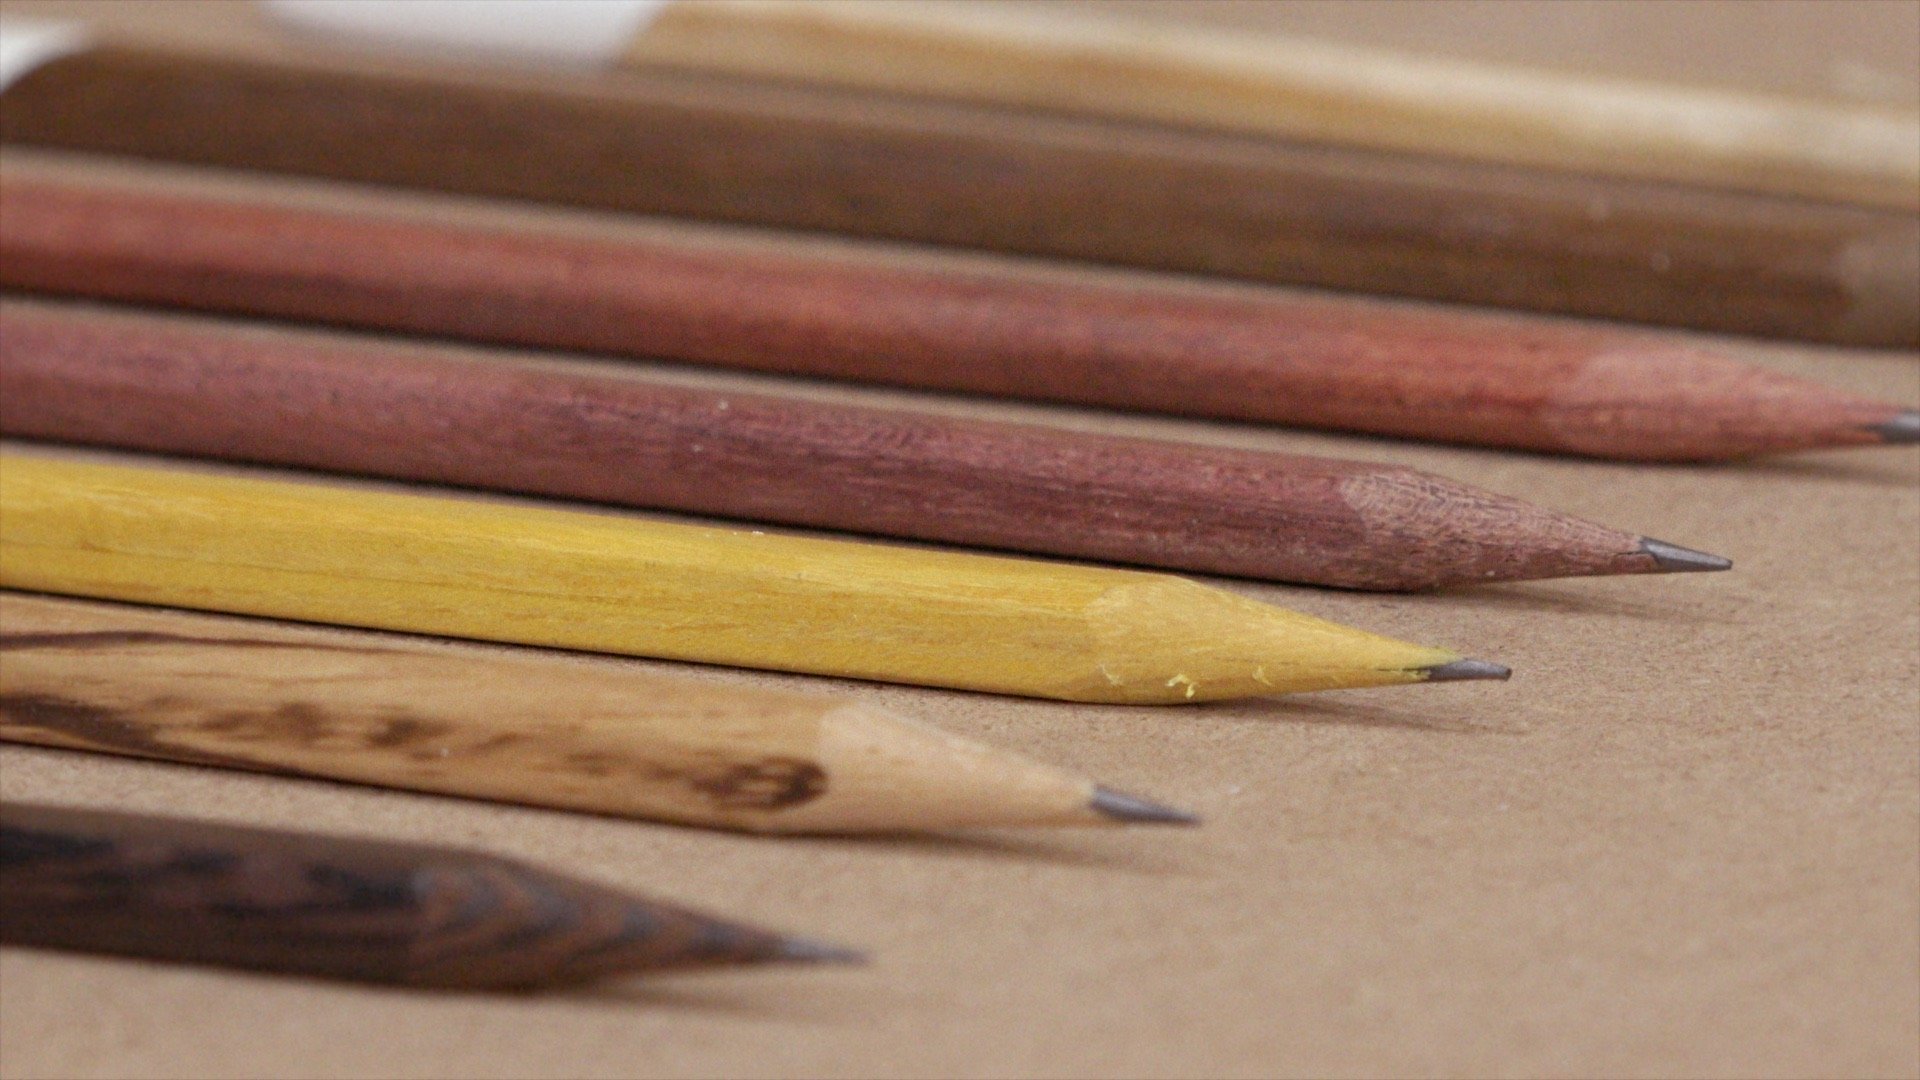
How to Make Wood Pencils
Make your own exotic wood pencils for no reason other than the fun of it!
This is one of those projects I’ve been thinking about for a long time and really glad I followed through on. I couldn’t be happier with how they came out. These were made by routing a very small groove into two pieces of wood to hold the graphite and glued together. I tried to have continuous grain to hide the seam and it worked pretty well. I sanded a hexagon shape into each pencil but it’s not really noticeable because as I was doing some final sanding they rounded out. The shape is still there and the pencils don’t roll off the table but the shape is not as noticeable as I was expecting. I did want them to be super smooth and have a “fine woodworking” feel so I thought the final sanding was necessary. Adding polyurethane and dipping the end in paint was the icing on the cake.
All of these pencils were made in a day. After doing one batch I feel like I could make them even quicker the next time around. These would make a great craft show seller since a handful could be made all at once keeping the final price down and I think I could make them even more eye catching by choosing different color paints for the ends.
If you make any yourself be sure to Tweet some photos to me so I can share them with my audience. Be safe! Be Passionate and Make Something!
Tools and Supplies


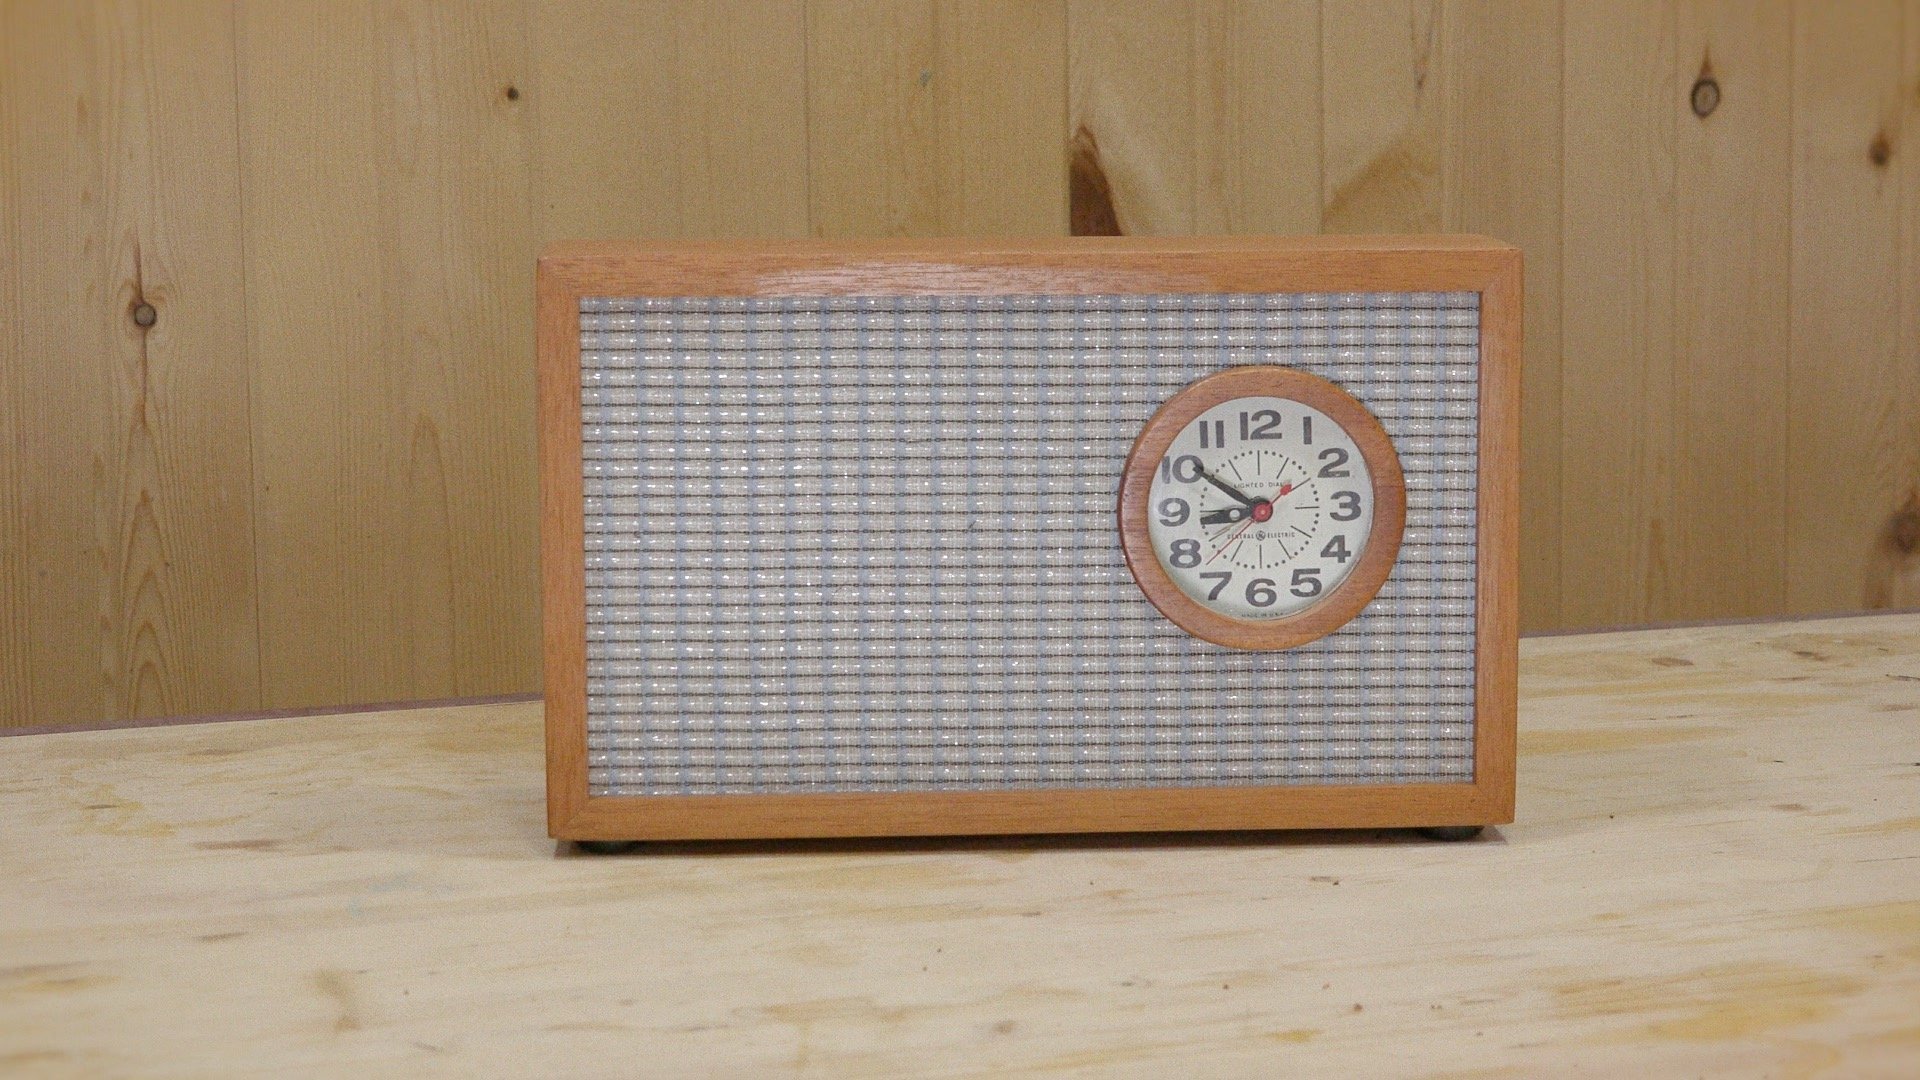
Upcycling a Clock from an Antique Store into Something New
Turn an old clock into something new and stylish in the upcycle project.
This was a fun project that involved one of my favorite hobbies and that’s going shopping at the antique store. I’m lucky enough to live close to a large antique mall in Maumee, Ohio and that’s where I found this old vintage clock I could upcycle into something new. What I liked about the clock is the face and the typography of the numbers so I decided to keep that and scrap the rest. I made a new case out of mahogany wood and guitar amp grill cloth. I liked the idea of having the clock offset with a lot of negative space and decided to fill that space with a piggy bank and removable money bag recycled from a Crown Royal sack.
I ended up donating the clock to my local Goodwill donation center in hopes that some stranger will find joy in this find. Inside the clock I left a note stating when it was made and to spread kindness.
I hope you found this build fun as I plan on doing more upcycle projects such as this in the future. As always, be passionate and make something!
Tools and Supplies Used


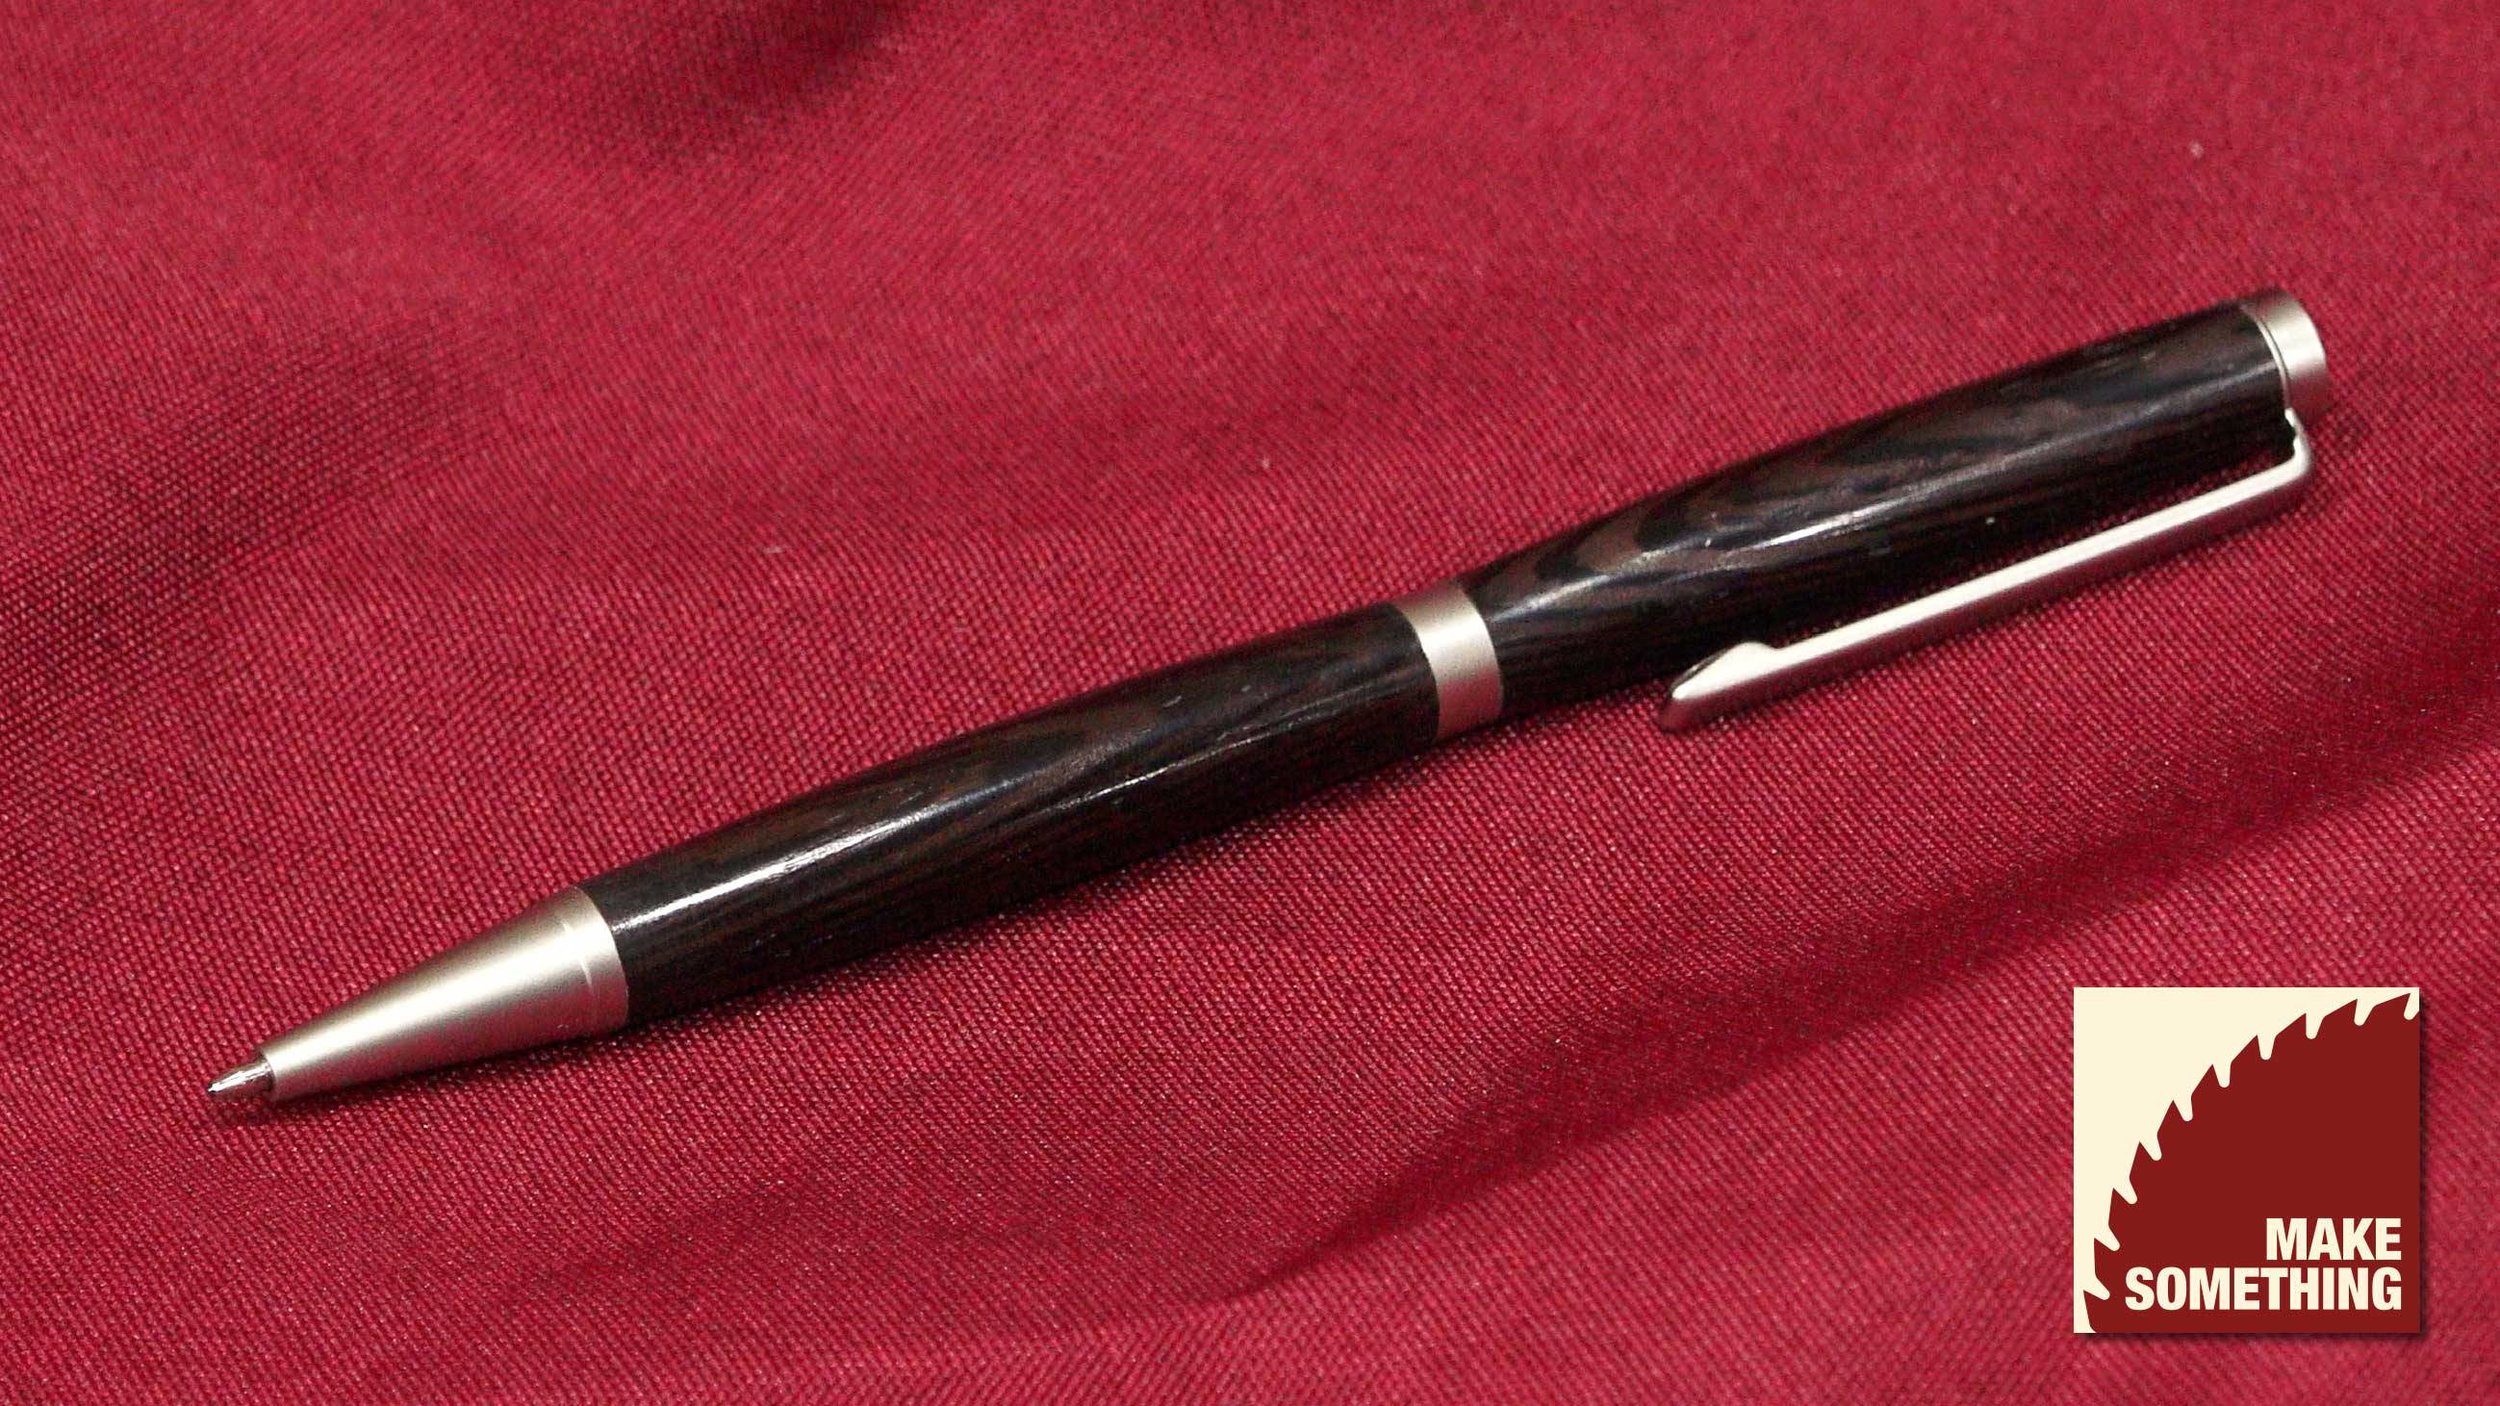
How to Turn a Slimline Pen
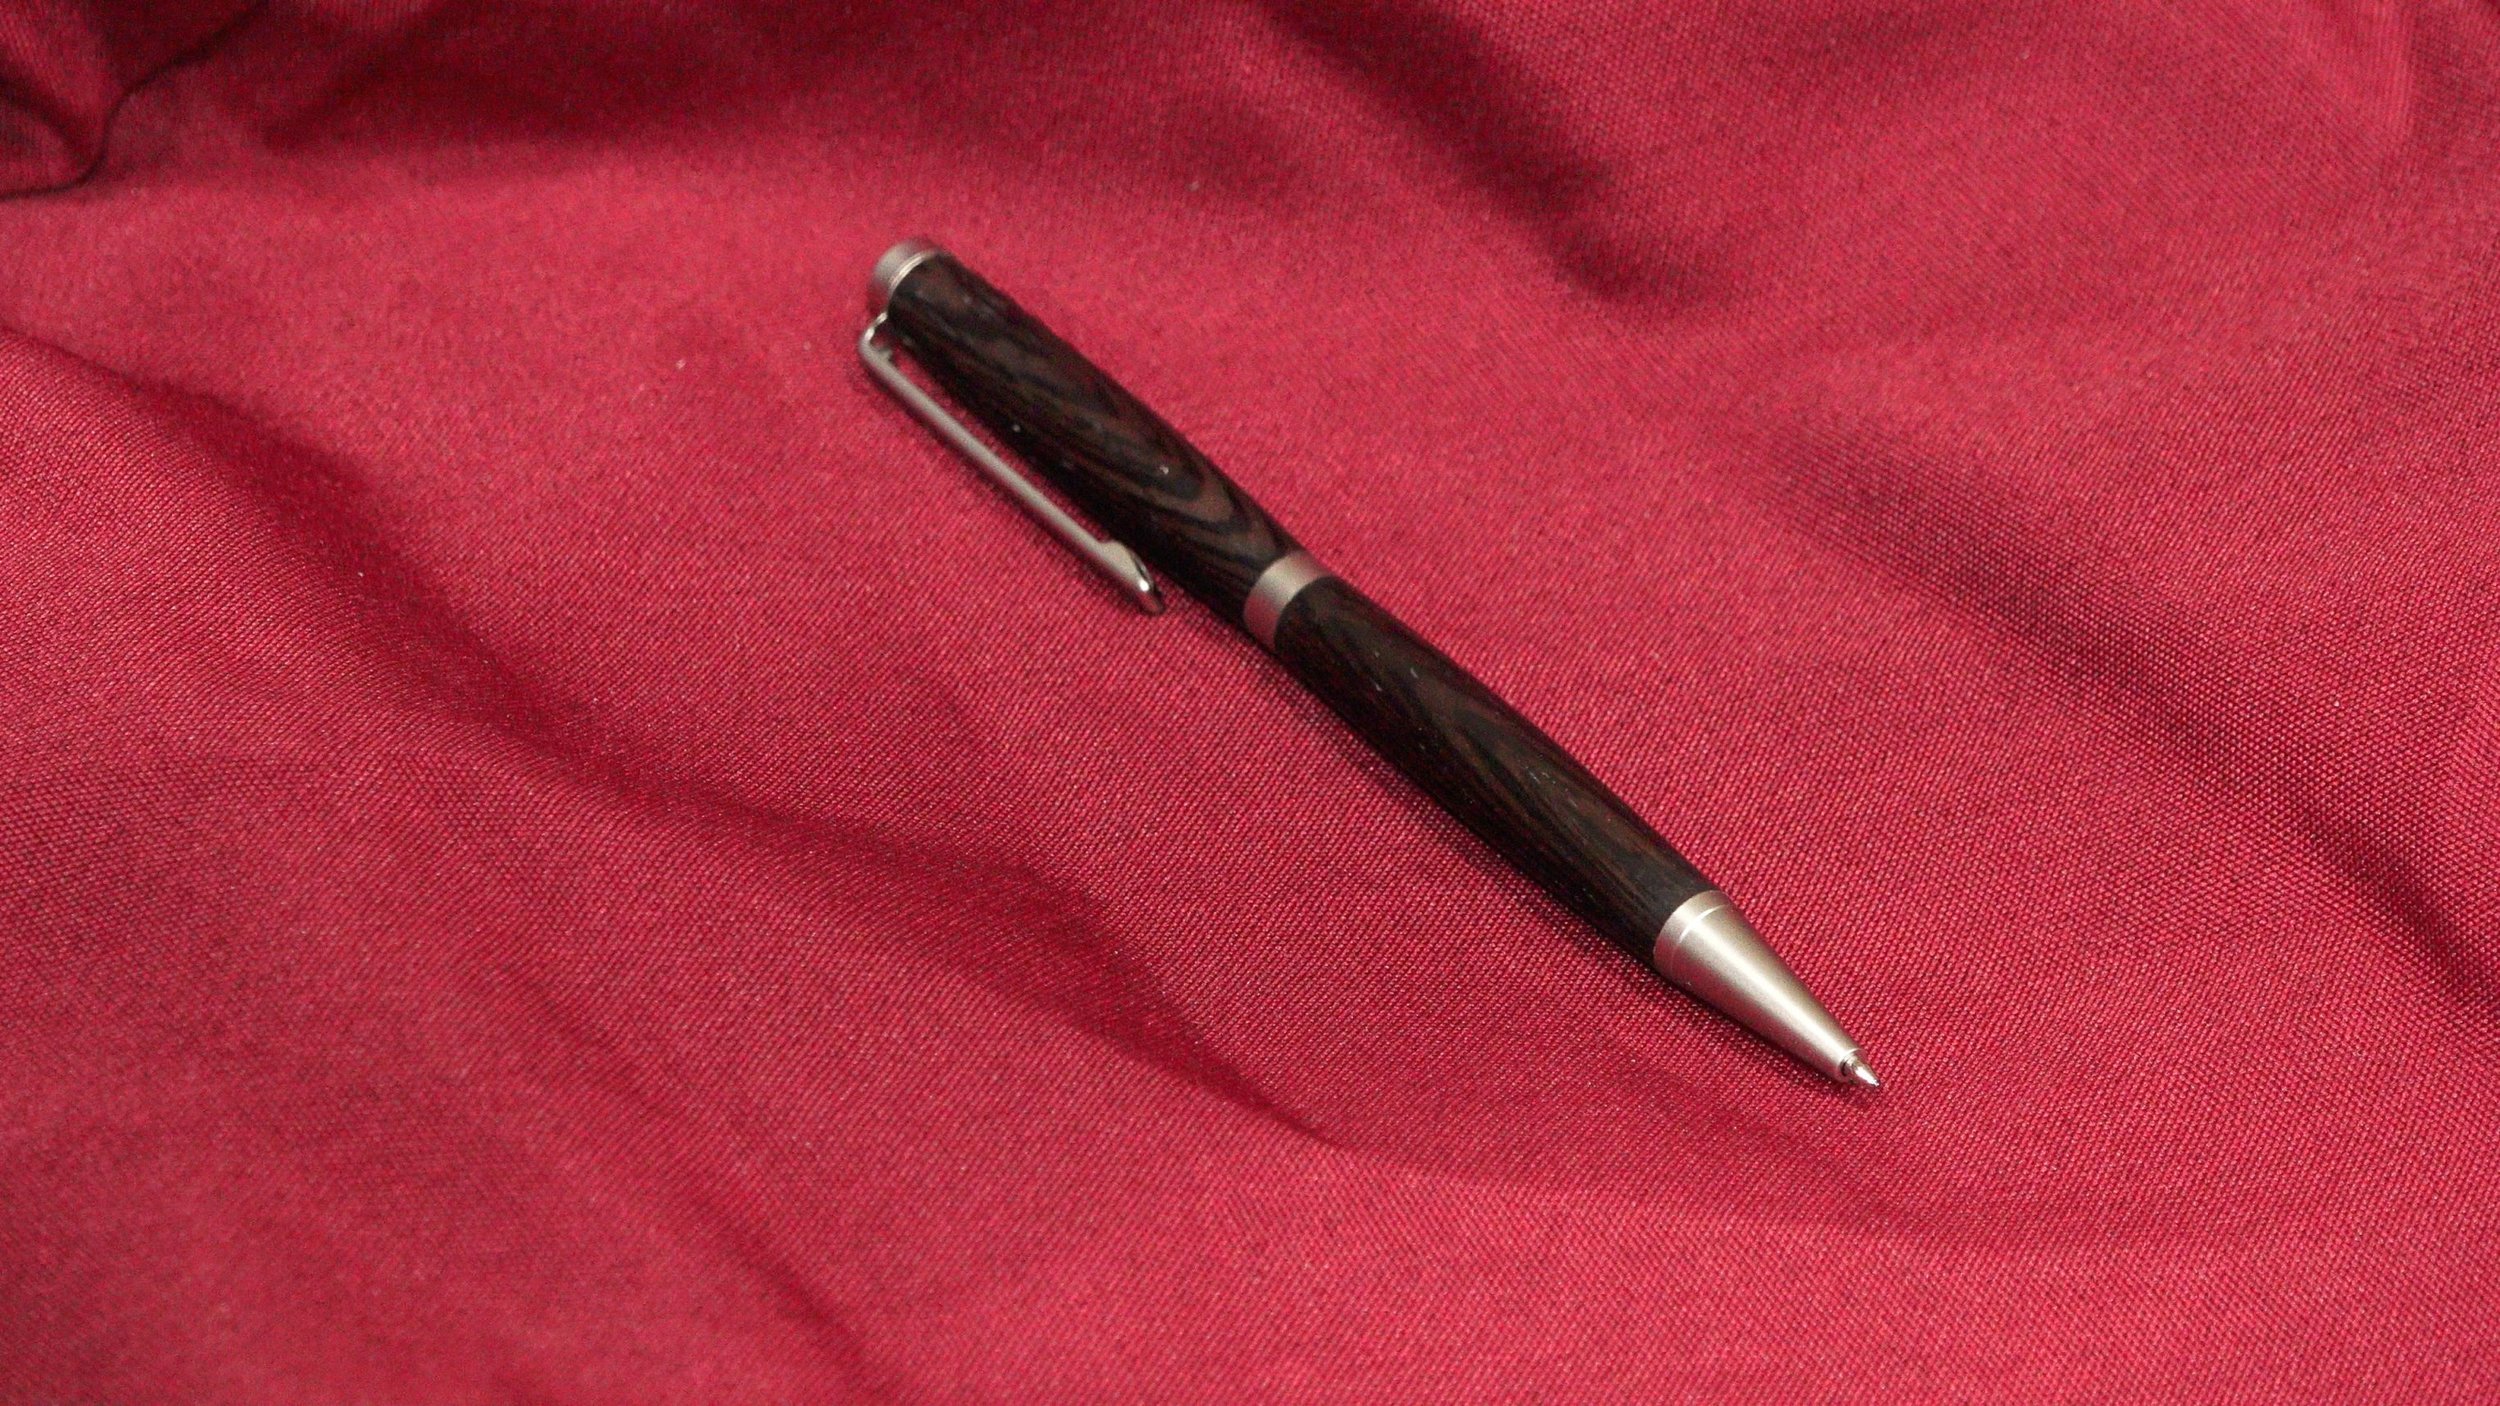
How to turn a slimline pen on the lathe. A quick and simple project that a great seller at craft shows.
Turning pens on a lathe is one of those addicting hobbies you come across in woodworking. They can be made from start to finish in about 30 minutes and can be very profitable at craft shows and also make great gifts that family and friends will love. There are a ton of gadgets available for pen turning which may be confusing. In the video above I simplify the process and break down what pen turning accessories you need and the ones you may not need for the slimline kits. The following steps are the basics in getting started in slimline pen turning. Once you have these down you can start to get into the more complicated pen kits and work with segmented pieces as well as acrylics and non traditional materials. I am by no means an expert turner so if you have any suggestions and pen turning tips, leave them in the comments below. As always, be safe, stay passionate and make something!
Pen Turning Supplies and Tools


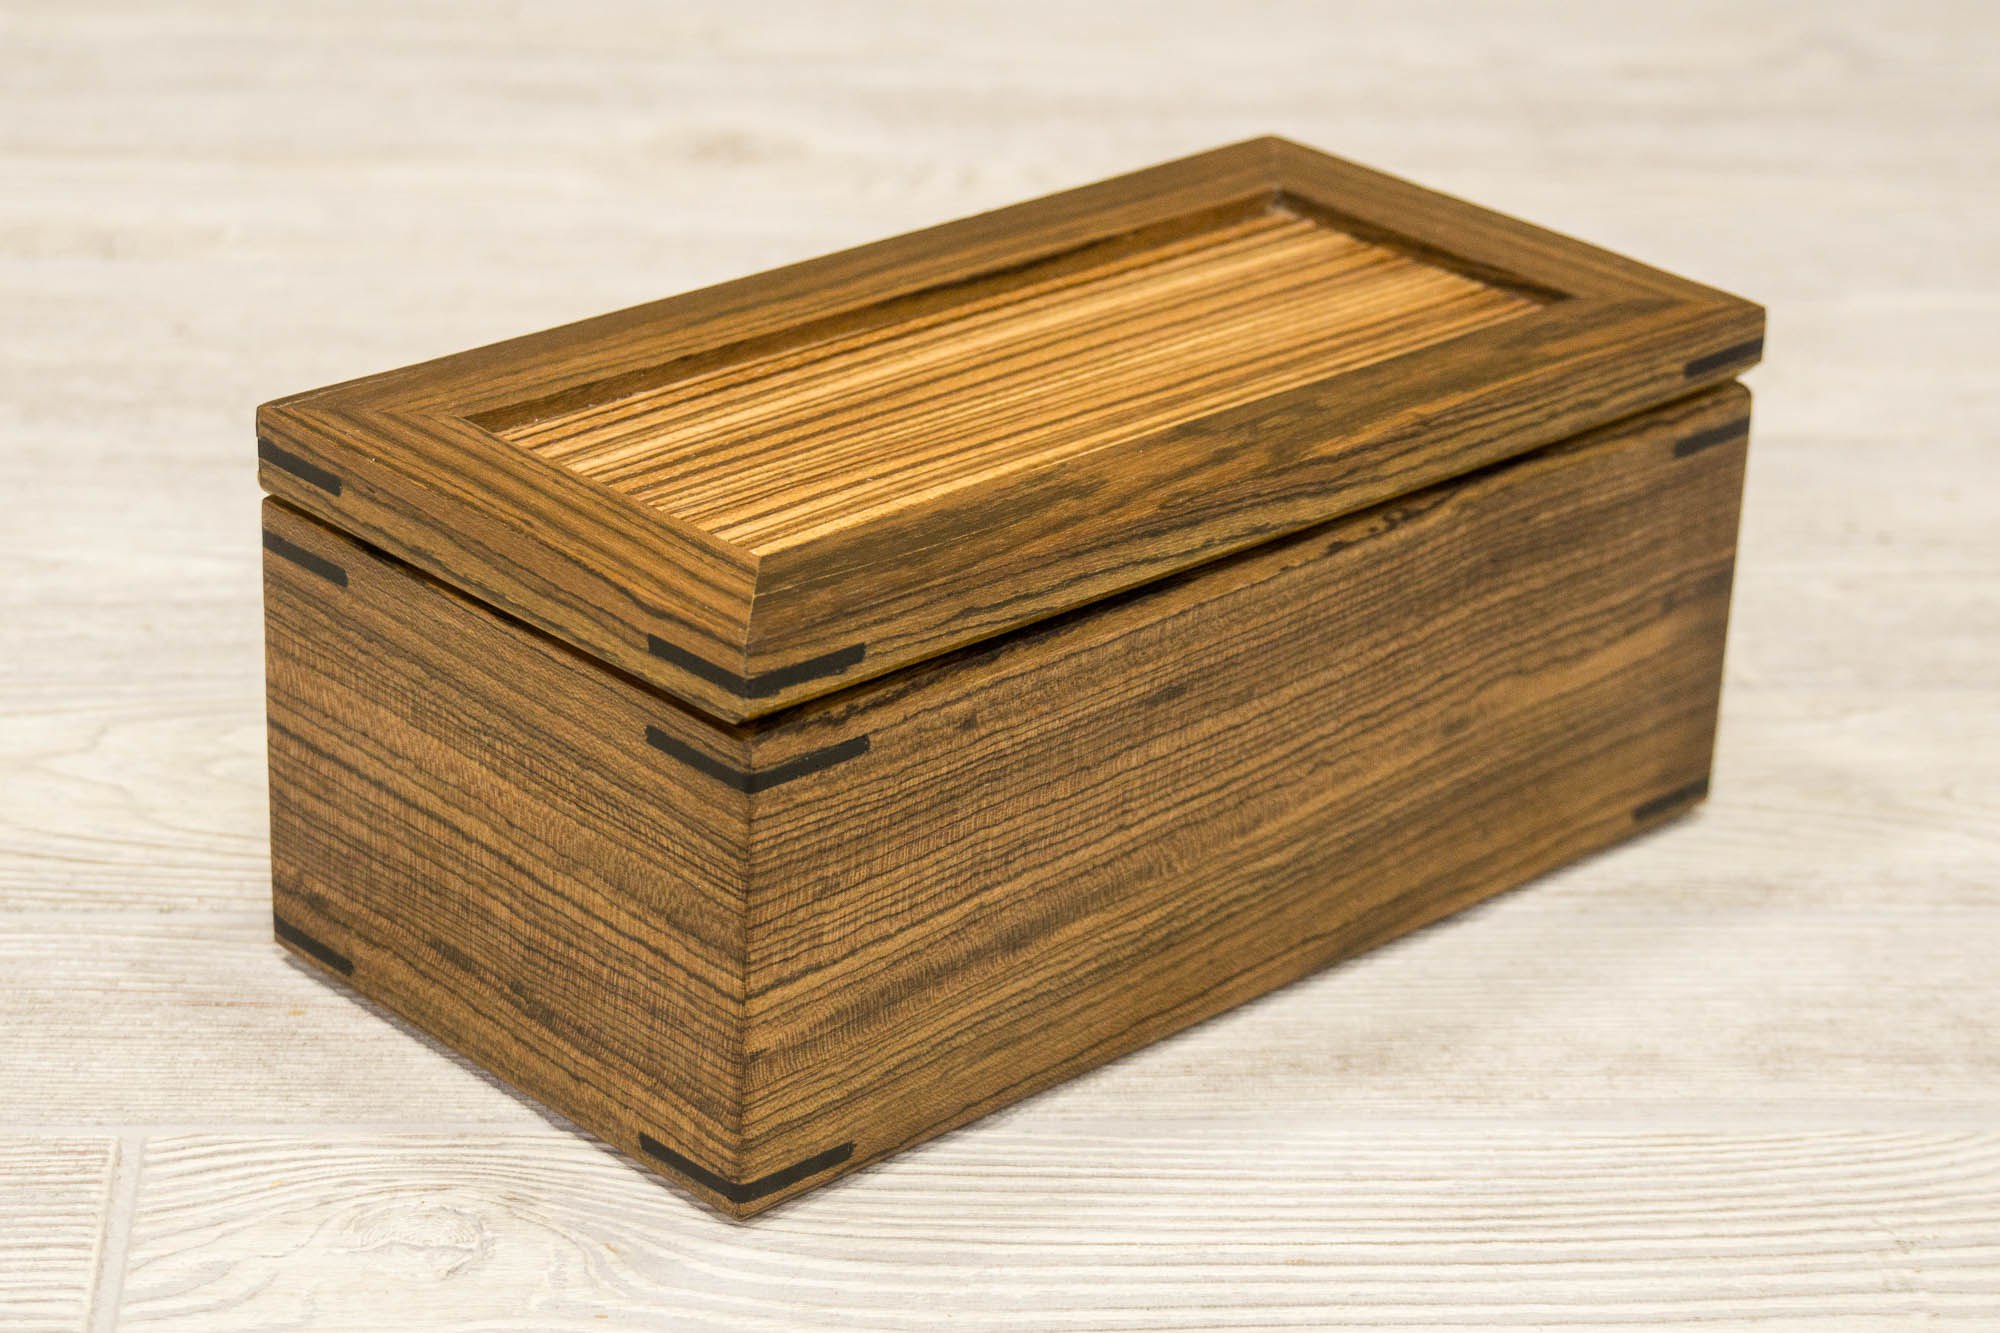
Making a Box with Hidden Compartment
This box that we’re about to make has mitered corners that can easily be done on the table saw and reinforced with easy-to-make splines.
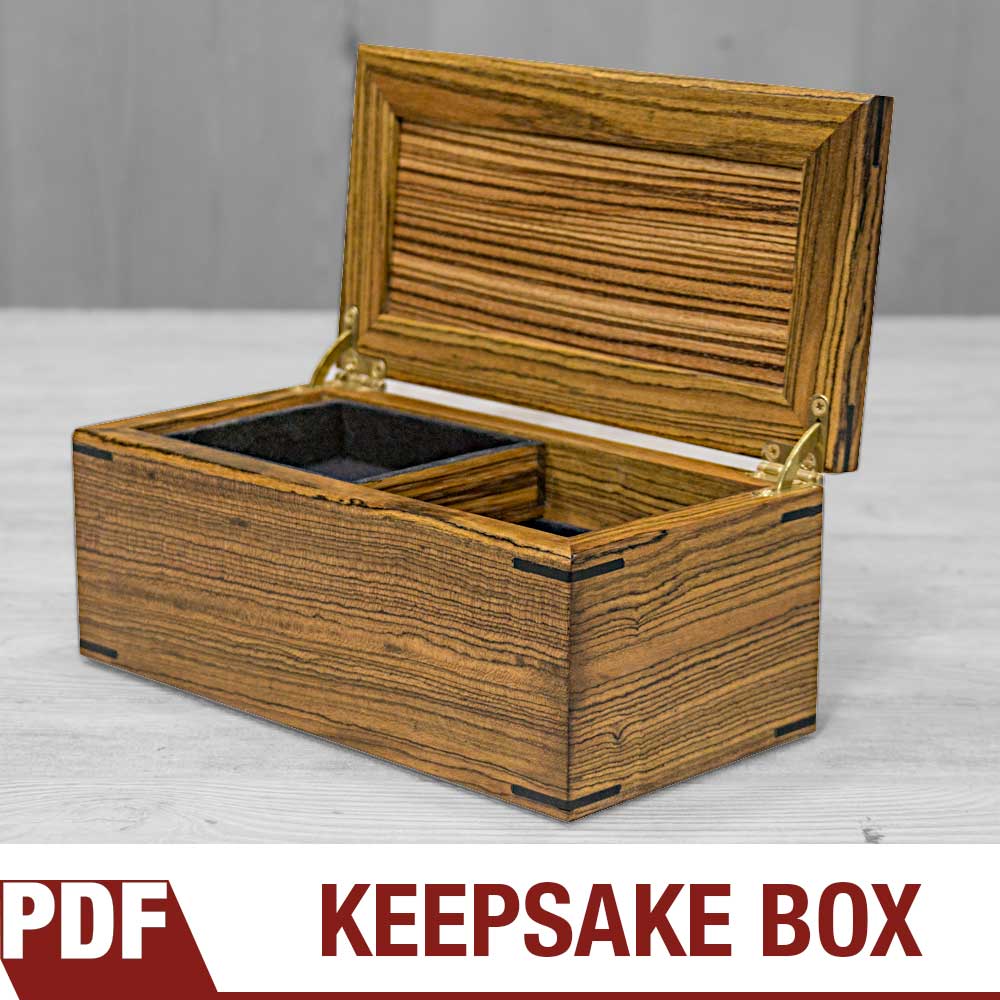
This box that we’re about to make has mitered corners that can easily be done on the table saw and reinforced with easy-to-make splines. The inside has a top sliding tray that when moved left and right reveals two trays below it. When all the trays are lifted out, a hidden compartment is revealed underneath to hide your valuables. All these trays are lined with a soft flocking that feels like velvet and I’m using solid brass quadrant hinges with lid support from Brusso Hardware. For this box I wanted to use special exotic woods so I went to Kencraft, my local hardwood dealer and picked out some Bocote for the sides, Zebrawood for the top and bottom and ebony for the splines.
Although I can’t give you an exact amount of hours it took to make this I can tell you that if well planned this could easily be made in two days. On day 1 all the pieces can be cut and glued together. On day 2 the splines, chamfers and hinges can be added. If you choose to use a lacquer finish you could also get multiple coats done on the second day as it will dry fast. The tri-blend finish I recommend on exotic woods takes 4 days but each day only requires a couple minutes of work with a full day to dry between coats. The price of wood can be very dynamic depending on the choice of woods and your location. I chose to get a little fancy and paid $73.58 for the wood used in this project without any leftovers. I also decided to use the well made Brusso hinges that come in at $49.99. Yes, the Brusso hinges cost a pretty penny but you can feel the difference in quality as soon as you hold them in your hand. They have high standards and a very good reputation for being the best in the business. So after taxes and shipping the total cost of materials was $135.62 which doesn’t include the flocking and finish.
I’m really happy with the way this box came out. The top tray slides effortlessly across the bottom tray and everything lifts out to reveal the hidden compartment. All of the joinery is mitered corners that are easily done on the tablesaw and reinforced with splines. And the solid brass hinges compliments the exotic woods and the the design. You learn more about the jigs I used as well as the flocking and finishing techniques in the links below. Plans are available in my store. I hope you enjoyed this video as I’ve got a lot more projects like this coming out as well as bigger builds and non-woodworking projects. As always, be safe, stay passionate and make something!
Tools and Supplies
- Micro Jig GB-1 GRR-Rip Block
- Micro Jig GRR-Ripper
- Brusso Solid Brass Quadrant Hinges
- Festool Random Orbit Sander
- SawStop Tablesaw
- Grizzly Bandsaw
- Blue Painters Tape
- TiteBond Glue
- Flush Trim Saw
- Suede-Tex Mini Flocker
- Suede-Tex Undercoat Adhesive – Black
- Flocking Fibers, 3 oz., Black
- Minwax Wipe-On Poly Polyurethane
- Mineral Spirits
- Boiled Linseed Oil
- Dewalt Plunge Router
- JIG IT Hinge Mortising System
- Bench Dog Router Table
Related Resources and Tutorials


Making Acoustic Panels
How to make decorative acoustic panels for your home office or studio.
I record the audio for my podcast and all my voice over work in my office. I recently removed a couch from this room and noticed a significant difference in the audio quality. I was getting a lot more reflection from the walls into my microphone so I’m making these acoustic panels to absorb some of the room sound. I purchased some acoustic foam panels from Amazon and decided to class them up a little bit with a nice wood frame and burlap face. The frame uses a simple picture frame construction with mitered corners reinforced with splines. The face consists of a burlap sack glued to a mitered frame and then screwed on to the base. I purposely exposed the screws and chose to use pocket hole screws for the way they look and how they sit on the surface.
In the video I decided to not voice over the steps but instead talk about how I got to be a YouTuber and all the career changes I’ve made. Making YouTube videos and blogging is a combination of many skills including photography, videography, branding, marketing, audio engineering, graphic design and copy writing.
Please feel free to ask me any questions you may have in the comment section below.
Items and Tools Used


Mid Century Modern Cabinet
This mid century modern influenced cabinet is made from baltic birch plywood and walnut plywood.
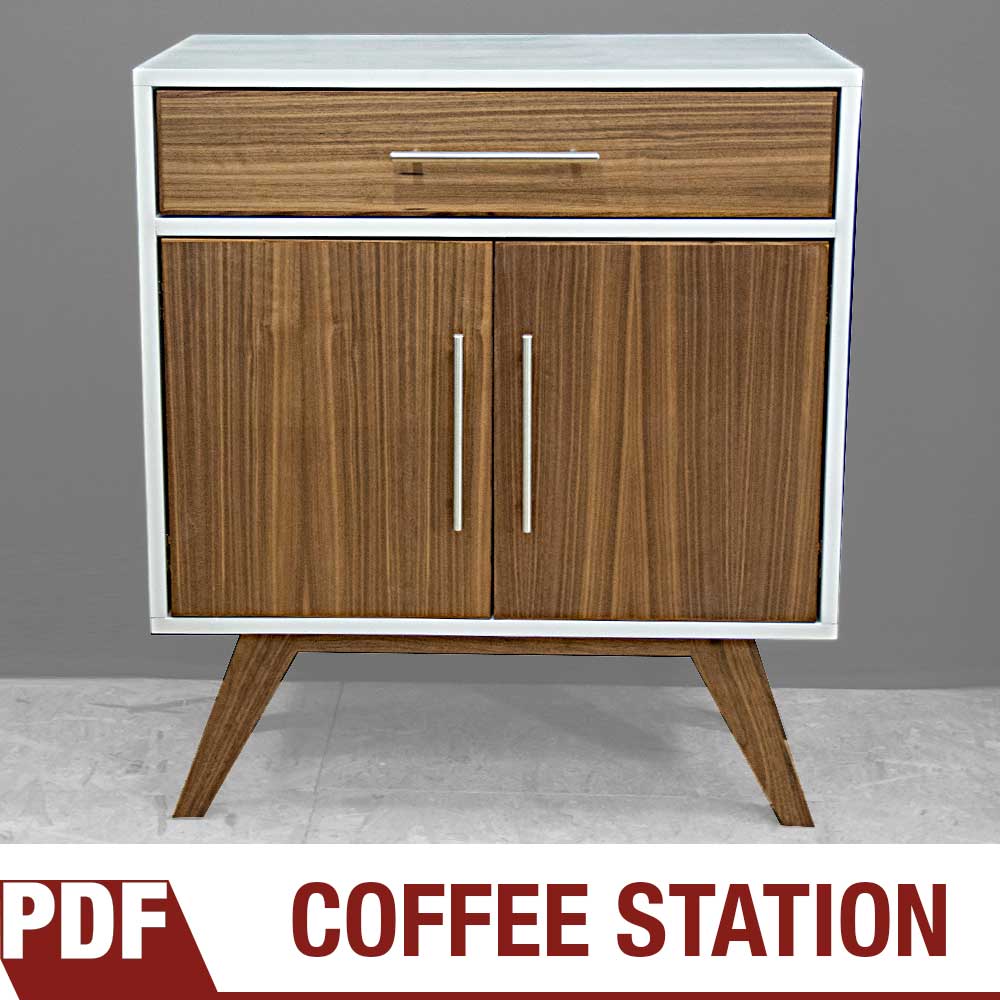
This mid century modern influenced cabinet is made from baltic birch plywood and walnut plywood. The legs on the mid century cabinet are made from 1 1/2″ thick solid walnut and angled for that classic vintage retro vibe. The drawer is custom fitted to hold k-cup coffee packages along with everything else to make a fine cup of coffee. The two hinged doors open up to reveal an adjustable pinned shelf. Iron on edge banding was applied to the baltic birch to hide the texture of the exposed edges and the outer cabinet was painted white with a standard paint roller. The drawer face and two cabinet doors are make from walnut plywood with solid walnut edge banding to hide the plywood edges. Most of the joinery was made from Festool Domino loose tenons which makes for easy alignment when assembling and provides durable long lasting strength.
Products Used in the Tutorial


How to Make a TV Remote Box with Hidden Dowel Joinery
How to make unique boxes using hidden dowel joinery.
Making a TV Remote Box
A great woodworking project where I show how I made these unique boxes using hidden dowel joinery out of hickory and mahogany woods. These boxes are the perfect size for storing and hiding all your TV remotes and would look great on any coffee table.
They don’t take much time to make and can be sold at craft fairs and online at places like Etsy. I encourage you to come up with your own design or even modify mine. You can also purchase the plans in the link down below. I’m giving you full permission to make, reproduce and sell these boxes at your next craft show or online. Be safe, stay passionate and make something!
Products Used


Woodworking Books

Make Your Own Cutting Boards
15 cutting board projects to make as gifts or sell! Get your signed copy!

The New Bandsaw Box Book
8 bandsaw box projects you can make and sell at craft shows. Signed copies now available!